Archive for June, 2006

IMBB 27: The Joy of Soy
Is My Blog Burning - Soy

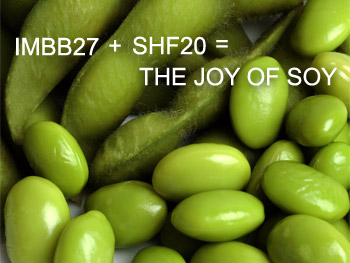
I know of no other food that is as versatile as soy. In its natural state above, it resembles green peas. It can also stand in for milk (as soy milk), custard (as silken tofu), cheese (as firm tofu), meat (as tofu or tempeh), flour (as okara), nuts (as roasted soy nuts) and salt (as soy sauce or miso). High in protein, fiber and antioxidants but relatively low in fat, soy is a staple in my kitchen.

dried soybeans
Dried soybeans

For the monthly themed cooking events, Is My Blog Burning and Sugar-High Friday, Reid at ‘Ono Kine Grindz has asked bloggers to make soy cuisine.

After making soy-sauce candied walnuts, I decided to experiment more with soy sauce in desserts. Soy sauce essentially tastes like caramel-flavored salt, so the idea isn’t too far-fetched.

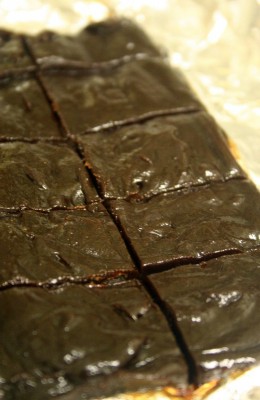
For my first creation, I made chocolate caramels with soy milk and soy sauce. Out of my two experiments, this one seemed like the safest bet. As the Kikkoman website says, “Kikkoman Soy Sauce…..In Chocolate? Absolutely! Naturally brewed soy sauce can enhance more than just savory flavors — its salty brewed flavor depresses the extra sweetness typical of chocolate syrups and enhances the richness of the cocoa powder. It also helps to blend dairy notes and highlights the fruit top notes of the cocoa. The result: a deep, nutty, roasted chocolate flavor with a rich color.”

These low-fat caramels were tasty for what they were, but they were slightly grainy. I don’t know whether it’s because I used homemade soy milk, which naturally has pulp. Or perhaps the granulated sugar crystallized, in which case more honey was needed. Also, soy milk curdles at the slightest introduction of acid, which was in the natural cocoa powder. You may fare better with commercially prepared soy milk, which is smoother and has thickeners.

My candy also did not set up, even in the freezer. I’ve clarified the instructions, so cook the candy until it reaches the softball stage–248 degrees F. I think these would have tasted better with plain old salt, but if you’re adventurous, add the soy sauce in the end, so you don’t cook out its delicate flavor.

chocolate soy caramels

Chocolate Caramels

Adapted from The Soy Dessert and Baking Book

This is a great way to sneak nutrients into candy.

Ingredients:
½ c sugar
1 c vanilla soy milk
1 Tbsp unsalted butter
1 tsp honey
2 Tbsp cocoa powder, sifted
1 tsp soy sauce or 1/4 tsp salt

Method:
Line a loaf pan with greased foil.

Over medium heat, melt sugar in a sauce pan, stirring until it has completely dissolved and is light golden in color. Gradually stir in soy milk and bring mixture to boil. Reduce heat to low and simmer 10-15 min., uncovered. Add butter, honey and cocoa and salt (if you’re not using soy sauce) and continue boiling and stirring for another 10-15 min., or until mixture thickens (about 248F) and shrinks away from the bottom and sides of the pan. Stir in soy sauce (if using). Pour into the greased pan and cool 10 min. While still warm, cut caramels into approximately 18 pieces. Wrap in individual candy wrappers. The leftovers freeze well.

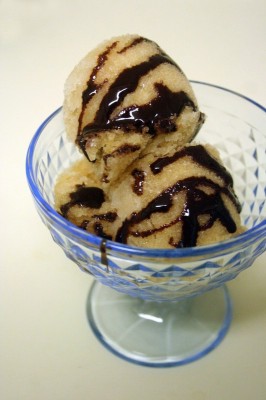
Now, what could possibly be weirder than chocolate and soy sauce? How about a dessert where the soy sauce doesn’t have “milk” or chocolate to hide behind? A dessert with just three ingredients? (Two if you don’t count the orange zest, which I didn’t use. Or one if you don’t count the sugar, which is mandatory in dessert.) It’s soy sauce sorbet, which Kikkoman features on its website, along with soy sauce chocolate sauce and soy fruit charlotte.

At first bite, the sorbet has an off-putting fermented flavor, but it gets better as you eat it. It’s the easiest way to make a refreshing “caramel” sorbet without having to caramelize the sugar. Serving it with chocolate sauce does double duty. The chocolate sauce offsets the sorbet’s saltiness, while soy sauce brings out the chocolate flavor.
The sorbet is slightly icy, like a granita. You can add more sugar if you want it smoother.

Now that my experiments are done, I declare soy sauce too weird to put in desserts. At least I tried. If you like Sam Mason-style desserts (ancho caramel or miso ice cream, anyone?) from WD-50, these might be up your alley.

soy sauce ice cream

Soy Sauce Sorbet

Adapted from a recipe by Chef Michael Bloise, Wish at The Hotel at South Beach (Miami Beach, FL)

Yield: 6 cups

4 cups water
1 1/3 cups sugar
2/3 cup low-sodium soy sauce (or substitute 1/3 cup regular soy sauce plus 1/3 cup water)
4 teaspoons grated orange zest
2 Tbsp vodka (optional but recommended to keep the sorbet from freezing hard)

Stir together all ingredients until sugar is dissolved. Freeze in an ice cream freezer according to manufacturer’s directions. Serving suggestion: Chef Bloise serves a small scoop of Soy Sauce Sorbet with ginger carrot cake.

and round-up.

Comments off      Email Email      Print Print

Whipped cream screams ice cream

chocolate ice cream

If you’ve ever made strawberry shortcake, a trifle, or whipped cream frosting (all summery desserts, I might add), you’re bound to have leftover whipped cream. Instead of throwing it in the trash, you can make ice cream without a machine. In still freezing, you need don’t a special machine to churn the ice cream. The air is already incorporated via the whipped cream.

Having acquired excess whipped cream from a semi-illegal source (don’t ask, don’t tell), I adapted a chocolate ice cream recipe from Ben & Jerry’s Homemade Ice Cream & Dessert Book.

Would you take whipped topping from a Starbucks frappuccino, add lots of sugar and eat it by the spoonful? It’s essentially what ice cream is. That’s why I lightened the Ben & Jerry’s recipe by reducing the heavy cream by half and substituting thick, low-fat evaporated milk for the rest of the dairy. I also added some extra steps to ensure a delicious ice cream.

The first thing I did was heat the milk and egg. The simplest ice cream, Philadelphia style, contains no egg and is often not cooked over the stove. It’s the easiest method and comprises typical supermarket ice cream. However, store-bought ice cream contains stabilizers not readily available to the home cook. For homemade ice cream, custard style is best, because egg yolks contain emulsifiers that make everything creamy. Also, heating the proteins in the milk makes it freeze smoother. In this case, heating the liquid also makes the chocolate flavor bloom.

I also added vodka to lower the freezing point (so it won’t freeze rock hard). Rose Levy Beranbaum (author of The Cake Bible, The Pie & Pastry Bible and The Bread Bible) suggests 1 1/2 tsp of 80% proof liquor per cup of liquid. You can use flavored liquor, like Frangelico or rum, but vodka is versatile because it has a neutral flavor.

Lastly, a thorough chill gives time for the flavors to meld and makes it freeze faster, which means fewer sandy ice crsystals.

This ice cream isn’t as rich as Ben & Jerry’s, but it by no means tastes low-fat. It is creamy, flavorful and knocks the socks off of Edy’s!

Chocolate Ice Cream (lightened recipe)
adapted from Ben & Jerry’s Homemade Ice Cream & Dessert Book

Makes one scant quart

Ingredients
3/4 cup unsweetened cocoa powder
1 pinch salt
1 can (12 fl oz.) evaporated milk (fat-free is fine)
2 large eggs
3/4 cup sugar
1 cup lightly sweetened whipped cream (whipped from 1/2 cup heavy cream and 1 Tbsp sugar)
1 teaspoon vanilla extract
1 Tbsp vodka

Method
Put the cocoa and salt in a saucepan and add just enough milk to make a paste. Add the remaining milk and scald over medium heat.

In a separate mixing bowl, whisk the eggs until light and fluffy, 1 to 2 minutes. Whisk in the sugar, a little at a time, then continue whisking until completely blended, about 1 minute more. Temper the eggs by gradually adding the hot milk mixture and whisking constantly.

Transfer the mixture back into the pan and cook over moderately low heat until a thermometer registers 170F, or until it thickens and coats the back of a spoon.

Add the vanilla and vodka. Pour custard through a sieve into a metal bowl set in ice and cold water and cool. If necessary, use a hand blender to smooth out the custard. Cover and refrigerate until cold (preferably overnight).

Fold in the whipped cream and pour into ice cube trays and freeze. Unmold the cubes into a food processor and break up with a fork. Pulse until smooth. (If you don’t have a food processor, freeze in a shallow pan for three hours. After every hour, break up the mixture with a fork, whisk or hand blender. If you have an ice cream maker, add the cream to the milk in the first step. Freeze according to the manufacturer’s instructions.)

Transfer to an airtight container and freeze for at least three hours to harden. If it becomes difficult to scoop, thaw in the fridge for 10 minutes prior to serving.

Nutrition (serving size: 1/2 cup)

The new version: calories 203 (34% from fat); fat 8g (sat 5g); protein 7g; cholesterol 75mg; calcium 17%; fiber 3g; carbohydrate 30g

The original: calories 305 (57% from fat); fat 20g (sat 12g); protein 5g; cholesterol 104mg; calcium 8%; fiber 2g; carbohydrate 32g

Comments (3)      Email Email      Print Print

Soy sweet nuts

soy-candied walnuts

In the past couple years, salt has taken on culinary heights as an accompaniment to chocolate, ice cream and caramel candies. The flavors work because salt contrasts sweetness. Fleur de sel and gray salt are the typical stars, but one form of sodium has been overlooked: soy sauce. Think about it: soy sauce is aged for months until malty/caramel flavors develop. It actually pairs very well with sugar.

For this candied walnut recipe, soy sauce and molasses are boiled down to create a robust glaze. These nuts are fantastic with broccoli, caramelized onions, ice cream or straight out of your hand. Be sure to drain the glaze well, or it will remain sticky and slightly messy. If that happens, store them in the fridge to harden.

Soy Sauce-Candied Walnuts

by Michel Nischan for O, The Oprah Magazine

Ingredients
2 cups walnut halves
1/4 cup molasses
2 Tbsp tamari or soy sauce

Preheat oven to 350°F. In a small saucepan, combine walnuts, molasses and tamari; bring to a boil. Reduce heat and simmer 5 minutes; drain nuts well in a sieve set over a bowl. Spread walnuts on a baking rack coated with cooking spray set over a cookie sheet. Bake until browned, 8 to 10 minutes. Remove and let cool.

Comments (3)      Email Email      Print Print