Archive for Chocolate

Homemade Chocolate-Hazelnut Spread Recipe (Better Than Nutella)
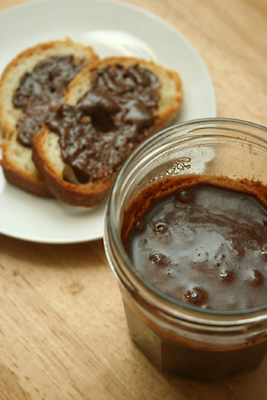
homemade chocolate-hazelnut spread (Nutella)

If someone offered you portable chocolate that could instantly be spread on bread, fruit, crackers and pastries, how could you refuse? Thus began my love affair with Nutella, a European spread made of hazelnut butter and cocoa.

During my days at NYU, I was at a make-your-own sandwich bar when I first tried Nutella with French bread. What a revelation! The chocolate oozed out of the nooks and crannies, while the spread’s smoothness contrasted the bread’s crust. I then saw that bagels were an excellent vehicle for Nutella. So were pretzels. And bananas. And gummy bears.

Fascinated by this new condiment, I bought myself a jar and finished it in one week. I’ve never met any food that does not taste better with a dollop of Nutella. Sometimes the best way to enjoy Nutella is to take a spoonful and just plop it in your mouth.
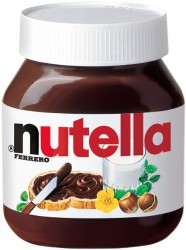
Nutella

According to Ferrero’s website, Nutella was created in the 1940s in the midst of a chocolate shortage. Pietro Ferrero, a pastry maker, stretched chocolate by thinning it out with ground hazelnuts. It became so popular that it’s as ubiquitous in Europe as peanut butter is in the U.S. If you ignore the high sugar content, Nutella actually has a nutritional profile similar to peanut butter. Its fat comes from the nuts, not the chocolate (Nutella gets its flavor from cocoa solids rather than cocoa butter). True, nuts are high in fat. But if you’re going to be eating fat, it might as well come from nuts rather than steaks.

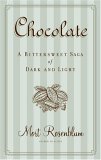
According to Mort Rosenblum’s Chocolate: A Bittersweet Saga of Dark and Light, a 13-ounce jar of Nutella contains 50 (2/3 cup) hazelnuts, 1 1/2 cups skim milk, “enough cocoa to make it brown, and a lot of sugar.” As much as I love Nutella, today’s commercial version is actually sugar that’s flavored with hazelnuts and cocoa. You can tell because sugar is first in the ingredient list. And there’s lots of added oil to make it spreadable.

The version that I make at home is truly chocolate-flavored hazelnut butter: I use 2 cups of hazelnuts rather than Ferrero’s puny 2/3 cup. This recipe is the same that I’ve sent out in Blogging by Mail and that Nic (of The Baking Sheet) used for her Nutella biscotti.

If you love this original recipe and repost it, please credit this site. Technically, recipes aren’t copyrightable, but the L.A. Times posted an eerily similar version.

Update: For an even richer version, try the second formula, which has caramel powder and no added oil. Unless you have a professional nut grinder, it won’t be as smooth as commercial Nutella, but the flavor more than makes up for it.

Chocolate-Hazelnut Spread (easy version)

Yield: about 12 ounces (1 1/2 cups)

2 cups whole raw hazelnuts
1 cup powdered sugar
1/4 cup unsweetened cocoa powder
up to 1/4 cup vegetable or nut oil
1/2 tsp vanilla extract

  1. Preheat oven to 350° F. Place hazelnuts in a single layer on a shallow baking pan. Toast until the skins are almost black and the meat is dark brown, about 15 minutes. Stir the nuts halfway through baking to ensure an even color.
  2. To get rid of the bitter skins, wrap the cooled hazelnuts in a clean kitchen towel or paper towel. Rub until most of the skins come off, but don’t worry if some remain.
  3. Process nuts in a food processor, scraping down the sides of the bowl occasionally, until they have liquefied, about 5 minutes. First, you will get coarsely chopped nuts, then a fine meal. After a little while, the nuts will form a ball around the blade, and it will seem like you only have a solid mass. Keep processing. The heat and friction will extract the natural oils, and you will get hazelnut butter!
  4. When the nuts have liquified, add the sugar, cocoa and vanilla. Slowly drizzle in enough oil to make a spreadable consistency. Since the mixture is warm, it will be more fluid now than at room temperature.
  5. Transfer the spread to an airtight container, and store in the refrigerator for 1-2 months. For best results, stir the chocolate-hazelnut spread before using.

Variations: To make any standard nut butter, use this procedure but omit the powdered sugar, cocoa, vanilla and extra oil. Add 1/2 tsp salt and up to 2 tbsp granulated sugar. Try making your own cashew butter: you may never go back to peanut butter again!

Chocolate-Hazelnut Spread (caramel base)

While this version requires a little more work, it has a richer, more sophisticated flavor.

Caramel instructions adapted from Chocolate and the Art of Low-Fat Desserts by Alice Medrich

Yield: about 12 ounces (1 1/2 cups)

Caramel:
1/2 cup sugar
1/4 cup water

Hazelnut Butter:
2 cups whole raw hazelnuts
1/4 cup unsweetened cocoa powder
1/2 tsp vanilla extract
1/8 tsp salt

  1. Preparation: Preheat oven to 350° F. Line a baking sheet with foil.
  2. Make the caramel: Combine the sugar and water in a 3- to 4-cup saucepan. To prevent crystallization, don’t stir it again during the cooking. Cover and bring the mixture to a simmer over medium heat. Remove the lid and wipe down the sides of the pan with a wet pastry brush or a scrunched up paper towel dipped in water. Cover and cook for 2 minutes, or until the sugar’s completely dissolved. Uncover and cook until the syrup looks like pale amber maple syrup. If your pan’s dark and you can’t gauge the color of the syrup, spoon a drop or two onto a white saucer. Swirl the pan gently, continuing to cook and test the color until the syrup turns medium amber.
  3. Immediately pour the caramel onto the lined baking sheet. Tilt the sheet to spread the caramel as thinly as possible. Let harden completely, about 15 minutes.
  4. Toast the nuts: Meanwhile, place the hazelnuts in a single layer on another baking sheet. Toast in the oven until the skins are almost black and the meat is dark brown, about 15 minutes. Stir the nuts halfway through baking to ensure an even color.
  5. To get rid of the bitter skins, wrap the cooled hazelnuts in a clean kitchen towel or paper towel. Rub until most of the skins come off, but don’t worry if some remain.
  6. Make the hazelnut butter: When the caramel is completely cool, break it into small pieces and pulverize in a food processor. Try to get the caramel as fine as possible at this stage (it won’t get finer once you add the nuts).
  7. Add the nuts and process until they have liquefied, about 5 minutes. Scrape down the sides of the bowl occasionally. Be patient; the nuts will go from a fine meal, to forming a ball around the blade, to nut butter. Add the cocoa, vanilla and salt and process until smooth.
  8. Transfer the spread to an airtight container, and store in the refrigerator for 1-2 months. For best results, stir the chocolate-hazelnut spread before using.

Notes:

  • Please use whole raw nuts, and toast them yourself to intensify the flavor. Pre-toasted or pre-chopped nuts are often spoiled.
  • To further intensify the nut flavor, use unrefined nut oil (for version 1), which is tan in color. Peanut oil is especially cheap in Chinese supermarkets: 20 ounces for $2.38! So if you’re looking for a “gourmet” ingredient, try an ethnic market.
  • You really need a full-sized food processor to make nut butter, not a mini version or a blender. I recommend a 7-cup Cuisinart: it’s large enough for most household tasks but isn’t too bulky.

Resources:
Official Nutella site
Nutella recipes

Comments (147)      Email Email      Print Print

Chewy Chocolate Chip Cookies and Chocolate-Covered Macaroons

Traditionally, cookie swap parties are held shortly before Christmas and allow people to sample a plethora of cookies. Each participant brings several batches of their favorite cookies and distributes them. The more people the better: you can potentially go home with 10 varieties! This month’s Is My Blog Burning, has the same concept, but it’s gone online. If you need holiday baking ideas, check out Jennifer (of The Domestic Goddess) and Alberto’s (of Il Forno) round-up.

I’ve decided to combine a bit of the old with a bit of the new. First is a chewy chocolate chip cookie that has been a family Christmas tradition for a decade. The second cookie is my signature macaroon, enrobed in chocolate.

As I’ve said before, chocolate chip cookies spurred my love for baking. When I was around 12, my mom and I whipped up a recipe that a co-worker had given her. It called for a half-half mixture of butter and vegetable shortening. Our kitchen was sparse and we didn’t have shortening. But we saw the word “vegetable” and figured we could substitute vegetable oil. (I still don’t use vegetable shortening for health, texture and taste reasons.) Because of the oil, the chocolate chips slipped of the dough, which we accepted.

At the time, we also didn’t own baking sheets, so we made our own by cutting up paper grocery bags. To place them in the oven, we slid them off a giant piece of cardboard, much like a cook uses a pizza peel. We didn’t know that cooling racks existed either, so we lined the stove with newspaper and laid the “cookie sheets” on top.

Despite these untraditional techniques, the cookies were delicious. Because they were made with 100% whole wheat flour, they were different from the traditional Toll House variety. But they were good in their own right: chewy, soft and satisfying. We’ve made these year after year for the holidays.

Below is the adapted version (I believe cookies should be 100% butter), and you can use a mixture of flours to lighten the texture (but I can’t tell you the ratio because I want to keep my secrets!).

Chewy Whole-Wheat Chocolate Chip Cookies
Makes 3 dozen cookies

1/2 c sugar
1/2 c brown sugar
1 stick butter, at room temperature
1 tsp baking soda
1 egg
1 tsp vanilla
1 1/2 c whole wheat flour
1/2 c chopped toasted nuts (optional)
1 c chocolate chips

Heat oven to 375° F. In a medium bowl, mix the sugars, butter, egg, and vanilla with a wooden spoon until smooth. In a separate bowl, stir the flour and baking soda. Add the flour mixture, chocolate chips and nuts to the wet ingredients. Drop by rounded teaspoons onto ungreased baking sheets.

Bake for 8-9 min, or just until edges begin to brown.

Notes:

I recommend these chocolate chips:
Whole Foods 365 Everyday Value-Outrageous semisweet flavor. At 1.99 for 12 oz., it’s actually cheaper than the brands below and better! It has only the real stuff: cocoa liquor, sugar, cocoa butter, vanilla and soy lecithin (an emulsifier). Chocolate manufacturers often cheat by substituting vegetable or milk fat and vanillin.
Nestle Toll House Semi-Sweet Morsels-classic semisweet flavor with a bit of an acidic edge (which I like). The chips soften after baking, so they melt right in your mouth when you bite into them.
Mrs. Fields-slightly more multi-faceted flavor than Nestle’s.
Ghirardelli Semi-Sweet Chocolate Chips-a dependable brand with a smoother flavor than Nestle’s. Despite the fancy name and packaging, they’re at the bottom of the “recommended” list.

Not recommended:
Hershey’s Semi-Sweet Chocolate Chips-flat flavor that resembles milk chocolate.
Guittard Semi-Sweet Chocolate Chips-they may make gourmet chocolate, but their chocolate chips aren’t as rich as Nestle’s.
Pathmark supermarket brand-an ideal ingredient list (cocoa liquor, sugar, cocoa butter, vanilla and soy lecithin) and cheap price attracted me to the product, but it was waxy and fake tasting.

Chocolate-Covered Macaroons

chocolate-covered macaroons

Although everyone loves chocolate chip cookies, the cookie that most people ask me to make is the French-style macaroon. While the American version consists of coconut and is often dry and mealy, the French version uses ground almonds and has a chewy bite underneath a crisp shell.

My only complaint is that macroons have a short shelf life. I can’t ship my them, lest someone wants to pay for overnight delivery. In my latest attempt to prolong the shelf life, I dipped my macaroons in chocolate (thanks to David Lebovitz’s blog for the idea!). I figured the chocolate would create a barrier to keep the cookies moist.

In my experiment, I ate one cookie a day and studied how the texture degraded over time. Sadly, the cookies still dried out after two days, but fresh chocolate-dipped macaroons are as decadent, if not more addictive, than truffles!

Adapted from Alice Medrich’s Cookies and Brownies

Makes 3 dozen sandwich cookies, about 1 1/2-inches wide

Ingredients
7 ounces blanched almonds (1 1/3 cups whole or 1 2/3 cups slivered)
1 1/2 cups sugar
3 to 4 large egg whites
A variety of jams, frosting, lemon curd, caramel sauce, Nutella, fudge sauce or ganache
12 oz. of dark chocolate (chocolate chips are not recommended, as they don’t melt as well)

Equipment
2 cookie sheets, greased, or lined with parchment paper

In a food processor with a steel blade, process the almonds and sugar until the almonds are very fine and the mixture begins to pack together around the sides of the bowl, at least 3 minutes. With the processor on, slowly drizzle only enough of the egg white to form a ball of dough around the blade. Keep the processor on. Add only enough additional egg white so the dough has the consistency of very thick, sticky mashed potatoes and no longer forms a ball.

Pipe or drop rounded teaspoons (equivalent to 2 level teaspoons) 2 inches apart on the cookie sheets. Gently press down on the top of each cookie to smooth it out. Let the cookies stand for 30 minutes .

Preheat the oven to 300° F. Position the racks in the upper and lower thirds of the oven. Bake for 20 to 25 minutes, or until the edges of the cookies barely begin to color. Rotate the pans from front to back and top to bottom about halfway through the baking time to ensure even baking. Slide the parchment onto racks. Cool the cookies completely before detaching them.

Spread the filling on the flat side of half of the cookies and top with the remaining cookies.

Drop the cookies into melted tempered chocolate. Couverture, or covering chocolate, is easiest to use because the extra cocoa butter makes the chocolate more fluid. It’s NOT confectionery or compound chocolate, which has vegetable fat and is not as rich. One way to temper is to melt 3/4 of the chocolate (9 oz. in this case) on top of a double boiler and add in small pieces of the reserved chocolate until the mixture registers 88° F on an instant-read thermometer. Use an immersion blender to smooth the mixture and circulate the good crystals. Tempering is done so that the final product has a good gloss and snap. To test the temper, spread some chocolate on the tip of a knife—it should set up within a minute.

If you plan on consuming the cookies right away or don’t mind occasional white streaks in the coating, simply drop the cookies into melted chocolate.

Roll the cookies around until all sides are coated with chocolate, and fish them out with a fork. Place on wax or parchment paper to harden. Consume within two days.

If you have leftover chocolate, grab everything in your cupboard and start dipping! Or, mix with milk to make hot chocolate. Or, pour it onto parchment paper to harden and use for another time.

Comments (9)      Email Email      Print Print

Drink to your health: banana hot cocoa

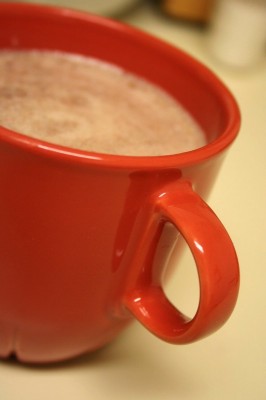
banana hot cocoa

Caffeine addicts drink coffee every day, while the health-conscious turn to tea or wine.  As for me, my daily drink is hot cocoa.

It’s no secret that cocoa contains more antioxidants than green tea and vegetables:

"Like some other plant foods, chocolate is chock-full of a wide range of antioxidant compounds called polyphenols, including the procyanidins epicatechin and catechin. Fruit, vegetables, wine, and tea have polyphenolic flavonoids as well but, amazingly, polyphenols are found in much higher abundance in chocolate and cocoa. The amount of polyphenols in milk chocolate is equivalent to that of five servings of fruits and vegetables. The following is the measurement of the polyphenol content in 1.25 ounces of cocoa products:

  • Milk chocolate 300 mg
  • Dark chocolate 700 mg
  • Cocoa powder 1,300 mg

Polyphenols are antioxidants that help the body’s cells resist damage from free radicals, which are formed in normal body processes as well as by environmental pollution, poor diet, alcohol and drug use, and smoking. Free radicals can damage cells, thereby causing cancer and accelerated aging of the body systems. Polyphenols in cocoa also minimize the oxidation of low-density lipoprotein (LDL) cholesterol, a major factor in the promotion of coronary disease such as heart attack and stroke. Reducing the oxidation rate of LDL cholesterol may be just as important as reducing the level of LDL cholesterol. Polyphenols also help inhibit platelet aggregation and activation, meaning they help prevent platelets from clumping together, therefore reducing the risk of arteriosclerosis. Cocoa polyphenols also seem to thin the blood, which slows the rate of coagulation, reducing the risk of heart attack and stroke." – "Today" Show Food Editor Phil Lempert

As if women didn’t have enough excuses to eat chocolate, they’re now popping morsels into their mouths and proclaiming, "I’m eating health food!"  But remember, just one ounce of semisweet chocolate has 8 grams of fat, with 5 being saturated (25% of the daily recommended value).  50% of its calories come from fat, and nutritionists recommend a diet of 30% of calories from fat.  Eating too much chocolate can cancel out its health benefits.

Chocolate is a mixture of cocoa solids, cocoa butter, sugar and vanilla.  Guess where all the nutrients and flavor come from?  I can in good conscience chug hot cocoa and proclaim it a health drink.

This banana hot cocoa was inspired by a recipe from Jacques Torres.  I swapped the chocolate with cocoa powder, so it’s lower in fat but not in flavor.  Since bananas are naturally sweet, you can also get away with using less processed sugar, and the banana/chocolate flavor is a classic combo.  Plus, bananas make it "arteriosclerotically thick," which is how NY Times writer Ed Levine described City Bakery’s legendary drink.

This drink packs a power punch: calcium and protein from the milk, potassium from the bananas and of course antioxidants from the cocoa.  Save your overripe bananas for this chocolately treat.

Banana Hot Cocoa

Inspired by a recipe from Jacques Torres
Serves 2

Ingredients:
1 large overripe banana, mashed with a fork
2 tablespoons unsweetened cocoa powder
2 teaspoons sugar
2 cups milk

Directions:
Combine all ingredients except milk in a heavy saucepan. Stir in enough milk to make a paste.  Whisk in the remaining milk.  Scald the mixture over a medium-low flame.  Pour into a blender to make the drink smooth and frothy on top.  Pour into cups and enjoy!

If you’re feeling lazy, you can just microwave the mixture for about 3 minutes, or until hot.  You can skip the blender and leave the drink chunky.

Notes: I like my hot cocoa strong, with a 1:1 ratio of cocoa and sugar.  Most hot cocoa recipes call for a 1:2 ratio, so you can increase the sugar to your tastes.
Comments (4)      Email Email      Print Print

Chocolate Haven tour

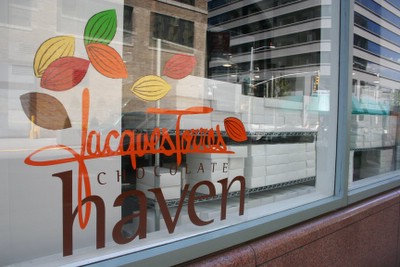
Chocolate Haven sign

As promised, here’s an extended tour of Jacques Torres Chocolate Haven in Manhattan. Part storefront, part chocolate factory, an outside glance of the building showcases its industrial side.

industrial interior

Can you guess which part’s the inside and which part’s a reflection from the outside?

oompa loompa

Large windows allow passersby to spy the inner workings of Jacques’ store. Here, an “oompa loompa,” as he calls his employees, pops the chocolate out of its mold.

Unlike most chocolatiers, Jacques makes his own chocolate from scratch, all the way from bean selection to the roasting, grinding, conching, tempering and molding. (From what I’ve heard, most chocolatiers buy chocolate from somewhere else and then re-melt them into truffles.) In a recent chocolate demo, Jacques said that making chocolate didn’t make sense from a business standpoint. It would be a lot cheaper to outsource the chocolate, but Jacques loves the craft of chocolate so much that he can’t wait to come in every morning and smell the beans that have been conching (a process to smooth the gritty beans) all night.

conveyer belt

A chocolate conveyer belt, in which goods are packaged.

Chocolate Haven entrance

Upon entering the store, a large welcome mat and bright red walls whet the visitor’s appetite for chocolate.

branches

Here are more chocolate teasers: a two-foot tall bag of cocoa beans, molinillos (wooden Mexican whisks used to froth hot chocolate) scattered on the wall, and a metate y mano (a stone rolling pin traditionally used to mash cocoa beans into chocolate).

cocoa press

Before modern machinery, chocolate making was literally a hands-on process.

truffles

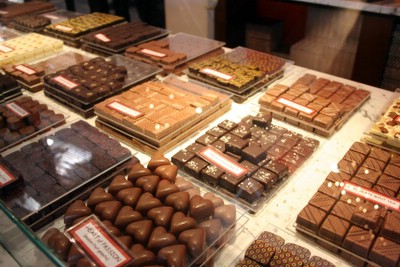
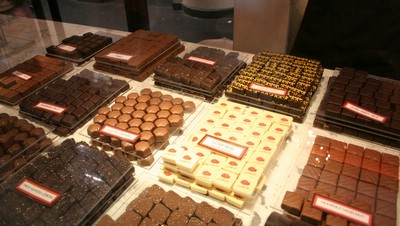
One of Jacques’ biggest draws are his truffles. I don’t know what’s more exciting: the exotic flavors like passion fruit, European peanut butter (hazelnuts and chocolate are a winning combination, as proven by my love for Nutella) and wicked fun (chili), or their $1 price tag! Yes, Jacques’ truffles are cheaper than Godiva’s!

more truffles

More truffles.

chocolate bark

Tower of chocolate bark.

milk-chocolate covered cheerios

Jacques also has a collection of ever-changing candy. Here, the chocolate-covered Cheerios show off his sense of humor.

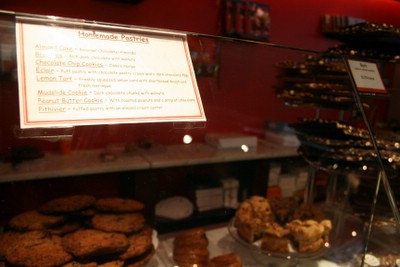
mini cookies

In addition to the chocolate, the store has baked goods, including mini-cookies…

pastries

…and full-sized pastries if your wasteline can handle them.

Jacques Torres Chocolate Haven
350 Hudson at King Street (1 block South of Houston)
New York, New York 10014
212.414.2462 phone
212.414.2460 fax

Comments off      Email Email      Print Print

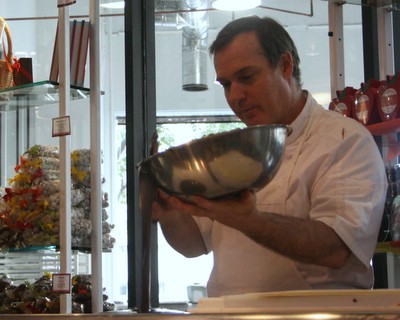
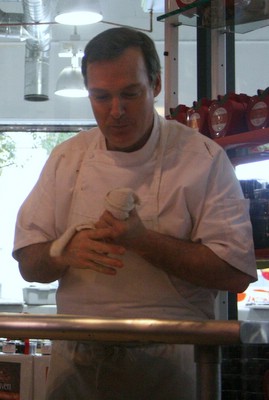
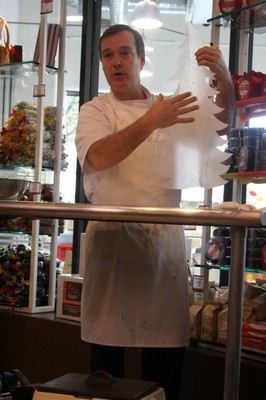
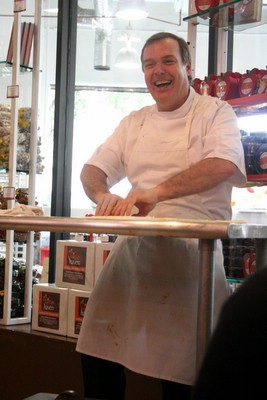
Jacques Torres Chocolate Haven demo

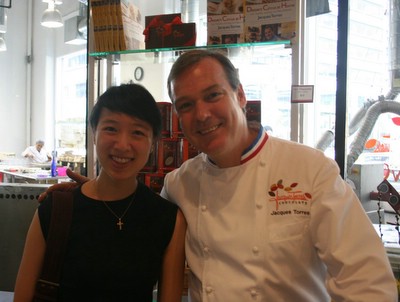
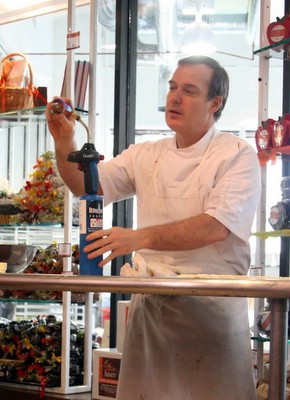
Jacques and me

Jacques Torres is my hero. I grew up watching his PBS show, Dessert Circus, where he made whimsical desserts, such as chocolate checkerboards with playing pieces, chocolate cages and croqombouche (a pyramid of cream puffs surrounded by spun sugar). The man can pipe out an entire batch of macaroons in one minute. I’ve made about a thousand macaroons, and it still takes me several minutes to form them.

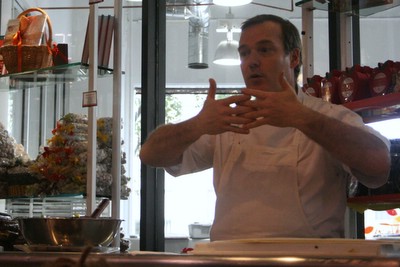
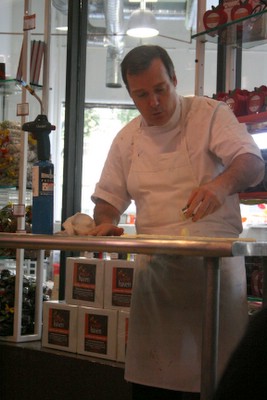
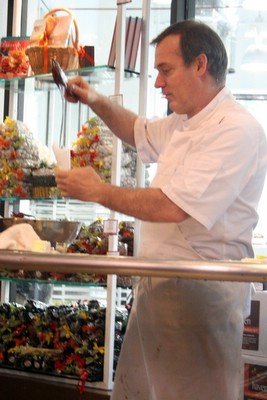
Even more astonishing than Torres’ skill is his eagerness to share knowledge.  Besides serving as Dean of Pastry Studies at New York’s French Culinary Institute, Torres gives free Saturday demos about once a month at his Chocolate Haven store.

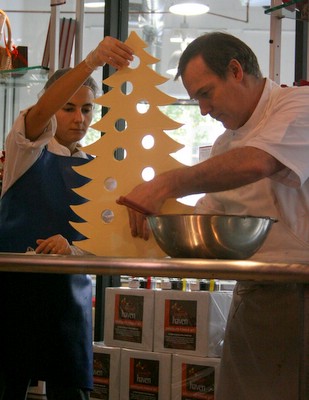
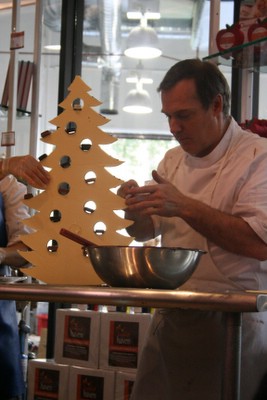
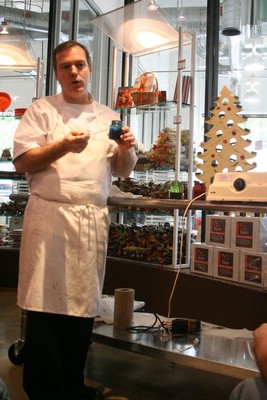
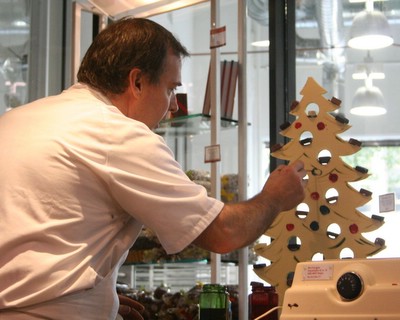
This week, he showed a crowd how to make a chocolate Christmas tree.

tempering chocolate

First, Torres explained that you must temper chocolate to realign the crystals…

…so it snaps cleanly when you break it.  Untempered chocolate develops white streaks (called bloom) on top, because the solids separated from the fat.  Once hardened, untempered chocolate won’t pull away from molds, so you’ll have to give people your molds along with your truffles, Torres said. His preferred method of tempering is melting chocolate over a double boiler and then adding solid chocolate to the liquid.  Then, use an immersion blender to break up the chocolate bits and circulate the good crystals.  Continue adding solid chocolate until the liquid measures 88F (for dark chocolate) or 86F (for milk and white chocolate).  To test the temper, dab some chocolate on the tip of a knife.  It should set up within one minute.

It’s easiest to keep the chocolate at the correct temperature if you work with a lot of it.  If you only temper one cup of chocolate at a time, it will cool down and harden too quickly…

pouring chocolate

…which is why Torres tempered about seven pounds of chocolate for the Christmas tree base.  If you have leftover chocolate, pour it in a pan and let it harden.  You will have to re-temper it if you work with it again.  What a pain.  Now I know why chef David Lebovitz hastily dips everything in leftover tempered chocolate.

Note: you only have to temper chocolate if you’re making candy or need a hard, glossy surface.  You do not need to temper chocolate for cake batters, mousse or ice cream.

staying clean

The hardest part about working with chocolate is staying clean, Torres said. When I’m at home, I lick my fingers rather than wiping them (shh, don’t look).

Christmas tree stencil

To make the Christmas tree, temper white chocolate and pour it into a pan so it’s about 1/4-inch thick. Then cut out a stencil out of wax or parchment paper.

eating your mistakes

Lay the stencil on top of the chocolate and use a paring knife to cut around it. Don’t cut all the way through the chocolate on the first pass, or else it will crack. Just score the chocolate and go over it a couple times. But if your chocolate does crack, it’s okay, because you can always eat your mistakes, Torres said as he showed off his belly.

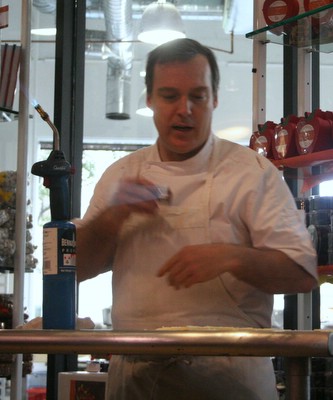
heating the cutter

To make holes in the tree, heat up a metal cutter.

too hot

Oops, that was too hot.

cutting the white chocolate

Then use the cutter to plop out holes.

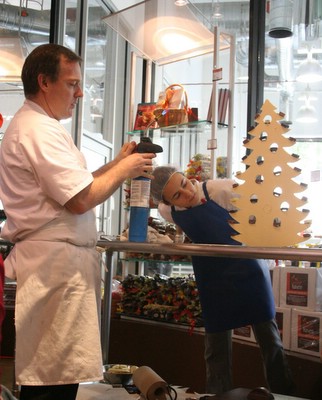
chocolate glue

Torres made “glue” by putting melted chocolate in a parchment cone.

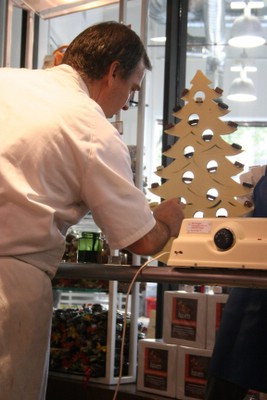
steadying the tree

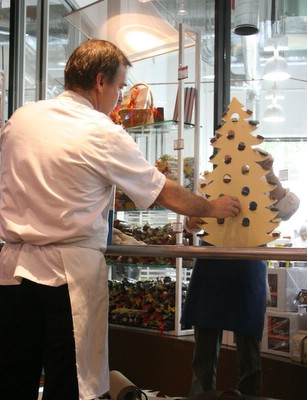
Torres and his assistant steadied the tree on top of the circular base and “glued” it in place.

gluing on bon bons

Then, he glued truffle “ornaments” into the holes and on the ends of the tree.

one more hole

Oops, one hole didn’t quite make it.

cutting the hole

It was time to use some more fire power.

painting the leaves

Next, Torres painted leaves…

chocolate dye

…by using a mixture of powdered food coloring and melted cocoa butter.

painting the ornaments

Lastly, he painted some ornaments.

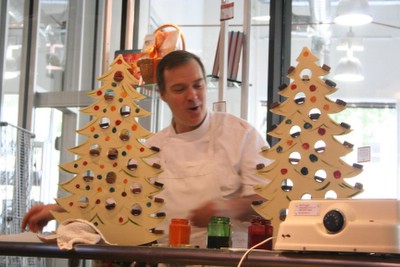
notice how the one on the left looks better

The finished product, along with a tree that was made earlier. Can you guess which one was prepared beforehand?

No, we did not get to eat the demo, but his staff did pass out samples of chocolate-covered macadamia nuts and peanut butter cups. The peanut butter cups were what Reese’s were meant to be: intense peanut flavor without being overpowered by high-fructose corn syrup. The milk chocolate was a little too creamy for me though. I would have preferred it to have the snap of well-tempered chocolate.

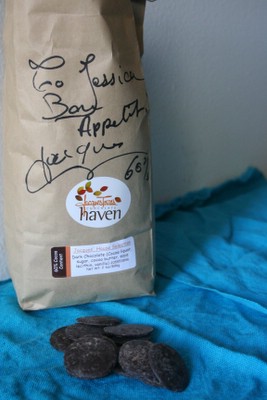
autographed chocolate

Afterwards, I proudly bought a two-pound bag of dark chocolate.  At $6/pound, it’s the best bang for the buck, especially since Torres claimed it was fair trade.  Chances are, non-fair trade chocolate is made through child labor.  I’m not talking about young farmhands helping out their family.  I mean child slavery, in which children are reportedly bought for about $30 and forced to carry bags that are bigger than they are.  But that’s another post.

Torres’ “pistoles” were well-tempered (he practices what he preaches!) and had hints of caramel and coffee flavor.  I’m no expert on tasting chocolate, so excuse my description.  There were no patches of bitterness or acidity, but instead it was almost too neutral.  Of course, the last chocolate I used was Valrhona guanaja, which spoiled my tastes.  Guanaja’s flavors are so multi-faceted that eating it is a cerebral experience.  The taste lingers long after the chocolate is swallowed.  It’s a little bit woodsy and cherry like.

P.S.-If you look at the first picture of Torres and me, he’s wearing different clothes.  That’s because I met him during another demo in the summer.

Jacques Torres Chocolate Haven
350 Hudson at King Street (1 block South of Houston)
New York, New York 10014
212.414.2462 phone
212.414.2460 fax

Shows/Recipes:
Chocolate with Jacques Torres
Passion for Dessert with Jacques Torres
Blue-Chip Cookies for the NY Times

Books:
Dessert CircusDessert Circus Dessert Circus at HomeDessert Circus at Home

Comments (7)      Email Email      Print Print

IMBB 20: Chocolate Chestnut “Su-fle” Cake

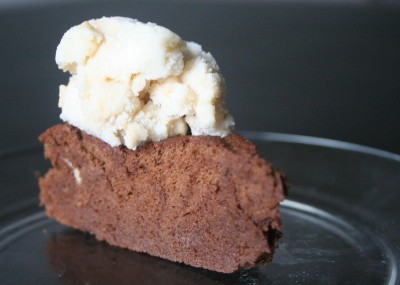
chocolate chestnut souffle cake

It’s a shame what Jeffrey Steingarten has done. The Vogue food writer’s two versions of lobster soufflé take 10 hours to prepare, enough to scare away even expert cooks.

For Is My Blog Blog Burning 20: Has my Blog Fallen?, Kitchen Chick sought to convince people that soufflés aren’t so difficult to make after all. Souffles are simply custards that have been leavened with beaten egg whites. Although souffles are notorious for collapsing quickly, soufflé cakes are easy to make because they’re meant to be served in their non-peak state.

The chestnuts in this low-fat “su-fle” (ha ha, get it?) cake add wonderful creaminess. You won’t taste the chestnuts unless someone points them out, but they definitely contribute to the cake’s texture. On the first day, it resembles chiffon cake but on the second day, its flavor develops and resembles mousse. Your patience will be rewarded!

Chocolate Chestnut Soufflé Cake

Adapted from Chocolate and the Art of Low-Fat Desserts by Alice Medrich

Ingredients:
4 ounces bittersweet or semisweet chocolate, chopped fine
1/2 cup plus 1/2 tablespoon unsweetened Dutch process cocoa
3/4 cup sugar
1/2 cup boiling water
1/2 cup chestnut spread (sweetened chestnut puree) (picture)
2 egg yolks
1 Tbsp rum
1 tsp vanilla extract
4 egg whites
1/4 tsp cream of tarter or 1/2 tsp vinegar or 1/2 tsp lemon juice
1/4 cup all-purpose flour
1 to 2 tsp powdered sugar, for dusting
vanilla ice cream, vanilla frozen yogurt, whipped cream, creme fraiche, sour cream, or sweetened pureed cottage cheese (optional but recommended)

Instructions:

  1. Position the rack in the lower third of the oven and preheat to 350F. Place a round of parchment paper on the bottom of the pan and grease the sides.
  2. Combine the chopped chocolate, cocoa and half of the sugar in a large mixing bowl. Pour in boiling water and whisk until the mixture is smooth and chocolate is completely melted.  Stir in the chestnut spread, egg yolks, rum and vanilla.  Set aside.
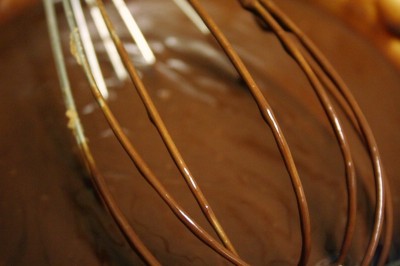
    chocolate mixture
  3. Combine the egg whites with the cream of tarter, lemon juice or vinegar. Beat at medium speed until soft peaks form. Gradually sprinkle in the remaining sugar and continue to beat at high speed until stiff but not dry. Whisk the flour into the chocolate mixture. Fold in a quarter of the egg whites. At this point, you don’t have to be too careful because you’re just lightening the chocolate so it will be easier to combine later. Then, carefully fold in the remaining whites. (Cut a spoon or spatula into the bottom of the bowl and plop the chocolate on top of the whites. Turn the bowl 90 degrees and repeat until no white streaks remain. The batter doesn’t have to be perfectly uniform in color. When in doubt, err on the side of undermixing so you keep the volume in the whites.) Scrape the batter into the pan and smooth the top. Bake until a skewer or toothpick inserted into the center comes out with a few moist crumbs clinging to it, about 30 to 35 minutes. Cool torte in the pan on a rack. rise
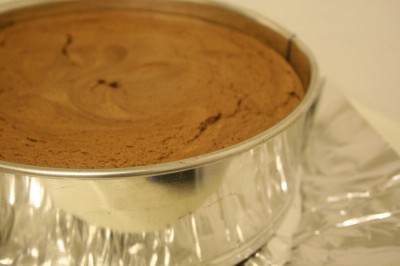
    [Rise…]It will sink in the center as it cools.
    fall
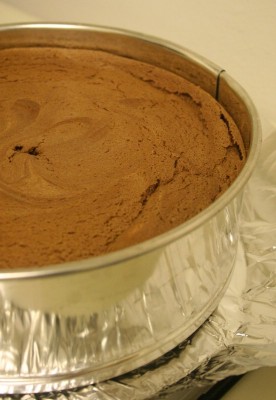
    […and fall]Cake may be prepared to this point and stored, covered at room temperature or refrigerated for 2 days or frozen, well wrapped, for up to 2 months.
  4. To serve: Slide a thin knife or spatula around the sides of the pan to release the cake.  
    Remove the sides and bottom of springform or invert cake onto a platter. Remove the paper liner from the bottom and turn the torte right side up. Dust with powdered sugar and serve with a dollop of dairy, if desired.

Notes/tips:

  • While this cake did not taste low-fat, I didn’t think it was rich enough. I used mildly sweetened chestnut puree and forgot to add the cocoa, so your results may vary.
  • For a milk chocolate-flavored cake, use unsweetened chestnut puree and do not add cocoa.
  • You may make your own chestnut puree by boiling canned roasted chestnuts with enough water to cover and brown sugar (I used 2 Tbsp for 14 ounces of chestnuts. My puree was slightly sweet but not like a confection.) for 45-60 minutes, or until most of the water is absorbed and the nuts are soft. Puree the mixture with 1/2 tsp vanilla in a food processor until creamy.
  • I’m not big on garnishes, but a dollop of a plain dairy product really enhances the chestnut’s creaminess.  Regular yogurt is not recommended though, because it’s too tangy.
  • Eggs are easier to separate when they are cold (the yolks are less prone to break), but the whites whip better when they’re at room temperature.
  • Cream of tarter, an acid, stabilizes the whites to insure against overbeating. You’ve overbeaten the whites when a white glob floats on top of a watery mess. For a couple bucks, you can buy one ounce of cream of tarter, a uni-tasker. Or, you can buy a big bottle of vinegar for less than a dollar and save it for a ton of other uses.  😉 Simply substitute twice the amount of vinegar or lemon juice for cream of tarter in all of your whipped egg white recipes.

Tagged with: IMBB # 20 + Souffle

Comments (6)      Email Email      Print Print

Back-of-the-bag M&M cookies

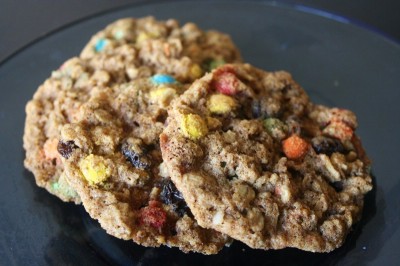
M&M cookies

What would you do to find the best recipe for chocolate chip cookies or whatever your heart desires? Consult an obscure cookbook? Experiment with endless variations? Take the modern route and see what the bloggers are cooking?

How about looking on the back of the bag of your star ingredient? “No no, if a good recipe were so readily available, surely everyone would be able to cook well,” you say. Besides, back-of-the-package recipes often trick you into buying other products from the same parent company. For example, to make “authentic” Philadelphia cheesecake, you must use Honey Maid graham crackers. Nice try, Kraft.
But think about it. I don’t know anyone who doesn’t like the classic Nestle Toll House chocolate chip cookie. The Hershey’s chocolate cake recipe on the back of every cocoa package produces a delicious, moist cake. All pumpkin pie recipes that I’ve seen are only slight variations from the one on Libby’s pumpkin label (15 oz. of pumpkin puree, 1 1/2 cups of dairy, two eggs and sugar and spice to taste). Manufacturers know that back-of-the-package recipes better be good, or you won’t be buying their product anytime soon.
The M&M oatmeal raisin cookie recipe is no exception. I’ve seached high and wide for a good oatmeal chocolate chip cookie recipe. I was convinced that it simply didn’t exist. In my cookies, the chunk of chocolate interfered with the chewiness of the oats. It was a completely different mouthfeel. I figured only raisins could go with oatmeal because both were chewy.

It turns out a trusty oatmeal chocolate cookie recipe was right under my nose, er, in my hands.

M&M Oatmeal Raisin Cookies

adapted from the M&M Gift Jar Cookie Mix recipe on every Mini bag

Ingredients:
1 stick of unsalted butter, at room temperature
3/4 cup (169g) firmly packed light brown sugar
1 large egg
3/4 teaspoon (3.75mL) vanilla extract
3/4 cup (169g) whole wheat flour
1 1/4 cups (281g) uncooked oats (quick or old-fashioned is fine)
1/2 teaspoon (2.5mL) baking soda
1/2 teaspoon (2.5mL) salt
1/2 teaspoon (2.5mL) ground cinnamon
1 cup (225g) M&M’S® Chocolate Mini Baking Bits
1/2 cup (113g) raisins
1/2 cup (113g) chopped toasted walnuts (optional)

Preheat oven to 350°F (177°C).

In a large bowl cream butter and sugar until light and fluffy; beat in egg and vanilla until well blended.

In a medium bowl combine flour, oats, baking soda, salt and cinnamon; blend into creamed mixture.

Stir in M&M’S® Chocolate Mini Baking Bits, raisins and nuts.

Roll into 1-inch balls and place about 2 inches apart on ungreased cookie sheets. Bake 12 to 15 minutes, or just until edges begin to brown. Cool 2 minutes on cookie sheets; cool completely on wire racks. Store in tightly covered container.

Makes 4 dozen cookies

Notes:

  • As usual, I reduced the butter. The original recipe called for 1 1/2 sticks, but you won’t miss it.
  • Also as usual, I swapped out all-purpose flour with whole wheat flour for health reasons. I think whole wheat flour gives the cookies a heartier flavor and texture.
  • To reduce spread, refrigerate the batter for at least one hour to solidify the butter and let the flour/oats soak up moisture. If chilling for more than a couple hours, roll the dough into three or four logs and slice off a chunk to bake. By then, it will be too hard to spoon. The logs can also be frozen, double-wrapped, to satisfy later cookie cravings.
  • The dough was uber flavorful for my tastes. Next time I will use 3/8 tsp salt and 1/2 cup plus 2 tbsp sugar. It’s all a matter of taste though. Nic at The Baking Sheet thinks salted butter (which already has 1/2 tsp of salt per stick) plus 1/2 tsp salt per 2 cups of flour is perfect.
  • Why use unsalted butter if you’re adding in salt anyway? First, unsalted butter is often fresher than salted butter. Second, you get to control the flavor. Regular butter is often too salty for cookies.

Comments (3)      Email Email      Print Print

IMBB 15: Chocolate Mousse Truffles

This month, Elise at Simply Recipes is hosting the online foodie event, Is My Blog Burning. The theme this time is “Has my blog jelled?” – meaning people across the world will cook with gelatin, pectin, or agar agar and blog about it. Check out her round-up of all the recipes and try something!In America, gelatin is synonymous with Jell-O. It’s fun to look at the jiggly dessert, but it’s nothing more than extra sweet fruit juice that’s been chemically altered to hold its shape. Time and again, I’m seduced by the clear, sparkling colors, but the taste never matches up. And the texture’s rubbery.
I resolve to elevate gelatin from its kitschy roots. Stop using it to make wobbly pineapple-marshmallow ambrosia! There are better applications out there, like chocolate truffles.

Chocolate goddess Alice Medrich has found a way to freeze mousse and make them into luxurious truffles. These have just 2.7 grams of fat each and less than half the calories of regular truffles!

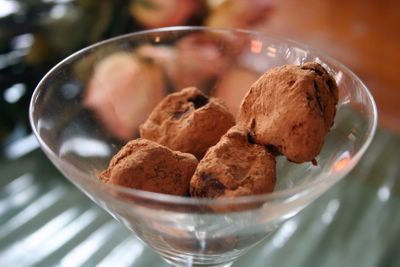
Chocolate Truffles
From Chocolate and the Art of Low-Fat Desserts by Alice Medrich
Makes about 45 truffles
Start working at least 1 day ahead

Chocolate truffle mousse center:
7/8 tsp. gelatin
1 egg, separated
1/4 cup unsweetened dutch process cocoa
1/4 cup plus 1/6 cup sugar
5/8 cup low-fat 1% milk
2 oz. bittersweet or semisweet chocolate, chopped fine
1/2 tsp. vanilla extract
1/16 tsp. cream of tartar

Coating:
16 oz. bittersweet or semi-sweet chocolate, chopped
1/3 cup unsweetened dutch process cocoa

Make the mousse:

  1. Sprinkle the gelatin over 1/8 cup cold water in a small cup. Let stand, untouched, for at least 5 minutes, or until needed.
  2. Place egg yolks in a medium bowl near the stove and have a small whisk ready on the side. Combine the cocoa with 1/6 cup of sugar in a 1- to 1 1/2-quart saucepan. Stir in enough milk to form a paste, then add in the remaining milk. Bring mixture to a simmer over medium heat, stirring frequently with a wooden spoon, reaching the bottom and sides of the pan to prevent burning. Stir the chocolate mixture continuously once it begins to simmer. Simmer gently, still stirring, for about 1 1/2 minutes.
  3. Turn off the heat and whisk a small amount of the hot mixture into the egg yolks. Scrape the mixture back into the pot and whisk well to combine. It’s now safe to eat and will thicken without anymore cooking. Stir in the softened gelatin, chopped chocolate, and vanilla. Let stand for a minute or so, and whisk again until chocolate’s completely melted and the mixture’s perfectly smooth.
  4. Set the saucepan in a large bowl of ice water to cool and thicken. Stir and scrape the sides occasionally. If the mixture begins to cool too quickly, remove from ice bath, whisk and set aside. Should the mixture actually set, place the pan in a bowl of hot water and stir just until resoftened.
  5. Make the meringue: Simmer 1 inch of water in a large skillet. Combine cream of tartar and 1 tsp of water in a 4- to 6-cup heatproof bowl. Whisk in the egg whites and 1/4 cup of sugar. Place an instant-read thermometer near the stove in a mug of very hot water. Place the bowl in the skillet. Stir the mixture briskly and constantly with a heat-proof spatula, scraping the sides and bottom often to avoid scrambling the whites. After 1 minute, remove the bowl from the skillet. Quickly insert thermometer, tilting bowl to cover the stem by at least 2 inches. If it’s less than 160 F, rinse the thermometer in the skillet water and return it to the mug. Place bowl in the skillet again. Stir as before until temperature reaches 160 F when bowl is removed. Beat on high speed until cool and stiff.
  6. Fold about a quarter of the cooled chocolate mixture into the beaten egg whites. Scrape the egg white mixture back into the remaining chocolate mixture. Fold to combine.
    Note: if you don’t mind raw egg whites, you don’t need to cook the whites beforehand. Simply beat the whites and cream of tartar in a bowl (water is unnecessary). When the mixture forms soft peaks, slowly sprinkle in the sugar and beat until stiff. Because this cooked meringue is firmer and deflates less than ordinary meringue, there’s a reversal in the conventional procedure for folding it with another mixture. If using regular meringue, lighten the mousse by folding a bit of the meringue in the chocolate mixture.
  7. Transfer to a bowl, cover, and freeze until firm enough to scoop, 5 hours or longer.

Form truffle centers:

  1. Get ready a bowl of hot water, a melon baller or spoon, a pan lined with wax paper, and the firm mousse. Dip the melon baller into the water and wipe dry. Form a scant 1-inch ball. Place it on the pan. Dip, wipe, and scoop centers until the mixture’s gone. Freeze centers at least 12 hours, or overnight. Centers may be prepared to this point and frozen for up to 2 weeks.

Coat the truffles:

  1. Melt chocolate in the top of a double boiler over barely simmering water, stirring frequently to prevent overheating. Or microwave on Medium (50% power) for about 3 minutes, stopping to stir several times. Chocolate is ready when it is completely melted and smooth and between 115 and 120 F.
  2. Pour cocoa into a shallow dish. Have ready another shallow dish for the completed truffles. Remove a third to a half of the frozen centers from the freezer and place them in a shallow dish next to the container of melted chocolate.
  3. With your right hand (left if you are left-handed), fingers together and slightly cupped, scoop a large handful of melted chocolate into your left hand. Rub both hands together to coat them with a thick layer of chocolate. Try not to get the chocolate on your fingers. Quickly pick up a frozen center with your left hand and roll it gently between your hands with a circular motion and as little pressure as possible, just long enough to cover it with a coating of chocolate. Add chocolate to your hands as you need it Immediately place the coated center in the cocoa dish. If you see any uncoated spots, dip a finger into the chocolate and patch the truffle. Have someone else shake the dish, roll the truffle in cocoa, and transfer it to a clean dish. Repeat until all the centers are coated, adding chocolate to your hands between each one. (If you’re alone, just divide the cocoa between 2 dishes. Place 2 or 3 truffles in the cocoa before stopping to shake the dish. Continue to add truffles and shake until the first cocoa dish is crowded with truffles, then start on the second.) Truffles may be stored in a tightly covered container in the freezer for up to 6 weeks. Serve frozen.

Notes:

  • Work quickly to keep the melted chocolate from hardening on your hands as you handle the frozen centers. Just keep the center moving–never let it rest in one place in your hands–and get it out of your hands as fast as possible.
  • You will have both chocolate and cocoa left over because the dipping technique requires that you work with more than you need. Place the leftovers in small plastic bags (strain the cocoa first). Store in the freezer (since they might have little of the melted truffle mixture) until needed for another recipe. Or heat the leftovers with milk and sugar to taste for decadent hot chocolate.
  • This should go without saying, but do not use a Hershey’s bar, chocolate chips or Baker’s chocolate. Use something decent, like Lindt, or Ghirardelli. Or splurge on Valrhona. I used the Valrhona that my brother gave me for my birthday.

Variations:
Add raspberry jam, peanut butter, coffee, Nutella, chile powder, cinnamon, or chopped nuts to the mousse mixture. Coat the truffles with chopped nuts, coconut, or sesame seeds.

Other applications for the low-fat filling:

Chocolate mousse: Double the mousse recipe and refrigerate it for four hours. Serve in 6-8 goblets. For an extra sensual experience, chop the chocolate coarsely, into 1-cm pieces, so it doesn’t dissolve completely in the hot milk mixture. The remaining chocolate bits will melt as they hit your tongue.

The mousse strikes a perfect balance between foaminess and creaminess.

It’s so rich that I could only eat a tablespoon at a time. Then I remembered how good it was and helped myself to some more and felt sick afterwards. Why oh why did I subject myself to such torture?

Bittersweet chocolate marquis: Double the mousse recipe and freeze it in a 4 to 5-cup loaf pan. Serve in 1/2-inch slices with creme anglaise (custard sauce) or strained raspberry puree. It’s richer than super-premium ice cream.

Chocolate gelato: Double the mousse recipe and freeze it in a container. No ice cream maker is necessary. Soften it in the fridge 15 minutes before serving and scoop into bowls. Gelato is softer and more flavorful than ice cream. This will explode in your mouth!

Frozen chocolate truffle sandwich cookies: Layer a thin coating of frozen mousse between two macaroon cookies and serve straight from the freezer.

Layered cake: Use the mousse immediately as a filling in your favorite cake. Refrigerate and serve when set.

Charlotte: Line a large bowl or round cake pan with plastic wrap. Then line the bottom and sides with ladyfingers or sponge cake and fill it with the mousse (triple the recipe above). Cover the top with berries and another layer of ladyfingers. Refrigerate 4 hours or until firm and invert the charlotte onto a serving platter.

Buche de Noel: Make your favorite sponge cake in a jelly-roll pan. Line it with the frozen mousse (triple the recipe above) and roll it into a cylinder. Cover the cake with meringue and freeze until ready to serve. Bake the cake in a 425 F oven until golden brown, about 4-6 minutes. Serve immediately.

Comments (4)      Email Email      Print Print

Chocolate delivery

*BZZ*

Hmm, who was visiting me at this strange hour at night?

“Who is it?” I cautiously asked over the intercom.

“Delivery for Jessica Su,” said the voice on the other end.

Those words made me giddy with delight as I rushed downstairs to open the door.

“These are from your brother,” the man said. “I spoke to him this morning.”

There was something old-fashioned about this delivery, since the man “knew” the sender and the recipient. It reminded me of the pony express, or hand-delivered telegrams.

I ravenously opened the nondescript package and dug out two tubs of dark Valrhona chocolate, arguably the most exquisite chocolate ever! My brother, recognizing my taste for fine chocolate (pavlova or chocolate truffle cookies, anyone?), ordered it for my birthday. Supposedly, the Brooklyn-based supplier, L’Epicerie, has reasonably priced Valrhona (I don’t know much it costs—I don’t want to check how much my brother spent on me) and a friendly French customer service rep.

The chocolate is pre-measured into small pieces, so no chopping is required for melting. The grand cru guanaja has a wide variety of applications: ganache, coating, cakes, biscuits, mousses/creams and ice cream.

One three-gram (a puny 1/10 of an ounce) “feve” is more satisfying than 10 Hershey’s kisses. The clean chocolate taste is slightly bitter. (Bitter as in rich. Not bitter as in harsh.) These would make awesome truffles (from Alice Medrich’s Chocolate and the Art of Low-Fat Desserts), gelato, or hot chocolate. Goodbye, City Bakery and your hot chocolate! I don’t need you anymore!

Comments (2)      Email Email      Print Print

Lazy Sunday Pavlova

Since today was Easter (see what Easter means to me), my friend Heather hosted a potluck lunch at her cozy Upper West Side apartment.

Lunch felt like an old-fashioned affair. There was no agenda to worry about and no reason to rush. It was a lazy Sunday afternoon shared by a group of friends.

Heather decorated the table with pastel napkins, plates and egg-shaped name tags. Instead of candy, the “eggs” held a different kind of suprise. When it came time to eat, we flipped over the name tags and read Bible verses from the back of them. It was like group theater meets a holiday celebration.

Then we said grace and slowly savored sweet potato vichyssoise (that’s soup for you non-culinary minded folk), salad with raspberry-glazed pecans, spiced potatoes, bread and my baked brown rice pilaf. For dessert, we paired date bars and my pavlova (recipe courtesy Nigella Lawson’s Forever Summer) with tea.

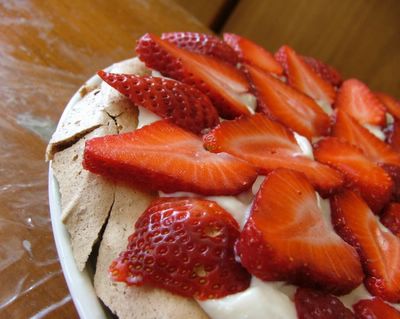
The pavlova had a crisp, meringue crust. The inside was a mixture between squidgy (as Nigella says) marshmallow and creamy, airy mousse. The whole thing was studded with bittersweet chocolate chunks, which gave it little jolts of richness.

It was super easy to make and rustic yet sophisticated. Don’t worry when the edges crack; it adds to the pavlova’s character. Besides, there’s nothing that can’t be repaired (er, covered up) with dollops of whipped cream and elegantly arranged fruit.

Notes/tips:
You can top the pavlova with any kind of semi-firm fruit, such as raspberries, kiwi, or blueberries. I chose strawberries because one pound is only $1 in Chinatown! (My favorite place to get fresh produce is the intersection of Canal and Walker. There’s lots of food stands, which ensures competitive pricing. Also, the fish so fresh that it’s odorless.)

Do not spread the batter all the way to the edges of the nine-inch circle, because it expands as it bakes.

To lighten the dessert, you can replace the whipped cream topping with yogurt cheese. Simply drain vanilla yogurt (with no gelatin) with a cheesecloth, coffee filter or paper towel fitted over a strainer overnight in the fridge. One cup yogurt yields about 1/3 cup cheese.

Or, if you’re lactose intolerant like Heather, take one 12-ounce block of extra-firm silken tofu (recommended brand: Morinu) , combine with 2 tbsp sugar, and blitz it in a blender till smooth. Refrigerate overnight to firm it up. It’s not the same as whipped cream, but I don’t think anyone knew they were eating tofu today.

The pavlova is extremely sweet, so I recommend adding an extra tbsp of cocoa to make it 1/4 cup. I would also decrease the sugar from 1 1/2 cups to 1 1/4 cups or even 1 cup.

Since the pavlova only has two ounces of chocolate, use the best chocolate you can find to make the flavor stretch further.

It’s easier to separate eggs when they’re cold but easier to beat when they’re at room temperature.

Comments (4)      Email Email      Print Print