Archive for Events

Extra, extra! Newsroom lunch!

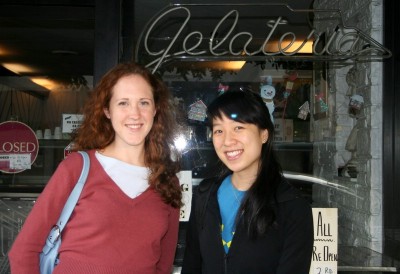
Nic and Jessica in front of Al Gelato

As promised, Nic (of The Baking Sheet) and I met up at Newsroom Cafe on Dec. 30 in Los Angeles. Via the power of the Internet, we ‘ve exchanged e-mails, sent each other dessert over the mail and now, finally met in person. Suprisingly, our lunch wasn’t awkward: we chatted for a couple hours about local bakeries, famous chefs and cooking gear. I must say that Nic is one of the nicest people I have ever met.

Newsroom is Californian cuisine at its best: health-conscious fare with lots of fresh veggies and a Mexican influence. They also serve breakfast all day. That’s my kind of restaurant. Their extensive menu satisfies every palate, from meatlover to vegan and ethnic to American. Well, everyone except Nic and I, who had a hard time narrowing down our choices.

I settled on a grilled artichoke with tofunaise. The only vegan dips I’ve tried (at Blockhead’s and Better Burger in New York) were watery, grainy or curdled. They were acceptable for a tofu-lover like me but not appetizing. Newsroom’s dip was wonderously creamy. It tasted just like a mixture between sour cream and mayonaise. The artichoke was nicely browned yet tender. It was liberally oiled, but good nonetheless.

I also sampled my mom’s cast iron skillet blue cornbread. It was moist and tender with fresh corn and tomatoes on top. It also came with dual-layer salsa (spicy on top, mild on the bottom) so you could control the heat. I fall l in the middle of the cornbread camp: traditional Southern cornbread is made with 100% cornmeal and dries out quickly, while Yankee-style cornbread resembles a sweet muffin. I think cornbread should be hearty and moist, so I wish Newsroom’s cornbread was coarser. Their cornbread was cake-like. It was so cakey, in fact, that there wasn’t the thick crust I expected from a blackened skillet.

Nic had the blue corn blueberry muffin and daily soup. I didn’t try any, but they looked delicious!

Newsroom is not worth fighting L.A. traffic, getting lost and finding parking. Actually, it’s worth flying across the country for. I mean, I still have to try their Oaxacan tamales, blue corn waffle with chile honey, tandoori chicken sandwich, smoothies and dessert. I wish they had a cookbook, because I want to know how to make everything in their restaurant.

After the delicious meal, Nic and I headed to Al Gelato, but they were closed for the winter vacation. 🙁 So we just snapped a picture in front of the place.

All was not lost though: for sweets, Nic made me chocolate mint and vanilla marshmallows. They were dangerously fun to eat. Squish them between your fingers, let them bounce around in your mouth, cover them with chocolate, or dunk them in hot cocoa. You could also make kabobs by toasting marshmallows and bananas over an open flame. Then spread peanut butter all around. It would be heaven on a stick.

These marshmallows were better than the ones that Nic mailed me earlier. She’s been improving her technique. They weren’t too sweet, so they were suited for snacking. I may never buy supermarket marshmallows again.

Newsroom
120 N Robertson Blvd
Los Angeles, CA 90048-3115
(310) 652-4444

Comments (3)      Email Email      Print Print

Reminder: LA food bloggers lunch this Fri.


Photo: AOL City Guide

Reminder!  Nic and I are having lunch this Friday at Newsroom Cafe and are extending an invite to the rest of the food blogging world.  We will also be having sweets: I’m bringing my macaroons, and we will take a stroll to Al Gelato.  If you’d like to join, please e-mail us so we know how many people to expect.  More info here.

Comments off      Email Email      Print Print

L.A. Bloggers Meetup

Newsroom
Photo: AOL City Guide

LOS ANGELES – Nic and Jessica were spotted Friday at the vegetarian-friendly Newsroom Cafe, dining on tofu and sesame flatbread amidst friendly chatter.  The couple then strolled down Robertson Blvd. to Al Gelato and shared a cone of Italian-style ice cream.  It seems the couple has reconciled their differences.

No, not that Nick and Jessica.  This Nic and Jessica.  Nic (of The Baking Sheet) and I previously teamed up to create Blogging by Mail.  I’d say she’s one of my good food blogger friends, although I’ve nver met her in person!  It turns out that we both have SoCal roots, and I’m visiting L.A. around Christmas.  Since Clotilde’s (of Chocolate & Zucchini) NYC bloggers’ meetup worked so well, Nic and I have decided to have lunch together on Friday, Dec. 30 at Newsroom, followed by dessert at Al Gelato.

All are welcome to join, but please RSVP so we know how many to expect and if we should reserve a table.  More details on time will follow.  I will try to bring some of my macaroons!

Newsroom
120 N Robertson Blvd
Los Angeles, CA 90048-3115
(310) 652-4444

Al Gelato
806 S Robertson Blvd
Los Angeles, CA 90035-1601
(310) 659-8069

Comments (2)      Email Email      Print Print

Blogging by Mail 3: Home for the Holidays

BBM 3 contents

Blogging by Mail is a care package/secret Santa-type event that Nic (of The Baking Sheet) and I created after serendipituous exchanges of homemade marshmallows and Nutella.

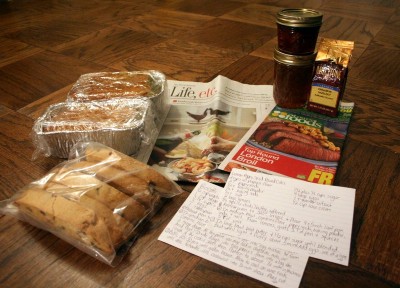
This month, Cathy (of My Little Kitchen) hosted a “Home for the Holidays” BBM. I received my package yesterday from Jennifer (of The Fallen Souffle) in North Carolina, complete with:

  • Five-flavor pound cake, from a secret recipe passed down through three generations
  • Lemon poppy seed pound cake
  • Cranberry biscotti
  • Hazelnut coffee
  • Homemade strawberry and hot pepper jams

She also gave me a flavor (no pun intended) of her home by packing her paper’s food section, a grocery store classified ad (it’s a miracle that I pay about the same amount for groceries as she does in the South), a handwritten letter detailing her family traditions, and recipes for her famous poppy seed pound cake and biscotti (check the comments section for the recipe). I felt like I had just received a family heirloom.

five-flavor pound cake

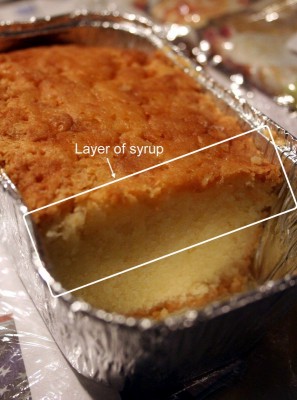
No offense to Jennifer, but my favorite part was her grandmother’s five-flavor pound cake. It was deliciously moist after two weeks in transit, yet the top had a crispy crust. I was so stricken by the double textures. Upon further investigation, I could see that a sugar syrup must have been poured over the top, as the top half of the loaf was moister and slightly darker than the rest. I think the sugar might have crystalized on top, which is how it got crunchy.

I wolfed down the first slice, not even bothering to analyze the five flavors. I just knew it was good. After a second slice, I definitely tasted coconut, but I cannot for the life of me figure out what the other four flavors were. I did not detect citrus, nut extract, anise extract or spices.

I can’t wait to dig into the jams, but right now I’m just trying to stretch out the five-flavor pound cake as much as I can.

Don’t forget to sign up for BBM4: Music Edition, hosted by Food Ninja, by Jan. 10!

Comments (2)      Email Email      Print Print

Chewy Chocolate Chip Cookies and Chocolate-Covered Macaroons

Traditionally, cookie swap parties are held shortly before Christmas and allow people to sample a plethora of cookies. Each participant brings several batches of their favorite cookies and distributes them. The more people the better: you can potentially go home with 10 varieties! This month’s Is My Blog Burning, has the same concept, but it’s gone online. If you need holiday baking ideas, check out Jennifer (of The Domestic Goddess) and Alberto’s (of Il Forno) round-up.

I’ve decided to combine a bit of the old with a bit of the new. First is a chewy chocolate chip cookie that has been a family Christmas tradition for a decade. The second cookie is my signature macaroon, enrobed in chocolate.

As I’ve said before, chocolate chip cookies spurred my love for baking. When I was around 12, my mom and I whipped up a recipe that a co-worker had given her. It called for a half-half mixture of butter and vegetable shortening. Our kitchen was sparse and we didn’t have shortening. But we saw the word “vegetable” and figured we could substitute vegetable oil. (I still don’t use vegetable shortening for health, texture and taste reasons.) Because of the oil, the chocolate chips slipped of the dough, which we accepted.

At the time, we also didn’t own baking sheets, so we made our own by cutting up paper grocery bags. To place them in the oven, we slid them off a giant piece of cardboard, much like a cook uses a pizza peel. We didn’t know that cooling racks existed either, so we lined the stove with newspaper and laid the “cookie sheets” on top.

Despite these untraditional techniques, the cookies were delicious. Because they were made with 100% whole wheat flour, they were different from the traditional Toll House variety. But they were good in their own right: chewy, soft and satisfying. We’ve made these year after year for the holidays.

Below is the adapted version (I believe cookies should be 100% butter), and you can use a mixture of flours to lighten the texture (but I can’t tell you the ratio because I want to keep my secrets!).

Chewy Whole-Wheat Chocolate Chip Cookies
Makes 3 dozen cookies

1/2 c sugar
1/2 c brown sugar
1 stick butter, at room temperature
1 tsp baking soda
1 egg
1 tsp vanilla
1 1/2 c whole wheat flour
1/2 c chopped toasted nuts (optional)
1 c chocolate chips

Heat oven to 375° F. In a medium bowl, mix the sugars, butter, egg, and vanilla with a wooden spoon until smooth. In a separate bowl, stir the flour and baking soda. Add the flour mixture, chocolate chips and nuts to the wet ingredients. Drop by rounded teaspoons onto ungreased baking sheets.

Bake for 8-9 min, or just until edges begin to brown.

Notes:

I recommend these chocolate chips:
Whole Foods 365 Everyday Value-Outrageous semisweet flavor. At 1.99 for 12 oz., it’s actually cheaper than the brands below and better! It has only the real stuff: cocoa liquor, sugar, cocoa butter, vanilla and soy lecithin (an emulsifier). Chocolate manufacturers often cheat by substituting vegetable or milk fat and vanillin.
Nestle Toll House Semi-Sweet Morsels-classic semisweet flavor with a bit of an acidic edge (which I like). The chips soften after baking, so they melt right in your mouth when you bite into them.
Mrs. Fields-slightly more multi-faceted flavor than Nestle’s.
Ghirardelli Semi-Sweet Chocolate Chips-a dependable brand with a smoother flavor than Nestle’s. Despite the fancy name and packaging, they’re at the bottom of the “recommended” list.

Not recommended:
Hershey’s Semi-Sweet Chocolate Chips-flat flavor that resembles milk chocolate.
Guittard Semi-Sweet Chocolate Chips-they may make gourmet chocolate, but their chocolate chips aren’t as rich as Nestle’s.
Pathmark supermarket brand-an ideal ingredient list (cocoa liquor, sugar, cocoa butter, vanilla and soy lecithin) and cheap price attracted me to the product, but it was waxy and fake tasting.

Chocolate-Covered Macaroons

chocolate-covered macaroons

Although everyone loves chocolate chip cookies, the cookie that most people ask me to make is the French-style macaroon. While the American version consists of coconut and is often dry and mealy, the French version uses ground almonds and has a chewy bite underneath a crisp shell.

My only complaint is that macroons have a short shelf life. I can’t ship my them, lest someone wants to pay for overnight delivery. In my latest attempt to prolong the shelf life, I dipped my macaroons in chocolate (thanks to David Lebovitz’s blog for the idea!). I figured the chocolate would create a barrier to keep the cookies moist.

In my experiment, I ate one cookie a day and studied how the texture degraded over time. Sadly, the cookies still dried out after two days, but fresh chocolate-dipped macaroons are as decadent, if not more addictive, than truffles!

Adapted from Alice Medrich’s Cookies and Brownies

Makes 3 dozen sandwich cookies, about 1 1/2-inches wide

Ingredients
7 ounces blanched almonds (1 1/3 cups whole or 1 2/3 cups slivered)
1 1/2 cups sugar
3 to 4 large egg whites
A variety of jams, frosting, lemon curd, caramel sauce, Nutella, fudge sauce or ganache
12 oz. of dark chocolate (chocolate chips are not recommended, as they don’t melt as well)

Equipment
2 cookie sheets, greased, or lined with parchment paper

In a food processor with a steel blade, process the almonds and sugar until the almonds are very fine and the mixture begins to pack together around the sides of the bowl, at least 3 minutes. With the processor on, slowly drizzle only enough of the egg white to form a ball of dough around the blade. Keep the processor on. Add only enough additional egg white so the dough has the consistency of very thick, sticky mashed potatoes and no longer forms a ball.

Pipe or drop rounded teaspoons (equivalent to 2 level teaspoons) 2 inches apart on the cookie sheets. Gently press down on the top of each cookie to smooth it out. Let the cookies stand for 30 minutes .

Preheat the oven to 300° F. Position the racks in the upper and lower thirds of the oven. Bake for 20 to 25 minutes, or until the edges of the cookies barely begin to color. Rotate the pans from front to back and top to bottom about halfway through the baking time to ensure even baking. Slide the parchment onto racks. Cool the cookies completely before detaching them.

Spread the filling on the flat side of half of the cookies and top with the remaining cookies.

Drop the cookies into melted tempered chocolate. Couverture, or covering chocolate, is easiest to use because the extra cocoa butter makes the chocolate more fluid. It’s NOT confectionery or compound chocolate, which has vegetable fat and is not as rich. One way to temper is to melt 3/4 of the chocolate (9 oz. in this case) on top of a double boiler and add in small pieces of the reserved chocolate until the mixture registers 88° F on an instant-read thermometer. Use an immersion blender to smooth the mixture and circulate the good crystals. Tempering is done so that the final product has a good gloss and snap. To test the temper, spread some chocolate on the tip of a knife—it should set up within a minute.

If you plan on consuming the cookies right away or don’t mind occasional white streaks in the coating, simply drop the cookies into melted chocolate.

Roll the cookies around until all sides are coated with chocolate, and fish them out with a fork. Place on wax or parchment paper to harden. Consume within two days.

If you have leftover chocolate, grab everything in your cupboard and start dipping! Or, mix with milk to make hot chocolate. Or, pour it onto parchment paper to harden and use for another time.

Comments (9)      Email Email      Print Print

Jacques Torres Chocolate Haven demo

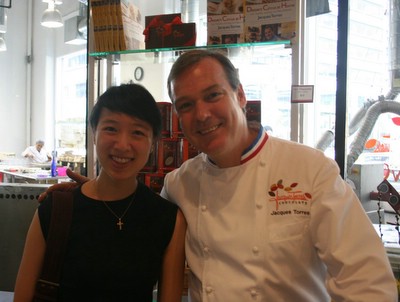
Jacques and me

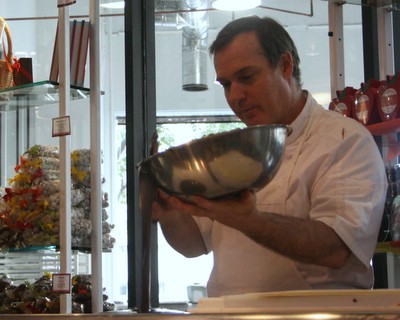
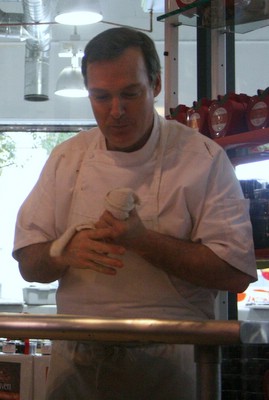
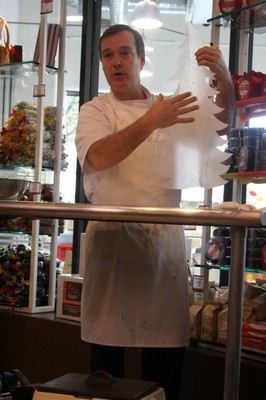
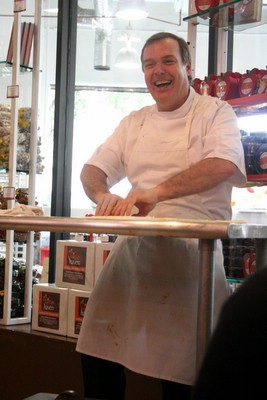
Jacques Torres is my hero. I grew up watching his PBS show, Dessert Circus, where he made whimsical desserts, such as chocolate checkerboards with playing pieces, chocolate cages and croqombouche (a pyramid of cream puffs surrounded by spun sugar). The man can pipe out an entire batch of macaroons in one minute. I’ve made about a thousand macaroons, and it still takes me several minutes to form them.

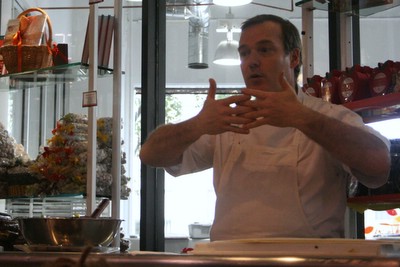
Even more astonishing than Torres’ skill is his eagerness to share knowledge.  Besides serving as Dean of Pastry Studies at New York’s French Culinary Institute, Torres gives free Saturday demos about once a month at his Chocolate Haven store.

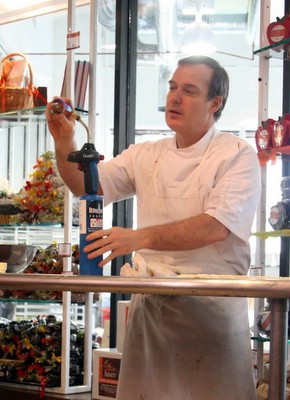
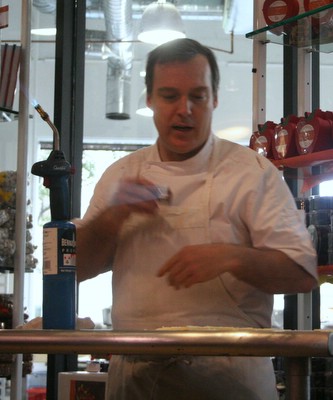
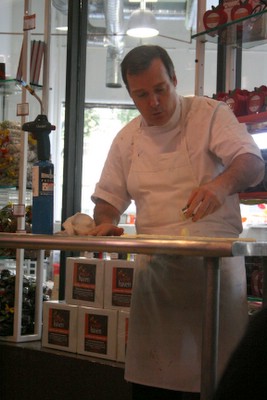
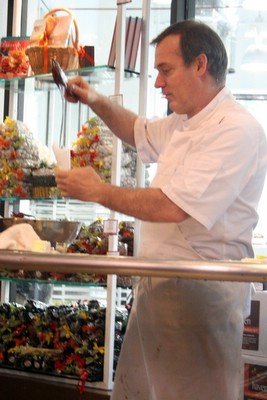
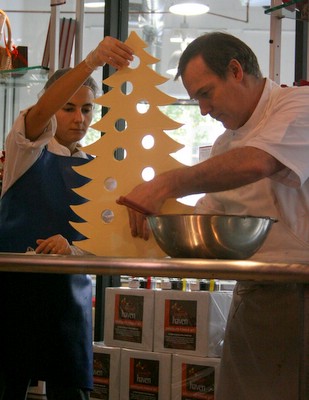
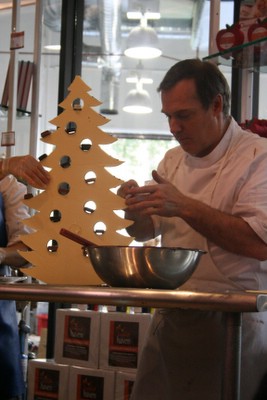
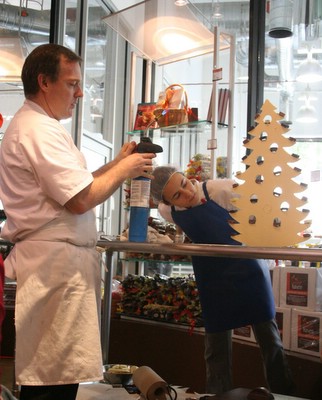
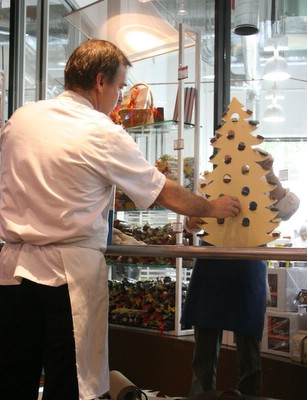
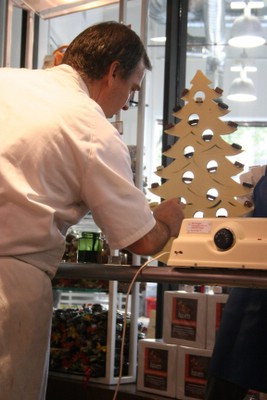
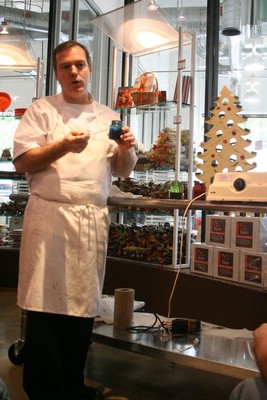
This week, he showed a crowd how to make a chocolate Christmas tree.

tempering chocolate

First, Torres explained that you must temper chocolate to realign the crystals…

…so it snaps cleanly when you break it.  Untempered chocolate develops white streaks (called bloom) on top, because the solids separated from the fat.  Once hardened, untempered chocolate won’t pull away from molds, so you’ll have to give people your molds along with your truffles, Torres said. His preferred method of tempering is melting chocolate over a double boiler and then adding solid chocolate to the liquid.  Then, use an immersion blender to break up the chocolate bits and circulate the good crystals.  Continue adding solid chocolate until the liquid measures 88F (for dark chocolate) or 86F (for milk and white chocolate).  To test the temper, dab some chocolate on the tip of a knife.  It should set up within one minute.

It’s easiest to keep the chocolate at the correct temperature if you work with a lot of it.  If you only temper one cup of chocolate at a time, it will cool down and harden too quickly…

pouring chocolate

…which is why Torres tempered about seven pounds of chocolate for the Christmas tree base.  If you have leftover chocolate, pour it in a pan and let it harden.  You will have to re-temper it if you work with it again.  What a pain.  Now I know why chef David Lebovitz hastily dips everything in leftover tempered chocolate.

Note: you only have to temper chocolate if you’re making candy or need a hard, glossy surface.  You do not need to temper chocolate for cake batters, mousse or ice cream.

staying clean

The hardest part about working with chocolate is staying clean, Torres said. When I’m at home, I lick my fingers rather than wiping them (shh, don’t look).

Christmas tree stencil

To make the Christmas tree, temper white chocolate and pour it into a pan so it’s about 1/4-inch thick. Then cut out a stencil out of wax or parchment paper.

eating your mistakes

Lay the stencil on top of the chocolate and use a paring knife to cut around it. Don’t cut all the way through the chocolate on the first pass, or else it will crack. Just score the chocolate and go over it a couple times. But if your chocolate does crack, it’s okay, because you can always eat your mistakes, Torres said as he showed off his belly.

heating the cutter

To make holes in the tree, heat up a metal cutter.

too hot

Oops, that was too hot.

cutting the white chocolate

Then use the cutter to plop out holes.

chocolate glue

Torres made “glue” by putting melted chocolate in a parchment cone.

steadying the tree

Torres and his assistant steadied the tree on top of the circular base and “glued” it in place.

gluing on bon bons

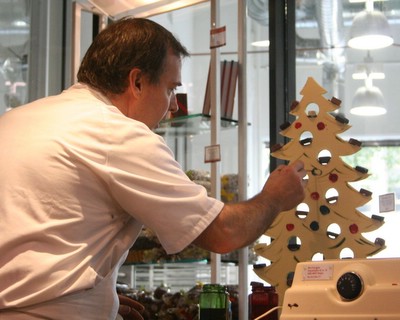
Then, he glued truffle “ornaments” into the holes and on the ends of the tree.

one more hole

Oops, one hole didn’t quite make it.

cutting the hole

It was time to use some more fire power.

painting the leaves

Next, Torres painted leaves…

chocolate dye

…by using a mixture of powdered food coloring and melted cocoa butter.

painting the ornaments

Lastly, he painted some ornaments.

notice how the one on the left looks better

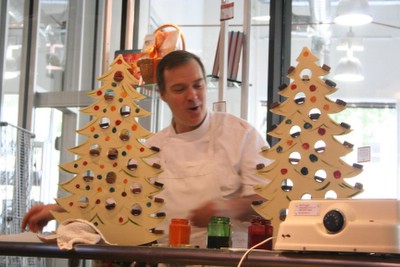
The finished product, along with a tree that was made earlier. Can you guess which one was prepared beforehand?

No, we did not get to eat the demo, but his staff did pass out samples of chocolate-covered macadamia nuts and peanut butter cups. The peanut butter cups were what Reese’s were meant to be: intense peanut flavor without being overpowered by high-fructose corn syrup. The milk chocolate was a little too creamy for me though. I would have preferred it to have the snap of well-tempered chocolate.

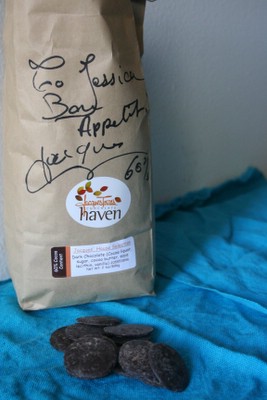
autographed chocolate

Afterwards, I proudly bought a two-pound bag of dark chocolate.  At $6/pound, it’s the best bang for the buck, especially since Torres claimed it was fair trade.  Chances are, non-fair trade chocolate is made through child labor.  I’m not talking about young farmhands helping out their family.  I mean child slavery, in which children are reportedly bought for about $30 and forced to carry bags that are bigger than they are.  But that’s another post.

Torres’ “pistoles” were well-tempered (he practices what he preaches!) and had hints of caramel and coffee flavor.  I’m no expert on tasting chocolate, so excuse my description.  There were no patches of bitterness or acidity, but instead it was almost too neutral.  Of course, the last chocolate I used was Valrhona guanaja, which spoiled my tastes.  Guanaja’s flavors are so multi-faceted that eating it is a cerebral experience.  The taste lingers long after the chocolate is swallowed.  It’s a little bit woodsy and cherry like.

P.S.-If you look at the first picture of Torres and me, he’s wearing different clothes.  That’s because I met him during another demo in the summer.

Jacques Torres Chocolate Haven
350 Hudson at King Street (1 block South of Houston)
New York, New York 10014
212.414.2462 phone
212.414.2460 fax

Shows/Recipes:
Chocolate with Jacques Torres
Passion for Dessert with Jacques Torres
Blue-Chip Cookies for the NY Times

Books:
Dessert CircusDessert Circus Dessert Circus at HomeDessert Circus at Home

Comments (7)      Email Email      Print Print

IMBB 20: Chocolate Chestnut “Su-fle” Cake

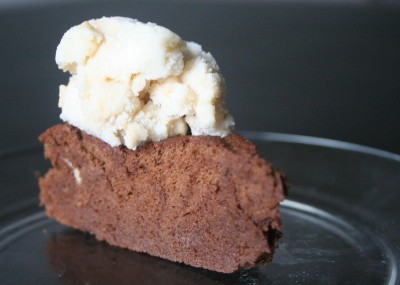
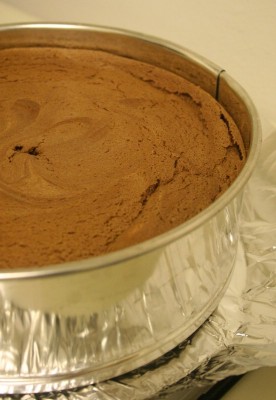
chocolate chestnut souffle cake

It’s a shame what Jeffrey Steingarten has done. The Vogue food writer’s two versions of lobster soufflé take 10 hours to prepare, enough to scare away even expert cooks.

For Is My Blog Blog Burning 20: Has my Blog Fallen?, Kitchen Chick sought to convince people that soufflés aren’t so difficult to make after all. Souffles are simply custards that have been leavened with beaten egg whites. Although souffles are notorious for collapsing quickly, soufflé cakes are easy to make because they’re meant to be served in their non-peak state.

The chestnuts in this low-fat “su-fle” (ha ha, get it?) cake add wonderful creaminess. You won’t taste the chestnuts unless someone points them out, but they definitely contribute to the cake’s texture. On the first day, it resembles chiffon cake but on the second day, its flavor develops and resembles mousse. Your patience will be rewarded!

Chocolate Chestnut Soufflé Cake

Adapted from Chocolate and the Art of Low-Fat Desserts by Alice Medrich

Ingredients:
4 ounces bittersweet or semisweet chocolate, chopped fine
1/2 cup plus 1/2 tablespoon unsweetened Dutch process cocoa
3/4 cup sugar
1/2 cup boiling water
1/2 cup chestnut spread (sweetened chestnut puree) (picture)
2 egg yolks
1 Tbsp rum
1 tsp vanilla extract
4 egg whites
1/4 tsp cream of tarter or 1/2 tsp vinegar or 1/2 tsp lemon juice
1/4 cup all-purpose flour
1 to 2 tsp powdered sugar, for dusting
vanilla ice cream, vanilla frozen yogurt, whipped cream, creme fraiche, sour cream, or sweetened pureed cottage cheese (optional but recommended)

Instructions:

  1. Position the rack in the lower third of the oven and preheat to 350F. Place a round of parchment paper on the bottom of the pan and grease the sides.
  2. Combine the chopped chocolate, cocoa and half of the sugar in a large mixing bowl. Pour in boiling water and whisk until the mixture is smooth and chocolate is completely melted.  Stir in the chestnut spread, egg yolks, rum and vanilla.  Set aside.
    chocolate mixture
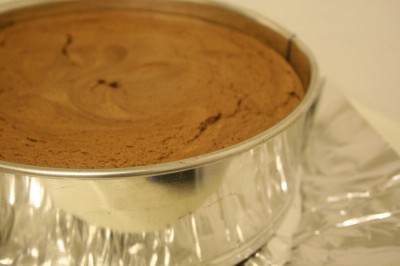
  3. Combine the egg whites with the cream of tarter, lemon juice or vinegar. Beat at medium speed until soft peaks form. Gradually sprinkle in the remaining sugar and continue to beat at high speed until stiff but not dry. Whisk the flour into the chocolate mixture. Fold in a quarter of the egg whites. At this point, you don’t have to be too careful because you’re just lightening the chocolate so it will be easier to combine later. Then, carefully fold in the remaining whites. (Cut a spoon or spatula into the bottom of the bowl and plop the chocolate on top of the whites. Turn the bowl 90 degrees and repeat until no white streaks remain. The batter doesn’t have to be perfectly uniform in color. When in doubt, err on the side of undermixing so you keep the volume in the whites.) Scrape the batter into the pan and smooth the top. Bake until a skewer or toothpick inserted into the center comes out with a few moist crumbs clinging to it, about 30 to 35 minutes. Cool torte in the pan on a rack. rise
    [Rise…]It will sink in the center as it cools.
    fall
    […and fall]Cake may be prepared to this point and stored, covered at room temperature or refrigerated for 2 days or frozen, well wrapped, for up to 2 months.
  4. To serve: Slide a thin knife or spatula around the sides of the pan to release the cake.  
    Remove the sides and bottom of springform or invert cake onto a platter. Remove the paper liner from the bottom and turn the torte right side up. Dust with powdered sugar and serve with a dollop of dairy, if desired.

Notes/tips:

  • While this cake did not taste low-fat, I didn’t think it was rich enough. I used mildly sweetened chestnut puree and forgot to add the cocoa, so your results may vary.
  • For a milk chocolate-flavored cake, use unsweetened chestnut puree and do not add cocoa.
  • You may make your own chestnut puree by boiling canned roasted chestnuts with enough water to cover and brown sugar (I used 2 Tbsp for 14 ounces of chestnuts. My puree was slightly sweet but not like a confection.) for 45-60 minutes, or until most of the water is absorbed and the nuts are soft. Puree the mixture with 1/2 tsp vanilla in a food processor until creamy.
  • I’m not big on garnishes, but a dollop of a plain dairy product really enhances the chestnut’s creaminess.  Regular yogurt is not recommended though, because it’s too tangy.
  • Eggs are easier to separate when they are cold (the yolks are less prone to break), but the whites whip better when they’re at room temperature.
  • Cream of tarter, an acid, stabilizes the whites to insure against overbeating. You’ve overbeaten the whites when a white glob floats on top of a watery mess. For a couple bucks, you can buy one ounce of cream of tarter, a uni-tasker. Or, you can buy a big bottle of vinegar for less than a dollar and save it for a ton of other uses.  😉 Simply substitute twice the amount of vinegar or lemon juice for cream of tarter in all of your whipped egg white recipes.

Tagged with: IMBB # 20 + Souffle

Comments (6)      Email Email      Print Print

Blogging by Mail 2

BBM2 box

Today I received a tubload of Nutella cookies in the mail, plus loads of chocolate and other goodies that were carefully packaged. Jealous?

It was all courtesy of Blogging by Mail, an organized gift exchange between bloggers. Nicole (of The Baking Sheet) and I dreamt it up this summer. She sent me some homemade marshmallows, and then I sent her homemade Nutella. We decided it was too fun to keep to ourselves.

This time Kristin, a skateboarding mom from CA, sent me a lovely care package. She mailed out the package in September but got it returned to her because I gave out the wrong address. So she was generous enough to re-bake cookies and send it out all over again.

BBM contents

From left to right, I received a tumbler that holds milk and cookies, Ibarra Mexican chocolate (I’ve heard it’s excellent for hot chocolate), a giant mug, pens to decorate the mug with, Nutella Mexican wedding cookies, a mini pouch (I’m guessing Kristin made it), honey from avocado flowers, and Chocolove dark chocolate with raspberries.

Not to be biased, but I think I got the best package. How can you go wrong with chocolate? Thanks so much Kristin! I didn’t expect so much. My head is swimming with ideas as to how I can “repay” my next partner in the third edition of Blogging by Mail. Hurry, sign ups for BBM3: Home for the Holidays end on Oct. 23.

Comments (1)      Email Email      Print Print

Alton Brown’s knife demo

Favorite chef?  Check.  Free cooking lesson?  Check.  Free food?  Check.

There wasn’t a reason NOT to go to Sur La Table last Wednesday to watch Alton Brown do a knife demo.  If you haven’t already guessed from the name of my blog, his show, Good Eats, is probably my greatest culinary influence.  He taught me about the whys of cooking so I can troubleshoot my recipes.  Like Alton, I’d rather enjoy simple, well-prepared food than a dish with so much going on that you can only name it by its ingredients, like Meyer lemon pepper sable with blueberry gelee.  Dang, sometimes I just want a cookie.

Like any free event, the demo was actually a giant promotion, specifically for Sur La Table, Alton Brown, Shun knives and American Express.  I took the commercial aspect with a grain of salt but walked away with a free lesson on knife skills.  Some highlights:

  • The design of the food will tell you how to cut it most efficiently.  For example, the standard way to dice an onion is the crosshatch method: score the onion horizontally and vertically before cubing it.  But if you’ve ever watched Shrek, you know that onions have layers, which can work to your advantage.  An easier way is to make several radial cuts (start at the edge and slant down into the center) in each onion half.  Then you can slice down to cube it.  You’ve just saved yourself one step.
  • Take the path of least resistance.  For example, it’s easier to julienne a bell pepper with the skin side up.  That way, the edges won’t curl up on you.  But if you have a dull knife that can’t pierce through the skin, you’re better off cutting it with the skin side down.
  • Use the cutting board as friction to cut through sticky foods.  For example, if you want to slice a peeled avocado half, don’t just cut straight down into the board.  Otherwise, you’ll continuously have to stop to remove each piece from your knife.  Instead, cut each strip at an angle and slide the avocado half across the board.  Sushi chefs use the same method to cut fish.
  • Minimize the possibility of accidents as much as possible.  Curl in the fingers on your non-knife hand, like a claw.  The knife should ride up against your knuckles so you always know where the blade is, even when you aren’t looking.
  • When chopping, your knife hand should stay in one area, while the other hand feeds the food into the blade, kind of like a log cutter.
  • To test if your cutting board is big enough for the knife, lay the knife diagonally across it.  The board should have about two inches clearance on both sides.
  • To cut uniform pieces, the object isn’t speed but rhythm.  That being said, it’s easier to cut on a wooden board.  Knives stick on plastic boards.

For more of Alton’s knife tips, check out the transcripts to his shows, Seeing Red (scroll down to scene three and four) and Soup’s On (scroll to scene five with the picture of little Elton and the cutting board).

Here’s Alton in action:

Alton yelling “Demo!” as he bisected a honeydew with one swoop of a knife.

Yes, that melon was cut in half with the effortless drop of a knife.

Who’s that handsome fellow?

Alton answered several questions as he went along. Most of the time, he wasn’t stumbled.

The “Alton’s Angle” line featured his picture on the blade, something only his mother would appreciate. (His words, not mine.)

There is a point to the cupcake dance…Note the humble muffin on the left and the frosted cake on the right.

Alton compared German blades (Wusthof-Trident, J.A. Henckels) to the interior of a spice muffin: delicious but rustic-shaped air pockets. Knives were modeled after swords, and in Germany swords were used for brute force.

In Japan however, swords were used for precision. Blades on Japanese knives were more delicate, kind of like the uniform air pockets in a poundcake-style cupcake.

He noted that knives are all about personal preference (do you prefer muffins or pound cakes?), but of course the Japanese knife sounded more desirable.

Alton demonstrated the correct way to grip a knife.

“You know why cooks in restaurants clank their knives on the honing steel?” Alton asked. “Because there’s a window!”

Honing re-aligns a sharp edge that got curved, while sharpening corrects a flattened edge. To hone, delicately slide the knife against a steel at a 22 degree angle. With practice, you can tell if you’re at the correct angle just by hearing the sound of the blade against the steel.

Alton demonstrating how to skin a mango with a Santoku knife. Santokus are good for beginners.

Check out Sur La Table in Soho for more free events, including a Mario Batali book signing/cooking demo on 10/26 and prepared foods from Jean-Georges Vongerichten, Laurent Tourondel, Todd English and Cedric Tovar on 11/16.  Upscale kitchen stores like Sur La Table, Williams-Sonoma and Crate & Barrel are all about the eye candy,  but use them to your advantage!

For actual purchases, I recommend the restaurant supply stores along Bowery St.  (If your job is to do bulk cooking, there’s no way you’d pay $10 for one cake pan.)  Chef Restaurant Supply has professional baking sheets for $5, less than what you’d pay in the supermarket for smaller, flimsy sheets.  And you wonder why your cookies burn on the bottom: generic cookie sheets attract heat because they’re thin and have a dark non-stick coating.  But that’s another post, or not.

Sur La Table
75 Spring Street
New York, NY 10012
Phone: (212) 966-3375
Hours: Mon-Sat 9:30am-8pm, Sun 10am-6pm

Chef Restaurant Supply
294 Bowery (near Houston)
New York, NY 10012
Phone: (212) 254-6644

Comments (2)      Email Email      Print Print

IMBB 19: I can’t believe I ate dog food

IMBB 19: Vegan

This month’s theme for Is My Blog Burning is "I Can’t Believe I Ate Vegan!" (the idea is to trick someone into eating delicious vegan food) but it might as well be called "I Can’t Believe I Ate Dog Food!"

Instead of preparing human vegan food, I fulfilled an unusual order for my bakery, Su Good Sweets.  Marlon, a vegan coworker, also has vegan dogs, but he’s dissatisfied with the chemical-laden vegan dog foods on the market.  So, he hired me to bake dog food.  The steps involved mixing pounds of flour, rolling out the dough and baking it twice.  I got to practice my pie crust, biscotti and crouton-making skills all at once.

Well, did Marlon’s dogs know the difference?  Yes, but in a good way.  Marlon was pleased that the smell wasn’t as strong as conventional dog food, and it kept his dogs’ teeth clean.

Since the dog food was also human grade, I tried the finished product.  It’s bland, but I’d snack on it if I were starved: it has a healthy balance of whole grains and protein.

No Soy Kibble

adapted from Vegedog
(Maintenance Only)

Makes 3 1/2 days’ worth of food

1/3 cup (2 oz. [80ml/50g]) yeast powder
2 Tbs. (25ml/32g) Vegedog™
4 tsp. (20ml/18g) baking powder
3/4 tsp. (4ml/4g) lecithin granules (picture)
2/3 tsp. (3ml/4g) salt (this could be omitted and replaced with soy sauce)

Thoroughly mix the above ingredients before adding the following ingredients.

6 1⁄2 cups (2 lbs. [1550ml/915g]) whole wheat flour
1 1⁄3 cups (7 oz. [330ml/200g]) vital wheat gluten (75% protein) (picture)
Mix all ingredients together.

1. Preheat oven to 325°F (160ËšC).
2. Add the above dry ingredient mixture to:

1⁄3 cup oil (70ml/65g)
4 cups (700ml) water (as necessary)
1 1⁄2 Tbs (20ml/25g) soy sauce (if salt was omitted from the dry ingredients)

For more flavor: Substitute a sugar-free prepared pasta sauce for the water or add tomato paste along with any necessary water.

3. Stir with a large strong spoon to form soft dough.
4. Flour your hands and counter. Knead the dough well until smooth and elastic. Divide the dough into two halves. Roll out each to fit a large cookie sheet (12”x17” [300 x 400mm]). Work the dough into the corners and prick with a fork to prevent bubbles.

Bake for 20 minutes.
5. Turn the sheets and rotate them from top to bottom.
6. Bake for 20 more minutes (don’t brown the edges). Remove from oven.
7. With a large chef’s knife cut each slab into 9-12 parts on a cutting board by cutting horizontally into three strips, and then each vertically 2 or three times. Cut each resulting rectangle into kibble sized pieces (like a miniature checkerboard) by cutting first in one direction, and then the other direction. Toy breeds like small sized pieces, and larger breeds will like much larger pieces.
Hint: a small cushion strip placed on top of your knive can protect your palm as you press down. An auto door edge protector cut to size works well.
8. Place kibble pieces on cookie sheets, breaking apart pieces that stick together.
9. Dry the kibble in a 325°F oven for about half an hour. Hot sunshine works as well. The pieces should be brittle and not yield to finger pressure.
10. Refrigeration is unnecessary for properly dried kibble. Store in covered containers for convenience. Some dogs may prefer kibble slightly coated with mashed vegetables, sauces, and yeast.

Nutrition info: Protein 24.2%, Fat 8.1%.

Thanks to Sam at Becks & Posh for hosting the event!

Tagged with: IMBB # 19 + Vegan

Comments (5)      Email Email      Print Print