Archive for Events

IMBB 17: GreenTea Biscotti


It’s that time of month again: Is My Blog Burning, in which bloggers around the world cook around a common theme. This time, Clement of A la Cuisine! has chosen tea as the themed ingredient.

I developed this recipe for Mariko of Super Eggplant, who loves green tea. You see, I sent her a care package for Blogging by Mail. Two events collide in one day!

I took a trusty chocolate chip biscotti recipe from Chocolate and the Art of Low-Fat Desserts, added green tea leaves, and swapped the semisweet chocolate with white chocolate, since green tea has a delicate flavor. Going with the white theme, I also substituted mild almonds for the walnuts.

Be sure to use white chocolate that lists cocoa butter as the main ingredient. In cheap brands, partially hydrogenated oil poses as white chocolate. And you wonder why most people don’t like white chocolate! Would you substitute brown-colored vegetable shortening for dark chocolate? I don’t think so. Use the real stuff!

These low-fat biscotti become wonderfully fragrant a day after baking. They are delightfully crunchy but not jaw-breakingly hard, if you don’t overbake them.

Green Tea Biscotti
Adapted from Alice Medrich’s Chocolate and the Art of Low-Fat Desserts
Makes about 4 dozen cookies

Ingredients:
2 cups sifted all-purpose flour
1/2 tsp baking soda
1/4 tsp salt
1 Tbsp pulverized green tea leaves, from about 3 tea bags
2 eggs
3/4 cups sugar
1 tsp vanilla extract
2 Tbsp brewed green tea
1/2 cup chopped toasted almonds (optional)
2/3 cup white chocolate chips

  1. Preheat the oven to 300 degrees F. Line the baking sheet with greased foil.
  2. Place the flour, baking soda, salt, and tea leaves in a small bowl. Stir with a whisk to combine. Set aside.
  3. In a medium bowl, beat the eggs with the sugar, vanilla, and brewed tea until well combined. Beat in the flour just until combined. Stir in the nuts and white chocolate chips. The mixture will be thick and sticky.
  4. Use a large spoon to scoop the batter onto the baking sheet, dividing it evenly into 3 long, skinny, rope-shape loaves, each one foot long, or 2 loaves 16 to 17 inches long, depending on your baking sheet. The loaves must be 2 1/2 inches apart. You’ll get slightly messy. Use the back of the spoon or a spatula to even up the “loaves” and neaten the edges. Bake for 35 minutes. Remove from oven and cool for 10 minutes on the pan. Leave the oven turned on.
  5. Carefully peel the loaves from the foil and transfer them to a cutting board. Use a sharp serrated knife to slice the loaves diagonally into 1/2-inch slices. Arrange the slices directly on the oven racks. Bake for 20 to 25 minutes, or until the cookies are crisp and dry. Or arrange the cookies on 2 baking sheets. Bake for 12 minutes, rotating the sheets from top to bottom and back to front about halfway through the baking time. Turn cookies over and bake for 12 to 15 minutes, rotating sheets as before.
  6. Cool biscotti completely before storing. They become more tender about 2 or 3 days stored in an airtight container. They keep for several weeks.

Notes:
This is a developing recipe, and the tea flavor, although present, is not as strong as I would like. Any ideas for improvement? I can’t add more brewed tea, or else the dough will be too sticky. There’s only so much you can do to concentrate the tea: you can’t brew three bags in 2 tablespoons of water.

Using matcha (green tea powder) rather than leaves may concentrate the flavor. From what I’ve researched, 1/2 Tbsp matcha = 1 Tbsp tea leaves.

Comments (9)      Email Email      Print Print

Blogging by Mail: A Sweet Package

As I mentioned before, Nicole (of The Baking Sheet) and I mailed each other homemade sweets, which sprouted the idea of Blogging by Mail. It was really fun to receive her marshmallows, and she thoroughly enjoyed my Nutella. So why not spread the fun to the rest of the blogging world?

My “secret” blogging pal, Jocelyn of Brownie Points, sent me raspberry jam, mango-jalapeno preserves and (ooh, is this legal?) hemp-hazelnut chocolate. I could have sworn she snooped around on my blog, because everything matched my tastes. I love spreadable fruit but am too cheap to buy a freaking $10 jar of Sarabeth’s preserves. I also love dark chocolate and hazelnuts (can’t you tell I love Nutella?). The hempen chocolate bar had a smooth dark flavor without being bitter or acidic. The hemp tasted like sesame seeds!

Nicole, the gracious hostess, mailed all the participants goodie packages too! She sent me Eating Well’s oatmeal chocolate chip cookies, chewy ginger candy and green tea. The cookies were thick and chewy, although I wish there were more butter flavor. But I’ll excuse that shortcoming, since tahini was the main source of (heart healthy) fat.

Comments (1)      Email Email      Print Print

NYC Bloggers Meetup Part II: Potluck Edition

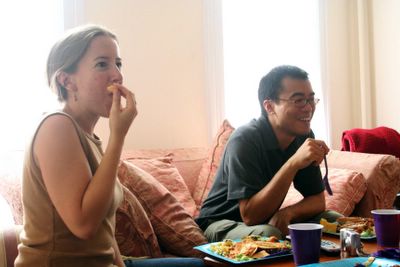
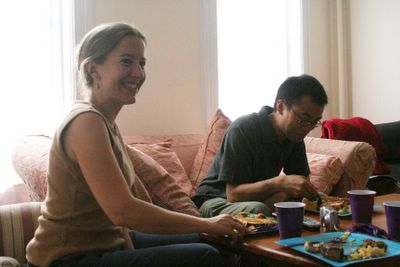
After the success of the NYC foodies’ get-together at Otto, we decided to meet again, but this time for a potluck. The dinner was destined to be good, since we all enjoy cooking and know our way around NYC restaurants. Rebecca, our gracious host, cooked pizza (with pizza stones to get the crust crispy!) and basil/almond pasta; Samantha brought edamame dip, red pepper dip, hummus, currant snack cake, chocolate walnut cake, chocolate candy bar cookies, roasted vegetable sandwiches and air-cured beef/mozarella/pesto sandwiches from Balthazar home; Susann brought broccoli and cornmeal upside-down cake (a tribute to Clotilde, who introduced us all) and Valrhona chocolate and jelly doughnuts from the Doughnut Plant; Lisa and her family brought lentil salad (recipe from a Moosewood cookbook); and I made my signature macaroons.

Thank you all for a good time, and I look forward to hanging out with more food bloggers at the next potluck!

Left to right: me, Samantha, Lisa’s dad, Pat (Lisa’s mom), Susann, Sonny (Lisa’s boyfriend), Lisa. Second row: Dave (Samantha’s husband), Rebecca.

A sampling of our food: currant snack cake, air-cured beef/mozarella/pesto sandwiches, Scharffen Berger chocolate, macaroons, broccoli cornmeal upside-down cake, pasta with basil and almonds, lentil salad, spiced pecans, hummus, edamame (soy bean) dip and pita chips.

Sonny marvelling at our spread.

Rebecca dumps freshly toasted almonds on her pasta salad.

Lisa and her boyfriend Sonny

Samantha, Dave (Samantha’s husband) and Pat (Lisa’s mom)

Lisa’s dad

Comments (8)      Email Email      Print Print

Blogging by Mail

In the age of e-mail, it’s rare to receive anything special in the mail anymore. The occasional handwritten letter is a delight, but surprise packages are even better. First, there’s the convenience of having something delivered to your door: no lines, no crowds and no carrying needed. Then, there’s the anticipation and wonder at what could possibly be inside. After tearing open the package, there’s a sense of satisfaction for receiving an undeserved gift.Nicole of The Baking Sheet and I proudly introduce Blogging by Mail: a foodie exchange. All participants send a homemade treat or regional specialty to someone else, and in return, they get a package as well! The deadline to sign up is this Friday, July 1.

Nicole and I tested out this idea serendipitously, and it was loads of fun! She sent me homemade lime and chocolate marshmallows so I could critique them. In return, I gave her homemade Nutella (Keep your eyes peeled for a recipe for reduced-fat Nutella cake! Or, you can order it through Su Good Sweets).

Comments off      Email Email      Print Print

New York Bloggers Otto Get Together


New York is crawling with food bloggers, but it’s ironic how a French woman prompted us to finally meet in person. Clotilde of Chocolate and Zucchini (she’s the quintessential food blogger and an NPR writer, for good reason) took a break from Paris and travelled to NYC this weekend.Just to show you how much influence she has, she proposed that us local bloggers meet at Otto, Mario Batali’s restaurant, and we all joined her this Sunday.

I met old “friends” (people whose blogs I already read) as well as new ones. One news article compared Clotilde to Audrey Tautou in Amelie, and I’d have to agree. She’s really cute in person, and I’m glad she’s the food blogger representative to the media.

It was cool to meet local “celebrities” like Josh of The Food Section and Adam of The Amateur Gourmet. I also bumped into Julie of A Finger in Every Pie (I was so flattered–she knew my blog name after I merely told her my first name), Lulu of Lulu’s Gonna Love Manhattan, Samantha of The Samantha Files, David of What I See, Danielle of Celebrity Baby Blog, and Paul of Paulfrankenstein.org. I had hoped to meet Debbie of Words to Eat By, Kelli of Lovescool, Allen of The Impetuous Epicure, Andrea of The Strong Buzz, Alaina of A Full Belly and Adam of Slice, but alas, another time. (How’s that for name dropping?)

I don’t have a liking for drinks, so I opted for “Gelotto” instead. Susanne (in white) and Andrea (in pink) and I split a trio of olive oil, hazelnut chocolate chip and ricotta gelati. (Picture is at the bottom of David’s post.) New York foodies like Adam and New York magazine unamimously agree that the olive oil gelato is the best in the city, and my favorite condiment is Nutella, so those two flavors were no-brainers. My favorite of the bunch, however, was the ricotta. It tasted just like cheesecake. But I have to say, the Gelotto wasn’t as good as I’d hoped. In Italy, the gelato flavors explode in your mouth (chocolate gelato tastes like the highest quality chocolate bar, and fruit gelato tastes like the ripest fruit imaginable). At Otto, the flavors were more subtle.

Also, David shared fava bean bruschetta with everyone. It came with crusty artisan bread. The fava bean puree tasted like buttery, garlicky mashed potatoes. It was an awesome combination of soft, chewy and crunchy. Otto’s now one of my favorite restaurants! Supposedly the main dishes and pizza aren’t so hot, but I’d be content just ordering the appetizers and gelato. If you can’t get a reservation, the bar area is spacious and provides instant gratification.

We bloggers were so inspired that we’re getting together again for a potluck! If you’re interested, leave a comment at Lulu’s Gonna Love Manhattan or e-mail her with the subject “NYC Bloggers Potluck.”

Comments (6)      Email Email      Print Print

IMBB 15: Chocolate Mousse Truffles

This month, Elise at Simply Recipes is hosting the online foodie event, Is My Blog Burning. The theme this time is “Has my blog jelled?” – meaning people across the world will cook with gelatin, pectin, or agar agar and blog about it. Check out her round-up of all the recipes and try something!In America, gelatin is synonymous with Jell-O. It’s fun to look at the jiggly dessert, but it’s nothing more than extra sweet fruit juice that’s been chemically altered to hold its shape. Time and again, I’m seduced by the clear, sparkling colors, but the taste never matches up. And the texture’s rubbery.

I resolve to elevate gelatin from its kitschy roots. Stop using it to make wobbly pineapple-marshmallow ambrosia! There are better applications out there, like chocolate truffles.

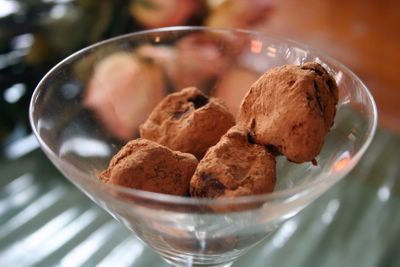
Chocolate goddess Alice Medrich has found a way to freeze mousse and make them into luxurious truffles. These have just 2.7 grams of fat each and less than half the calories of regular truffles!

Chocolate Truffles
From Chocolate and the Art of Low-Fat Desserts by Alice Medrich
Makes about 45 truffles
Start working at least 1 day ahead

Chocolate truffle mousse center:
7/8 tsp. gelatin
1 egg, separated
1/4 cup unsweetened dutch process cocoa
1/4 cup plus 1/6 cup sugar
5/8 cup low-fat 1% milk
2 oz. bittersweet or semisweet chocolate, chopped fine
1/2 tsp. vanilla extract
1/16 tsp. cream of tartar

Coating:
16 oz. bittersweet or semi-sweet chocolate, chopped
1/3 cup unsweetened dutch process cocoa

Make the mousse:

  1. Sprinkle the gelatin over 1/8 cup cold water in a small cup. Let stand, untouched, for at least 5 minutes, or until needed.
  2. Place egg yolks in a medium bowl near the stove and have a small whisk ready on the side. Combine the cocoa with 1/6 cup of sugar in a 1- to 1 1/2-quart saucepan. Stir in enough milk to form a paste, then add in the remaining milk. Bring mixture to a simmer over medium heat, stirring frequently with a wooden spoon, reaching the bottom and sides of the pan to prevent burning. Stir the chocolate mixture continuously once it begins to simmer. Simmer gently, still stirring, for about 1 1/2 minutes.
  3. Turn off the heat and whisk a small amount of the hot mixture into the egg yolks. Scrape the mixture back into the pot and whisk well to combine. It’s now safe to eat and will thicken without anymore cooking. Stir in the softened gelatin, chopped chocolate, and vanilla. Let stand for a minute or so, and whisk again until chocolate’s completely melted and the mixture’s perfectly smooth.
  4. Set the saucepan in a large bowl of ice water to cool and thicken. Stir and scrape the sides occasionally. If the mixture begins to cool too quickly, remove from ice bath, whisk and set aside. Should the mixture actually set, place the pan in a bowl of hot water and stir just until resoftened.
  5. Make the meringue: Simmer 1 inch of water in a large skillet. Combine cream of tartar and 1 tsp of water in a 4- to 6-cup heatproof bowl. Whisk in the egg whites and 1/4 cup of sugar. Place an instant-read thermometer near the stove in a mug of very hot water. Place the bowl in the skillet. Stir the mixture briskly and constantly with a heat-proof spatula, scraping the sides and bottom often to avoid scrambling the whites. After 1 minute, remove the bowl from the skillet. Quickly insert thermometer, tilting bowl to cover the stem by at least 2 inches. If it’s less than 160 F, rinse the thermometer in the skillet water and return it to the mug. Place bowl in the skillet again. Stir as before until temperature reaches 160 F when bowl is removed. Beat on high speed until cool and stiff.
  6. Fold about a quarter of the cooled chocolate mixture into the beaten egg whites. Scrape the egg white mixture back into the remaining chocolate mixture. Fold to combine.
    Note: if you don’t mind raw egg whites, you don’t need to cook the whites beforehand. Simply beat the whites and cream of tartar in a bowl (water is unnecessary). When the mixture forms soft peaks, slowly sprinkle in the sugar and beat until stiff. Because this cooked meringue is firmer and deflates less than ordinary meringue, there’s a reversal in the conventional procedure for folding it with another mixture. If using regular meringue, lighten the mousse by folding a bit of the meringue in the chocolate mixture.
  7. Transfer to a bowl, cover, and freeze until firm enough to scoop, 5 hours or longer.

Form truffle centers:

  1. Get ready a bowl of hot water, a melon baller or spoon, a pan lined with wax paper, and the firm mousse. Dip the melon baller into the water and wipe dry. Form a scant 1-inch ball. Place it on the pan. Dip, wipe, and scoop centers until the mixture’s gone. Freeze centers at least 12 hours, or overnight. Centers may be prepared to this point and frozen for up to 2 weeks.

Coat the truffles:

  1. Melt chocolate in the top of a double boiler over barely simmering water, stirring frequently to prevent overheating. Or microwave on Medium (50% power) for about 3 minutes, stopping to stir several times. Chocolate is ready when it is completely melted and smooth and between 115 and 120 F.
  2. Pour cocoa into a shallow dish. Have ready another shallow dish for the completed truffles. Remove a third to a half of the frozen centers from the freezer and place them in a shallow dish next to the container of melted chocolate.
  3. With your right hand (left if you are left-handed), fingers together and slightly cupped, scoop a large handful of melted chocolate into your left hand. Rub both hands together to coat them with a thick layer of chocolate. Try not to get the chocolate on your fingers. Quickly pick up a frozen center with your left hand and roll it gently between your hands with a circular motion and as little pressure as possible, just long enough to cover it with a coating of chocolate. Add chocolate to your hands as you need it Immediately place the coated center in the cocoa dish. If you see any uncoated spots, dip a finger into the chocolate and patch the truffle. Have someone else shake the dish, roll the truffle in cocoa, and transfer it to a clean dish. Repeat until all the centers are coated, adding chocolate to your hands between each one. (If you’re alone, just divide the cocoa between 2 dishes. Place 2 or 3 truffles in the cocoa before stopping to shake the dish. Continue to add truffles and shake until the first cocoa dish is crowded with truffles, then start on the second.) Truffles may be stored in a tightly covered container in the freezer for up to 6 weeks. Serve frozen.

Notes:

  • Work quickly to keep the melted chocolate from hardening on your hands as you handle the frozen centers. Just keep the center moving–never let it rest in one place in your hands–and get it out of your hands as fast as possible.
  • You will have both chocolate and cocoa left over because the dipping technique requires that you work with more than you need. Place the leftovers in small plastic bags (strain the cocoa first). Store in the freezer (since they might have little of the melted truffle mixture) until needed for another recipe. Or heat the leftovers with milk and sugar to taste for decadent hot chocolate.
  • This should go without saying, but do not use a Hershey’s bar, chocolate chips or Baker’s chocolate. Use something decent, like Lindt, or Ghirardelli. Or splurge on Valrhona. I used the Valrhona that my brother gave me for my birthday.

Variations:
Add raspberry jam, peanut butter, coffee, Nutella, chile powder, cinnamon, or chopped nuts to the mousse mixture. Coat the truffles with chopped nuts, coconut, or sesame seeds.

Other applications for the low-fat filling:

Chocolate mousse: Double the mousse recipe and refrigerate it for four hours. Serve in 6-8 goblets. For an extra sensual experience, chop the chocolate coarsely, into 1-cm pieces, so it doesn’t dissolve completely in the hot milk mixture. The remaining chocolate bits will melt as they hit your tongue.

The mousse strikes a perfect balance between foaminess and creaminess.

It’s so rich that I could only eat a tablespoon at a time. Then I remembered how good it was and helped myself to some more and felt sick afterwards. Why oh why did I subject myself to such torture?

Bittersweet chocolate marquis: Double the mousse recipe and freeze it in a 4 to 5-cup loaf pan. Serve in 1/2-inch slices with creme anglaise (custard sauce) or strained raspberry puree. It’s richer than super-premium ice cream.

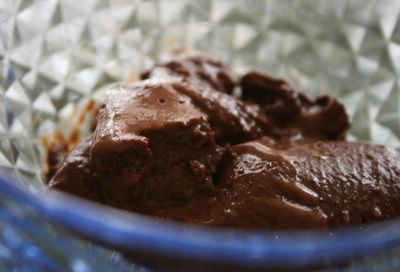
Chocolate gelato: Double the mousse recipe and freeze it in a container. No ice cream maker is necessary. Soften it in the fridge 15 minutes before serving and scoop into bowls. Gelato is softer and more flavorful than ice cream. This will explode in your mouth!

Frozen chocolate truffle sandwich cookies: Layer a thin coating of frozen mousse between two macaroon cookies and serve straight from the freezer.

Layered cake: Use the mousse immediately as a filling in your favorite cake. Refrigerate and serve when set.

Charlotte: Line a large bowl or round cake pan with plastic wrap. Then line the bottom and sides with ladyfingers or sponge cake and fill it with the mousse (triple the recipe above). Cover the top with berries and another layer of ladyfingers. Refrigerate 4 hours or until firm and invert the charlotte onto a serving platter.

Buche de Noel: Make your favorite sponge cake in a jelly-roll pan. Line it with the frozen mousse (triple the recipe above) and roll it into a cylinder. Cover the cake with meringue and freeze until ready to serve. Bake the cake in a 425 F oven until golden brown, about 4-6 minutes. Serve immediately.

Comments (4)      Email Email      Print Print

Is My Blog Burning: Fluffernutter Cupcakes


Cupcakes take the cake! At least that’s what Maki at I Was Just Really Hungry says for this month’s edition of Is My Blog Burning.

Cupcakes take me back to my childhood, when the best thing about celebrating classmates’ birthdays was the obligatory cupcakes. Ha, forget about wishing them a good birthday. Just give me the cupcake…a cake I don’t have to share with anyone else.

Remember the good old days, before schools banned cupcakes? At least Texas reversed its decision.

And perhaps no other food encompasses childhood like the Fluffernutter sandwich. Before artisan breads became stylish, before we had to worry about eating whole grains, stick-to-the-roof-of-your-mouth peanut butter and marshmallow fluff on soft white bread was perfectly acceptable.

So I made a Fluffernutter sandwich in cupcake form. These are semi-healthy, since most of the fat comes from the peanuts. Most cupcake recipes call for a stick of butter each for the batter and frosting. This recipe has 1/8 of a stick of butter!

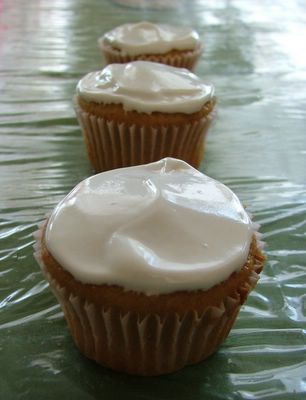
The first thing I noticed about these cupcakes was the intense peanut butter smell. Although they weren’t as moist as the cakes from Sugar Sweet Sunshine (which can be remedied by adding butter of course), they were a satisfying snack for a sweet ‘n’ salty craving.

Fluffernutter Cupcakes
(adapted from The Joy of Cooking)
Makes 15-18 cupcakes

For the peanut butter cupcakes:
1 1/4 cups all-purpose flour
3/4 cup packed light or dark brown sugar
1 1/2 tsp baking powder
1/2 tsp salt
3/4 cup milk
1/3 cup creamy peanut butter
1 large egg
1 tbsp unsalted butter, softened
1 tbsp vegetable oil
1 tsp vanilla
3/4 cup semisweet chocolate chips (optional)

Preheat oven to 350 F. Line muffin pans with paper liners.

Combine all ingredients in a food processor. Pulse for a few seconds to mix. Scrape the sides of the bowl and the blade and pulse until smooth. The entire mixing process should not take more than 5 seconds.

If you don’t have a food processor, whisk all the dry ingredients in a bowl and set aside. Cream the butter, oil and peanut butter with an electric mixer until smooth. Add the sugar. When incorporated, add the egg and vanilla. Scrape down the sides of the mixing bowl frequently with a rubber spatula to keep the batter smooth. On low-speed, alternately add the dry mixture in three additions with the milk in two additions, beginning and ending with the dry mixture. Stir in chocolate chips, if using. Hint: toss the chips with a bit of flour to keep them from sinking to the bottom of the cake.

Fill the muffin cups about two-thirds full. Hint: for mess-free, consistent portion control, use an ice cream scoop.

Bake until a toothpick inserted in the center of a cupcake comes out clean, 25-30 minutes.

Remove from the pan and let cool completely on a rack before frosting. Hint: put more frosting than you think you need on a spatula/knife and place it in the middle of the cake. Without lifting the spatula, spread the frosting to the edges by rotating your wrist.

For the marshmallow (aka seven-minute) frosting:
(adapted from The Joy of Cooking)
Makes 2 cups

2 1/2 tbsp water
1/8 tsp cream of tartar
2/3 cup sugar
1 large egg white
1/2 tbsp light corn syrup
1 tsp vanilla

Have the egg whites at room temperature, 68-70 F. Whisk everything except the vanilla together in a large stainless-steel bowl. Whipe excess sugar off the side of the bowl, as it will be difficult to dissolve later.

Set the bowl in a wide, deep skillet filled with about 1 inch of simmering water. Make sure the water level is at least as high as the depth of the egg whites in the bowl.

Beat the whites on low speed until the mixture reaches 140F on an instant-read thermometer. Do not stop beating while the bowl is in the skillet, or the egg whites will be overcooked. If you cannot hold the thermometer stem in the egg whites while continuing to beat, remove the bowl from the skillet just to read the thermometer, then return the bowl to the skillet. Beat on high speed for exactly 5 minutes.

Remove the bowl from the skillet and add the vanilla.

Beat on high speed for 2-3 more minutes to cool. Use the day it is made.

Since I won a pack-rat/frugal food food award, here’s suggestions for leftover frosting:
Dollop hot cocoa with it
Make Fluffernutter sandwiches out of it
Melt it with 1-2 tbsp butter and stir in rice krispies/oatmeal (1-2 cups) to make bars
Spoon it on top of ice cream

Variations:

Chocolate Peanut Butter Cupcakes
Frost with chocolate frosting for a richer cupcake.

Chocolate Frosting:
(adapted from The Joy of Cooking)
Makes about 2 cups

1 cup plus 2 tbsp sugar
1 cup unsweetened cocoa
1 cup milk
1 tsp vanilla
6 ounces milk chocolate, finely chopped (You can substitute dark chocolate for adult tastes. Or you can simply use 3 ounces dark chocolate to cut the fat and keep the flavor)

Combine sugar and cocoa small, heavy saucepan. Gradually add just enough milk to make a paste, and then stir in the rest.

Cook, stirring constantly with a wooden spoon and reaching into the corners of the pan, over medium heat until the mixture comes to a boil Boil gently, sirring, for about 2 minutes. Remove from the heat and add vanilla.

Let cool for 5 minutes. Stir in chocolate until melted and smooth. Cover the surgace of the frosting with a piece of wax or parchment paper and let cool until spreadable.

This keeps, refrigerated, for up to 1 week. Or freeze for up to 6 months.

Peanut Butter Jelly Cupakes
Swirl 1/3 cup melted jelly in the batter. Or, fill muffin cups 1/3 of the way up, spoon in 1 tsp jelly, and top with batter to fill the cups 2/3 full.

Nutella-Peanut Butter Cupakes
Frost cupcakes with Nutella. Melt the Nutella with a couple tablespoons milk, or it will be too thick and tear the cupcakes.

Honey Nut Cupcakes
Substitute sugar with 1/2 cup + 1 2/3 tbsp honey and reduce milk to 1/2 cup + 2 tbsp. Also add 1/8 tsp baking soda. Note that honey browns faster than sugar, so the cakes will probably cook faster. Thanks to Good Eats for the adaptation. I have no idea if it works.

Frost with:
Honey Cream Cheese Frosting
(Adapted from The Joy of Cooking)

8 ounces cream cheese
5 tbsp unsalted butter (optional)
2 tsp vanilla
1 1/2 to 2 cups honey (feel free to change based on your tastes)

Have the cream cheese cold and the butter at room temperature, 68-70 F.

In a medium bowl, beat cheese, butter and vanilla just until blended. Add the honey one-third at a time and beat just until smooth and the desired consistency. If the frosting is too stiff, beat for a few seconds longer. Do not overbeat.

This keeps, refrigerated, for about 1 week. Or freeze for up to 3 months. Soften and stir until smooth before using.

Comments (12)      Email Email      Print Print

Is My Blog Burning: Black-Eyed Pea Cake


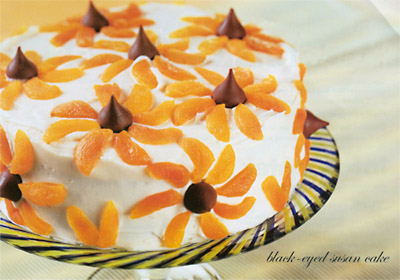
Photo: Vegetarian Times-Feb. 2005

For my first post, I’ve decided to participate in Is My Blog Burning?, a designated day where bloggers cook with a common ingredient or method. This time, the theme is beans. I think a dessert can be made from virtually any ingredient, so why not try a bean cake?

When I first saw the Black-Eyed Bean Cake recipe in the Feb. 2005 issue of Vegetarian Times, I wondered if I could substitute Asian red beans (azukis) for the black-eyes and red dates for the apricot puree to make a Chinese-ified cake. Before getting too adventurous though, I tested the original recipe to see if it was any good.

I had doubts about this recipe because a couple days earlier, I made the Fungi (cornmeal mush) from the same issue. I expected it to be a mixture between cornbread and oatmeal, but instead I got tasteless, watery goop. I’ll usually eat anything, but I seriously considered throwing the Fungi out. After boiling it on the stove for another 40 minutes (the recipe said I’d only need to boil it for two min.), the mixture reduced to one-third its volume and was quite good. It got nice and firm, like polenta.

Anyway, on to the recipe!

Black-Eyed Susan Cake
adapted from Vegetarian Times, Feb. 2005

Serves 12

Cake
2 cups dried apricots
2 cups cooked, drained and rinsed black-eyed peas
1/4 cup canola oil
1 cup packed light brown sugar
3 large eggs
1 cup whole wheat flour
2 tsp. ground cinnamon
1/2 tsp. ground cloves
1 1/2 tsp. baking soda
1/2 tsp. baking powder
2/3 cup golden or regular raisins
1 cup chopped pecans, optional

Frosting
1/3 of 8-oz. pkg. fat-free cream cheese
2 1/2 cups confectioners’ sugar
2 tsp. lemon zest
1 tsp. vanilla extract

Optional Decoration
12 chocolate drops or stars
32 dried apricots

  1. If using dried beans, measure out a little more than 1/2 a cup. (1 cup dried=3 1/2 cups cooked, so if you do some algebra, you’ll actually need .57 cups). Sort through the peas and pick out tiny stones and stray seeds. This is best done by spreading them on a table with a pot in your lap and pulling the good peas into the pot. To soak dried black-eyed peas, rinse them, and place them in a pot. Add enough water to cover them plus at least 4 inches more. Add 1/4 tsp. baking soda to the water, and stir. (This pulls out the sugars that cause gas in the intestines.) Let them sit overnight. Rinse thoroughly. The beans will cook perfectly in fewer than 90 minutes. Add salt after cooking.
  2. Preheat oven to 375F (350F if using glass or dark-colored pans). Grease and flour 2 8-inch cake pans, or grease and line pans with circles of parchment.
  3. To make Cake: Cook apricots in 2 cups water, about 12 minutes, until very soft. Measure out 1 cup apricots and liquid, and set aside. Put remaining apricots and liquid in blender, and puree. Add peas, and puree.
  4. Put oil, brown sugar and eggs in mixing bowl; beat on high 3 minutes. Mixture will look creamy. Whisk flour, cinnamon, cloves, baking soda and baking powder in separate bowl. Mix in raisin and pecans, if using. (Hint: tossing nuts, fruit, or chocolate chips with flour keeps them from sinking to the bottom of the cake.)
  5. Pour egg mixture over puree, and fold together. Gently fold in flour mixture. Pour into prepared cake pans.
  6. Bake 35 to 40 minutes, or until toothpick inserted in center of cake comes out clean. Remove from pans, and cool completely on wire rack. Ooh, nice and crusty! While this cake was baking, the entire kitchen smelled like gingerbread.
  7. To make Frosting: Using an electric mixer, beat cream cheese until creamy. Beat in remaining ingredients. Frosting should be soft; it will firm upon sitting.
  8. Place one cake layer on plate, and spread reserved apricots evenly over it. Top with second layer. Spread frosting evenly over top and sides of cake.
  9. To decorate, cut apricots into slices. Place chocolate drop on cake, and arrange 8 apricot “petals” around it (skin side up). Repeat until cake is covered.

PER SERVING: 290 CAL; 6G PROT; 6G TOTAL FAT (1 G SAT. FAT); 55G CARB; 55MG CHOL; 200MG SOD; 5G FIBER; 35G SUGARS

I didn’t make the filling or the frosting…Growing up, my mom always complained that frosting was too sweet. So out of habit, I made my cake plain.

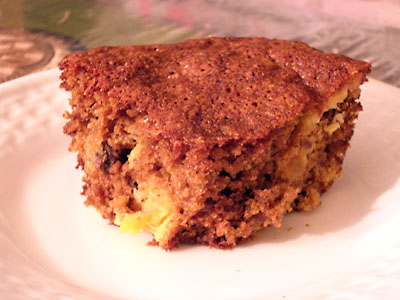
My handblender didn’t puree the apricot-bean mixture all the way, so you can see a chunk of apricot in the front and a white stripe of beans on the right.

The verdict: the texture was very good. The cake was moist and not dense (as is the problem with whole-wheat baked goods). I could not tell it was low-fat. Aside from the couple streaks, you can’t tell there’s beans in it either. This cake would be a good joke to play on friends. Imagine their faces when you tell them the secret ingredient!

EDIT:

I was unimpressed with the flavor on the first day, but on the second day, the flavors intensified. The cake got even more moist, but it wasn’t soggy or damp. My only complaint is that it’s a bit sweet, and I can’t really taste the spices. The cake is kind of like spice cake without the spices or carrot cake with extra brown sugar and no carrots.

Maybe to spice up the flavor, I’ll spread some apple butter (recipe featured at 101 Cookbooks) on the cake.

2nd EDIT:

On further investigation, I found out that I added too much sweetener. Brown sugar is simply white sugar plus molasses. I made my own brown sugar for this cake. According to the Grandma’s molasses package, 1 c brown sugar = 1 c white sugar + 1/2 c molasses. Or, it’s 2 parts white sugar, 1 part molasses. In previous experience, I found this ratio to be overkill, so I used 4 parts white sugar to 1 part molasses. On the Grandma’s molasses site though, it recommends 9 parts white sugar to 1 part molasses. Also, Baking 911 recommends 1-2 tbsp molasses for 1 cup of white sugar (or, 8-16 parts white sugar to 1 part molasses). Bottom line: I used waaaay too much molasses.

Partly because of my traumatic experience with the cornmeal mush, I still have qualms with Vegetarian Times recipes. Case in point: this recipe doesn’t tell you how much salt to add to the beans. I put a pinch. Evidently I needed more to bring out the spice flavors. Also, I seriously doubt 375F is a good temperature for the cake. Since I had an 8×8 glass pan (I halved the recipe), which conducts heat better than aluminum, I lowered the temperature to 350F. The edges browned very quickly, and I baked at 325F for the last five minutes.

So, this is a good cake, but it’s not to die for. I like the wholesome ingredients though. If you ever want to eat cake for breakfast, you can “fool” yourself by making healthy muffins with this recipe.

Maybe I’ll try the Chinese variation, but not anytime soon. My desk is exploding with “to try” recipes, and they’re from trusted sources.

Comments (8)      Email Email      Print Print