Archive for Light Delights

Plainly the Best Frozen Yogurt

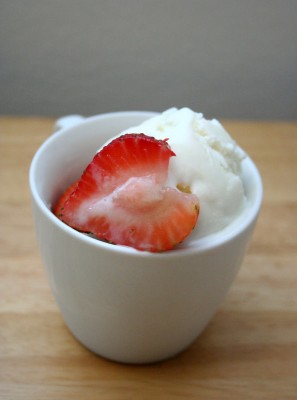
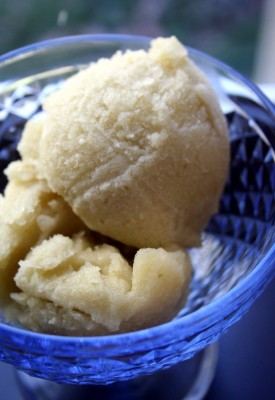
plain frozen yogurt

One year ago, New York frozen yogurt was in a state of emergency. Fake Tasti D-Lite and its clones were in every 10-block radius. The “frozen dessert” chain boasts 100 flavors, but they all taste like soapy whipped air. There’s no excuse, since each serving has as much as 224 calories, instead of the advertised 40. Dude, why don’t you add some cocoa powder (which is virtually fat-free anyway) instead of lactase?

Tasti even replaced the excellent soft-serve at Ben & Jerry’s in Grand Central station. To satisfy my craving, I scoped out at least five delis, which advertised in big letters: “Frozen yogurt.” I always came out disappointed, since their machines were never running.

“Does anyone remember real frozen yogurt?” a Chowhounder lamented on an online message board. I felt the same way. Where was that stuff I ate to celebrate my brother’s birthday and me passing my driver’s license exam?

Early this year an L.A. transplant, Pinkberry, revived real frozen yogurt. It’s so popular out west that people don’t mind paying $68 for a large: $7.50 for the yogurt and the rest in parking tickets (because it’s so crowded). While I’m thankful that Pinkberry changed the culinary landscape, I’m not sure why they got all the credit.

Since the ’70s, Bloomingdale’s Forty Carrots cafe has made much better plain frozen yogurt. Not to be confused with vanilla, it’s refreshingly tart and creamy. “Crapberry” resembles sour ice milk. There’s a difference between tart and sour. Sour is what spoiled food tastes like.

Several bloggers, including 101 Cookbooks, re-created the treat at home with nothing more than plain yogurt and sugar. I used Fage’s 2% Greek yogurt, which is incredibly rich, since the water’s strained out. A 32-ounce tub costs about $4 at Trader Joe’s and Whole Foods, but it’s not so expensive, considering that you’d need to buy twice as much mediocre yogurt and let it drain for 24 hours to get the same result.

Paired with strawberries, it makes a great berries and cream-type dessert. Add some blueberries too, to get a red, white and blue theme going. Happy fourth!

101 Cookbooks posted the recipe from David Lebovitz’s The Perfect Scoop. The yogurt gets hard after more than two hours in the freezer, but you can try adding 1 1/2 tablespoons of vodka to the mix.

Comments (11)      Email Email      Print Print

True Brew: Cold Drip Iced Coffee Recipe

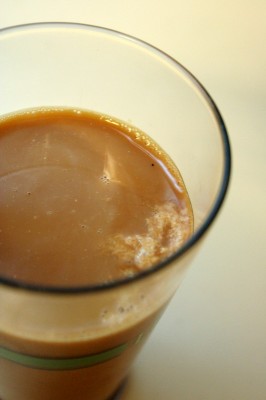
cold-brew iced coffee

Thanks to those of you who discovered this blog through through Chow, Serious Eats and Blogging New Orleans. After detailing the perils of my CulinaryCorps/Katrina service trip, I’m ready to move on to the highlights of New Orleans cuisine. When you think of New Orleans food, you probably gravitate towards gumbo, neon-colored king cake or funny French things like etouffee. Not coffee, right?

Among New Orleans’ many food secrets is cold-brew coffee. It’s as low-tech as you can get: no coffee maker, French press or special equipment is needed. Heck, you don’t even need electricity. Just combine coffee grounds and cool water in a bowl. After 12 hours, strain the solids out, and iced coffee is at your call — no extra chilling required. Yes, you need the long soak, but prep it before you go to bed, and coffee will be waiting for you in the morning. Once you try it, you’ll see how backwards it is to brew coffee with hot water and then wait for it to cool down.

“Heat brewing releases acids and oils, and as the coffee sits in the refrigerator, the bitterness intensifies,” according to a NY Times Magazine article. Cold-brew coffee is 67% less acidic, making it smooth, rich and naturally “sweeter.”

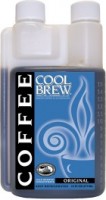
Cold-brew coffee concentrate
Cold-brew is so common in New Orleans that you can buy syrupy coffee concentrate at neighborhood supermarkets, as well as Whole Foods.

For better or worse, I can now enjoy coffee! For the longest time, regular cups would dehydrate me like crazy. I switched to decaf, and still no dice. The culprit, as I found out, wasn’t caffeine. It was the acid. I also would take my coffee unsweetened, since sugar somehow made it sour (the exception: coffee from Dunkin Donuts and Oaxaca, Mexico). Again, the culprit was the acid.

For an authentic experience, try a coffee-chicory blend from Cafe du Monde, French Market or Blue Bottle Coffee company. During their civil war, the French ran short on coffee, so they used chicory as an extender. Chicory is the root of the endive plant. It tastes chocolatey, is caffeine free, cleanses the blood and improves your liver’s health.

Note: today’s Times article on cold-brewed coffee is purely a coincidence. The NY Times Magazine ran a similar (but better) article way back in May.

Cold-Brew Iced Coffee Recipe

Rating: 51

Prep Time: 10 minutes

Total Time: 12 hours

Yield: 1 1/2 cups coffee concentrate

Serving Size: 1 cup

Cold-Brew Iced Coffee Recipe

Scaled down from a Blue Bottle Coffee Company recipe, as appeared in the New York Times Magazine

Ingredients

1/5 pound dark roast coffee and chicory, medium ground (about 1 cup)
2 cups cold water
Ice
Milk

Instructions

  1. Put coffee in a nonreactive container, like a stainless-steel bowl. Add 1/4 cup water, stirring gently to wet the grounds, then add remaining water, agitating the grounds as little as possible. Cover and let steep at room temperature for 12 hours.
  2. Strain coffee concentrate through a medium sieve, then again through a fine-mesh sieve.
  3. To make iced coffee, fill a glass with ice, add 1/4 cup coffee concentrate and 3/4 to 1 cup milk, then stir. To make café au lait, warm 3/4 to 1 cup milk in a saucepan or microwave, then pour into a mug and add 1/4 cup coffee concentrate. (Concentrate will keep in the refrigerator for up to two weeks.)
http://www.sugoodsweets.com/blog/2007/06/iced-coffee/

Comments (54)      Email Email      Print Print

My Mayabars

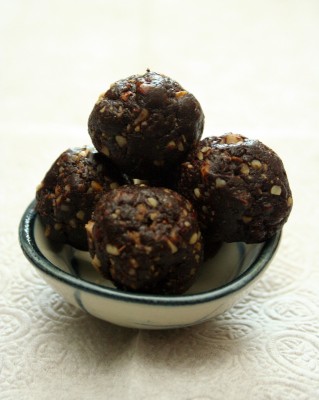
homemade chocolate Larabars

When it comes to sugar, I let nature be the guide. Instead of eating flavored yogurt with one tablespoon of added sugar, I’d rather eat plain yogurt with real fruit. For breakfast, I sweeten my oatmeal with raisins rather than maple syrup (maple syrup may have trace minerals, but you have to eat a lot to get the benefits).

Although I love sweets, most packaged stuff is overkill. Case in point: Quaker chewy granola bars are 1/3 sugar by weight. There’s more sugar than fiber and protein combined. Their 25% Less Sugar line sounds like a great idea in theory, but it has calorie-free sweeteners. The solution is dialing down the sweetness, not replacing it with lab-made “food!”

Larabar, on the other hand, makes excellent no-added-sugar snacks. They use the natural sugar of dates, nature’s sweetest fruit. White sugar isn’t evil per se, but it lacks the fiber, vitamins, and minerals of fruits.

Larabar used to make Mayabars (which I dubbed the best chocolate energy bar from the 2006 Fancy Food Show). They were fruit-sweetened chocolate bars with crunchy cacao nibs. Unfortunately, they revamped the line (now called Jocolat) and removed the nibs for a “smoother texture.” Bah, I want my essence of chocolate. The other problem is they’re expensive at $2 each. Since their bars are essentially dried fruit and nuts, it’s not that hard to figure out the recipe.

Anna at Cookie Madness developed a formula: 1 part of dried fruit to 1/2 part of crunchies (nuts, oatmeal, puffed rice, cacao nibs, etc.) by weight. I added a little more cocoa for extra chocolatiness. It’s not an exact recipe; you can adjust the ingredients by taste.

These are delicious chocolate bars that are actually good for you! You get a one serving of fruit with plenty of omega-3 fatty acids.

Naturally Sugar-Free Chocolate Bars

Adapted from Cookie Madness

Makes 6 bars or 24 “truffles”

2/3 cup walnuts
1 cup packed, pitted dates (about 24)
2 Tbsp unsweetened cocoa powder, preferably Dutch-processed
2 Tbsp cacao nibs or finely chopped dark chocolate

Toast the walnuts in a preheated 325F oven for 15 min., or until browned and fragrant. Stir the nuts half way through baking.

In a food processor, pulse the walnuts until they are pebble sized pieces. Set aside in a medium bowl.

Place the dates in the processor and pulse until coarsely chopped. Process until they’re smooth and form a ball around the blade. (At first, you will get lots of sticky pieces.) Add the cocoa and process until smooth.

In a bowl, knead the date mixture with the walnuts and cacao nibs until they stick together. If the mixture is too sticky, add more nuts or cacao nibs. If too dry, add a couple teaspoons of water.

On a cutting board lined with plastic wrap, shape the mixture into a long 1″-wide rectangle. Slice pieces with a sharp knife. Or, roll into 1″ balls. Store leftovers in the fridge.

Note: You can use natural or Dutch-processed cocoa, depending on your tastes. Natural cocoa has more complex flavors, but it is more acidic. I like to use it in cooked recipes. Dutch-processed cocoa has some the edge taken out, but you also loose other flavor elements. I like it for frostings and other raw uses. Generally, don’t swap one cocoa for another in baking recipes, since it can throw off the pH and affect the way cakes rise.

Comments (2)      Email Email      Print Print

Sour ‘doh! Muffins

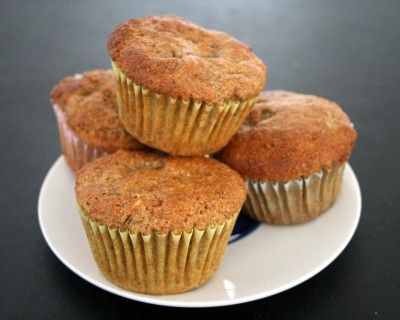
sourdough muffins

According to an online quiz, my ideal pets are rocks and hermit crabs. Pet rocks are nice because they live forever and never have to be fed or cleaned. Believe it or not, there are more unusual pets to be had, such as wild yeast. Yeast is in bread of course, but it also floats throughout the air. Before modern days, bread bakers could not go to the supermarket and pick up packets of yeast. They had to cultivate wild yeast in a sourdough starter, which was made by letting flour and water sit out for for several days at room temperature. The idea is for the starter to go “bad” and attract natural yeast in the air. This time-honored tradition makes crusty artisan breads, such as baguettes, taste so good.

There are several ways to ferment flour. Nancy Silverton’s Breads from La Brea Bakery uses grapes, while others insist that rye flour is easiest to work with. See The Fresh Loaf and The Amateur Gourmet‘s chronicles for more info. To build a starter, it needs to be fed with flour every day for about a week. With all the fuss, you can easily run into problems.

In Kitchen Confidential, chef Anthony Bourdain described getting a late-night phone call from his baker, who insisted that Bourdain “Feed the b—-, or else she’ll die.” The baker was referring to a beloved 250-pound batch of sourdough that he kept in his apartment. For one reason or another, the baker was away, and Bourdain had to brave his way into the apartment to save his restaurant’s bread.

If I weren’t a baker, I’d much rather keep a pet bird or better yet, a rock. But as a recipe tester for Peter Reinhart‘s new whole-grain bread book (due out in 2007), I had to keep pet bacteria. The problem with sourdough is that it inevitably involves waste. Every time you feed the yeast, you end up with a bigger blob that can potentially take over your kitchen. You’re supposed to throw away some starter or flush it down the toilet, but I don’t like wasting anything.

For a while, I used the excess starter for crumpets (thanks to The Baking Sheet for the tip), but I grew tired of them. After some googling, I found that sourdough can also be used to leaven muffins. This recipe from Sourdough Home makes the closest thing to cake for breakfast without inducing guilt. A tip: if you’re using whole-wheat starter, use white flour for the main dough, or else your muffins will be extra wheaty and coarse.

How else can do you use excess starter? How do you convert regular quick bread recipes to incorporate sourdough?

Resources to tide you over until Reinhart’s new book comes out:

Reinhart’s excellent recipe for NY-style bagels

The Bread Baker's Apprentice

Crust and Crumb

Free sourdough starter (with SASE) if you’re too lazy to make your own.

Comments (2)      Email Email      Print Print

Chocolate brain freeze

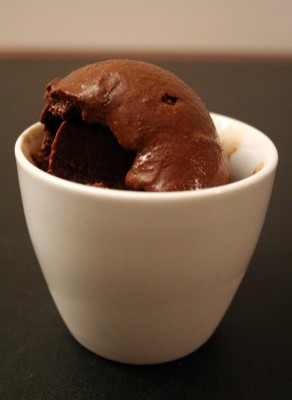
chocolate sorbet

Joe is driving East at 60 miles per hour. Andy is driving in the same direction at 70 miles per hour. If Andy started one hour after Joe, how long will it take for them to meet?

The only test that I failed in school was for word problems. Maybe it’s because I think too much and make them more complicated than they are. Or maybe it’s because I don’t see their practical application and don’t care about the question. Unless the question were, “How do I re-create my favorite chocolate sorbet?” then I could get serious.

Ciao Bella chocolate sorbet

As noted in my gelato post, Ciao Bella Gelato makes unbelievably rich chocolate sorbet. It is creamy and rich like ice cream, but there is no dairy, so it’s virtually fat-free.

In my quest to make this sorbet at home, I looked at the ingredient list/nutrition information and deduced a recipe.

Nutrition Facts

Serving Size 1/2 cup (112g)
Servings Per Container: 4
Calories 157
Calories from Fat 5
Amount/Serving %DV*
Total Fat <1g 2%
Saturated Fat <1g 3%
Trans Fat 0g 0%
Cholesterol 0mg 0%
Sodium 25mg 1%
Total Carbohydrate 43g 14%
Dietary Fiber 3g 12%
Sugars 31g
Protein 2g
Vitamin A 0%
Vitamin C 0%
Calcium 2%
Iron 7%
*Percent Daily Values (DV) are based on a 2,000 calorie diet. Your daily values may be higher or lower depending on your needs.

Ingredients

Water, Sugar, Chocolate Liquor, Cocoa Powder (Processed with Alkalai), Corn Syrup, Vanilla Extract, Rum Extract.

Not only does the ingredient list tell you what to use, but it also tells you how much. Everything is listed in descending order by weight. For example, there is more water than rum extract.

Since it’s such a short list, the 31 grams of sugar listed is essentially granulated sugar. 31 grams x 4 servings = 124 grams for one batch. The dietary fiber gives a clue as to how much cocoa/chocolate is involved: one tablespoon of cocoa has 2 grams of fiber, according to Nutrition Data. There’s also corn syrup, vanilla, rum extract, but they’re listed at the bottom of the ingredients, so their presence is minute. I guessed how much there was based on other sorbet recipes I’ve seen. The chocolate liquor (unsweetened chocolate) gave me some trouble, because there’s no way the sorbet could be low-fat if there were more chocolate than cocoa powder. I made an estimated guess, then subtracted the weight of the ingredients from the total weight to yield the amount of water. I came up with this preliminary recipe:

Ingredient Grams Volume
Sugars (total) 124
Granulated sugar 115 ½ cup
Corn syrup 33 3 T
Dutch-process cocoa powder 42 ½ cup
Unsweetened chocolate 10
Vanilla 4 1 tsp
Vodka/rum 1¾ tsp
Water 258 1 to 1¼ cup
Total 448

Boy, was this CHOCOLATE sorbet. The flavor was very intense, and it didn’t freeze solid. It melted as quickly as Frosty the Snowman in the Mojave dessert. I used too much sugar and liquor, which keeps frozen desserts soft. Part of the problem is that the supermarket’s “light corn syrup” actually contains high-fructose corn syrup, which is sweeter.

Rather than tweak my recipe (guessing the amount of cocoa liquor gave me a headache!), I tried an Ultimate Ice Cream Book recipe for my second attempt. Here is the recipe, courtesy of Recipe Link. It had a better flavor but was still a little icy. (I don’t have an ice cream maker, so I froze the mixture in ice cube trays and broke it up in a food processor.)

For my third attempt, I just bought a pint at Whole Foods. It was the best $4 I spent.

Resources:

The Ultimate Ice Cream Book: Over 500 Ice Creams, Sorbets, Granitas, Drinks, And More

Comments (2)      Email Email      Print Print

Great grape sorbet

grape sorbet

I’m interrupting the Fancy Food Show series with an ode to summer sorbet.

Grapes are supermarket standbys that no one gives second thought to. They take the form of wrinkled, dried up raisins or neglected Skittles that sit at the bottom of the bag. But when frozen, they transform into creamy, sweet-as-candy gems. It’s a magical metamorphosis; instead of becoming rock hard and flavorless (cold dulls the sensation of taste), they resemble bite-sized popsicles. My cousins let me in on this secret when I was about 10. Now, I pop grapes in the freezer when I want dessert or when I buy too many and need to preserve them.

The essence of frozen grapes can also be captured in this refreshing grape sorbet. A poster on the Chowhound message board called it the easiest, most delicious thing she made all summer. I couldn’t agree more. This sorbet is still scoopable after days in the freezer, and no ice cream maker is needed.

Grape sorbet
Adapted from Gourmet, Dec. 1996

2 cups chilled seedless green, purple or black grapes (about 3/4 pound)
1/4 cup superfine sugar
1 1/2 tablespoons fresh lemon juice
1 1/2 teaspoons vodka (to keep the sorbet scoopable)

In a blender, purée sorbet ingredients until sugar is dissolved, about 3 minutes, and pour through a fine sieve into a bowl, pressing on solids. Discard solids and freeze in an ice-cream maker.

Alternate freezing method: Freeze the sorbet in ice cube trays and pulse in a food processor until smooth.

Transfer sorbet to an airtight container and in freezer harden until firm.
Each serving about 155 calories and 1 gram fat (6% of calories from fat)

Makes about 1 1/3 cups of sorbet.

Comments (2)      Email Email      Print Print

IMBB 27: The Joy of Soy

Is My Blog Burning - Soy

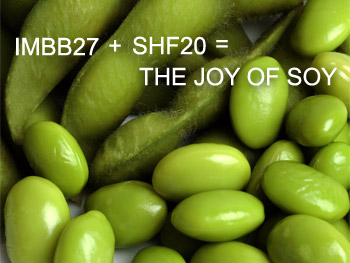
I know of no other food that is as versatile as soy. In its natural state above, it resembles green peas. It can also stand in for milk (as soy milk), custard (as silken tofu), cheese (as firm tofu), meat (as tofu or tempeh), flour (as okara), nuts (as roasted soy nuts) and salt (as soy sauce or miso). High in protein, fiber and antioxidants but relatively low in fat, soy is a staple in my kitchen.

dried soybeans
Dried soybeans

For the monthly themed cooking events, Is My Blog Burning and Sugar-High Friday, Reid at ‘Ono Kine Grindz has asked bloggers to make soy cuisine.

After making soy-sauce candied walnuts, I decided to experiment more with soy sauce in desserts. Soy sauce essentially tastes like caramel-flavored salt, so the idea isn’t too far-fetched.

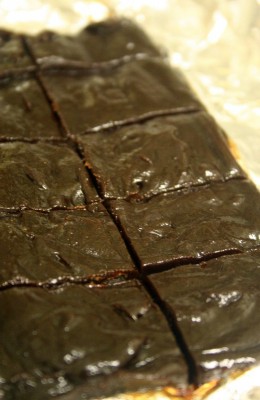
For my first creation, I made chocolate caramels with soy milk and soy sauce. Out of my two experiments, this one seemed like the safest bet. As the Kikkoman website says, “Kikkoman Soy Sauce…..In Chocolate? Absolutely! Naturally brewed soy sauce can enhance more than just savory flavors — its salty brewed flavor depresses the extra sweetness typical of chocolate syrups and enhances the richness of the cocoa powder. It also helps to blend dairy notes and highlights the fruit top notes of the cocoa. The result: a deep, nutty, roasted chocolate flavor with a rich color.”

These low-fat caramels were tasty for what they were, but they were slightly grainy. I don’t know whether it’s because I used homemade soy milk, which naturally has pulp. Or perhaps the granulated sugar crystallized, in which case more honey was needed. Also, soy milk curdles at the slightest introduction of acid, which was in the natural cocoa powder. You may fare better with commercially prepared soy milk, which is smoother and has thickeners.

My candy also did not set up, even in the freezer. I’ve clarified the instructions, so cook the candy until it reaches the softball stage–248 degrees F. I think these would have tasted better with plain old salt, but if you’re adventurous, add the soy sauce in the end, so you don’t cook out its delicate flavor.
chocolate soy caramels

Chocolate Caramels

Adapted from The Soy Dessert and Baking Book

This is a great way to sneak nutrients into candy.

Ingredients:
½ c sugar
1 c vanilla soy milk
1 Tbsp unsalted butter
1 tsp honey
2 Tbsp cocoa powder, sifted
1 tsp soy sauce or 1/4 tsp salt

Method:
Line a loaf pan with greased foil.

Over medium heat, melt sugar in a sauce pan, stirring until it has completely dissolved and is light golden in color. Gradually stir in soy milk and bring mixture to boil. Reduce heat to low and simmer 10-15 min., uncovered. Add butter, honey and cocoa and salt (if you’re not using soy sauce) and continue boiling and stirring for another 10-15 min., or until mixture thickens (about 248F) and shrinks away from the bottom and sides of the pan. Stir in soy sauce (if using). Pour into the greased pan and cool 10 min. While still warm, cut caramels into approximately 18 pieces. Wrap in individual candy wrappers. The leftovers freeze well.

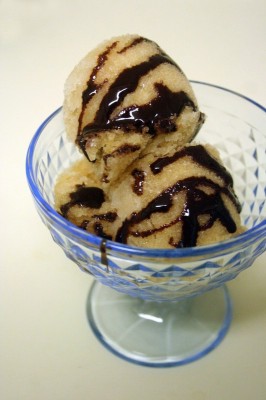
Now, what could possibly be weirder than chocolate and soy sauce? How about a dessert where the soy sauce doesn’t have “milk” or chocolate to hide behind? A dessert with just three ingredients? (Two if you don’t count the orange zest, which I didn’t use. Or one if you don’t count the sugar, which is mandatory in dessert.) It’s soy sauce sorbet, which Kikkoman features on its website, along with soy sauce chocolate sauce and soy fruit charlotte.

At first bite, the sorbet has an off-putting fermented flavor, but it gets better as you eat it. It’s the easiest way to make a refreshing “caramel” sorbet without having to caramelize the sugar. Serving it with chocolate sauce does double duty. The chocolate sauce offsets the sorbet’s saltiness, while soy sauce brings out the chocolate flavor.
The sorbet is slightly icy, like a granita. You can add more sugar if you want it smoother.

Now that my experiments are done, I declare soy sauce too weird to put in desserts. At least I tried. If you like Sam Mason-style desserts (ancho caramel or miso ice cream, anyone?) from WD-50, these might be up your alley.
soy sauce ice cream

Soy Sauce Sorbet

Adapted from a recipe by Chef Michael Bloise, Wish at The Hotel at South Beach (Miami Beach, FL)

Yield: 6 cups

4 cups water
1 1/3 cups sugar
2/3 cup low-sodium soy sauce (or substitute 1/3 cup regular soy sauce plus 1/3 cup water)
4 teaspoons grated orange zest
2 Tbsp vodka (optional but recommended to keep the sorbet from freezing hard)

Stir together all ingredients until sugar is dissolved. Freeze in an ice cream freezer according to manufacturer’s directions. Serving suggestion: Chef Bloise serves a small scoop of Soy Sauce Sorbet with ginger carrot cake.

and round-up.

Comments off      Email Email      Print Print

Whipped cream screams ice cream

chocolate ice cream

If you’ve ever made strawberry shortcake, a trifle, or whipped cream frosting (all summery desserts, I might add), you’re bound to have leftover whipped cream. Instead of throwing it in the trash, you can make ice cream without a machine. In still freezing, you need don’t a special machine to churn the ice cream. The air is already incorporated via the whipped cream.

Having acquired excess whipped cream from a semi-illegal source (don’t ask, don’t tell), I adapted a chocolate ice cream recipe from Ben & Jerry’s Homemade Ice Cream & Dessert Book.

Would you take whipped topping from a Starbucks frappuccino, add lots of sugar and eat it by the spoonful? It’s essentially what ice cream is. That’s why I lightened the Ben & Jerry’s recipe by reducing the heavy cream by half and substituting thick, low-fat evaporated milk for the rest of the dairy. I also added some extra steps to ensure a delicious ice cream.

The first thing I did was heat the milk and egg. The simplest ice cream, Philadelphia style, contains no egg and is often not cooked over the stove. It’s the easiest method and comprises typical supermarket ice cream. However, store-bought ice cream contains stabilizers not readily available to the home cook. For homemade ice cream, custard style is best, because egg yolks contain emulsifiers that make everything creamy. Also, heating the proteins in the milk makes it freeze smoother. In this case, heating the liquid also makes the chocolate flavor bloom.

I also added vodka to lower the freezing point (so it won’t freeze rock hard). Rose Levy Beranbaum (author of The Cake Bible, The Pie & Pastry Bible and The Bread Bible) suggests 1 1/2 tsp of 80% proof liquor per cup of liquid. You can use flavored liquor, like Frangelico or rum, but vodka is versatile because it has a neutral flavor.

Lastly, a thorough chill gives time for the flavors to meld and makes it freeze faster, which means fewer sandy ice crsystals.

This ice cream isn’t as rich as Ben & Jerry’s, but it by no means tastes low-fat. It is creamy, flavorful and knocks the socks off of Edy’s!

Chocolate Ice Cream (lightened recipe)
adapted from Ben & Jerry’s Homemade Ice Cream & Dessert Book

Makes one scant quart

Ingredients
3/4 cup unsweetened cocoa powder
1 pinch salt
1 can (12 fl oz.) evaporated milk (fat-free is fine)
2 large eggs
3/4 cup sugar
1 cup lightly sweetened whipped cream (whipped from 1/2 cup heavy cream and 1 Tbsp sugar)
1 teaspoon vanilla extract
1 Tbsp vodka

Method
Put the cocoa and salt in a saucepan and add just enough milk to make a paste. Add the remaining milk and scald over medium heat.

In a separate mixing bowl, whisk the eggs until light and fluffy, 1 to 2 minutes. Whisk in the sugar, a little at a time, then continue whisking until completely blended, about 1 minute more. Temper the eggs by gradually adding the hot milk mixture and whisking constantly.

Transfer the mixture back into the pan and cook over moderately low heat until a thermometer registers 170F, or until it thickens and coats the back of a spoon.

Add the vanilla and vodka. Pour custard through a sieve into a metal bowl set in ice and cold water and cool. If necessary, use a hand blender to smooth out the custard. Cover and refrigerate until cold (preferably overnight).

Fold in the whipped cream and pour into ice cube trays and freeze. Unmold the cubes into a food processor and break up with a fork. Pulse until smooth. (If you don’t have a food processor, freeze in a shallow pan for three hours. After every hour, break up the mixture with a fork, whisk or hand blender. If you have an ice cream maker, add the cream to the milk in the first step. Freeze according to the manufacturer’s instructions.)

Transfer to an airtight container and freeze for at least three hours to harden. If it becomes difficult to scoop, thaw in the fridge for 10 minutes prior to serving.

Nutrition (serving size: 1/2 cup)

The new version: calories 203 (34% from fat); fat 8g (sat 5g); protein 7g; cholesterol 75mg; calcium 17%; fiber 3g; carbohydrate 30g

The original: calories 305 (57% from fat); fat 20g (sat 12g); protein 5g; cholesterol 104mg; calcium 8%; fiber 2g; carbohydrate 32g

Comments (3)      Email Email      Print Print

A green breakfast: Zucchini pancakes

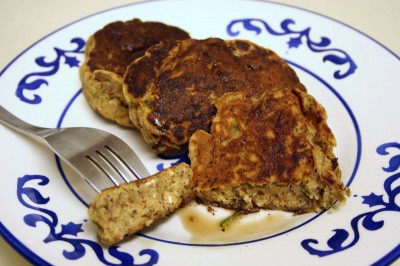
zucchini pancakes

My sweet tooth has convinced me that virtually any food can be dessert. Olive oil potato chips, for example, are excellent in chocolate fondue. The fruity/floral flavors go so well with chocolate that I’m surprised olive oil truffles aren’t out on the market. Nutella pizza from Pie (“pie” is New York-speak for a whole pizza) is a novel idea, although it can be replicated by spreading Nutella on any white pizza (with ricotta cheese and no tomato sauce).

So when I had a leftover zucchini, my immediate thought was to make it into something sweet. Zucchini bread is a well-known option, but I wanted something acceptable for breakfast. So I took a pancake recipe and added some zucchini and slightly reduced the liquid to compensate.

I also substituted the milk and eggs with vegan ingredients for health and environmental reasons. I generally avoid meat, dairy, and eggs because their plant-based counterparts have the same proteins but more antioxidants and fiber. However, the amount of animal products in baked goods is so negligible that I don’t obsess over them. I also make exceptions for treats, like ice cream/gelato and Shake Shack burgers.

Vegan Zucchini Pancakes

Adapted from The Joy of Cooking

If five-grain flapjacks sound more like a five-pound rock in your stomach, don’t worry. You won’t taste the zucchini (just like you don’t taste carrots in carrot cake). Try these with grated carrots or apples, too.

Whisk together in a large bowl:

1 cup whole-wheat flour
3/4 cup all-purpose flour
1/3 cup cornmeal, preferably stone ground
1/4 cup old-fashioned or quick-cooking rolled oats
2 Tbsp sugar
2 tsp baking powder
1 tsp salt
1/2 tsp baking soda
1/2 tsp ground cinnamon (optional)
pinch of freshly grated or ground nutmeg

Whisk together in another bowl:

1 3/4 cups + 1 Tbsp plain soy milk
3 Tbsp oil
1/4 cup honey
1/2 cup ground flax seeds

Add to the wet ingredients:

1 packed cup (about 1 large) grated zucchini

Pour the wet ingredients over the dry ingredients and gently whisk them together, mixing just until combined. Spoon 1/4 cup batter onto a heated (medium heat or 350 F), greased griddle for each pancake, nudging the batter into rounds. Cook until the top of each bancake is speckled with bubbles and some bubbles have popped, then turn and cook until the underside is lightly browned. Serve immediately or keep warm in a 200 F oven while you finish cooking the rest. Serve with pure maple syrup or honey.

Makes about 24 4-inch pancakes.

Notes/tips:
The batter is thick, so it will puff up but not spread.

Soy milk and flax seed brown quickly, so turn down the heat if the insides are taking a relatively long time to cook.

For traditional pancakes, use 1 1/4 cup milk, 3 Tbsp melted unsalted butter, and 3 large eggs (instead of the flax seed).

To completely veganize the recipe, substitute the honey with an equal amount of agave nectar or golden syrup. Or, use a scant 1/3 cup of vegan granulated sugar and reduce the soy milk by 3/4 Tbsp.

Pancakes freeze beautifully. Wrap cooled pancakes in plastic and re-heat (no need to defrost) in a toaster. The edges will re-crisp, giving you a fresh-off-the-griddle sensation.

Vegan Resources:
The Post Punk Kitchen’s guide to veganizing baked goods

Vegan food pyramid-how to plan your diet accordingly

Why go vegan? Read The China Study for a compelling argument.

Comments off      Email Email      Print Print

Chocolate-Hazelnut Cake x3

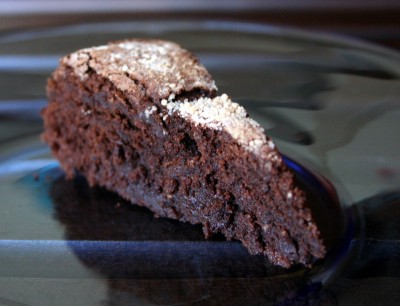
Nutella cake

Licking the jar clean is strictly encouraged when making a Nutella cake. That’s why it’s my favorite dessert to make. The recipe, from How to Be a Domestic Goddess, is kitschy yet decadent. A whole jar of Nutella, a stick of butter, a half dozen eggs, melted dark chocolate and ground hazelnuts combine to make a pudding-like cake.

Since I’m obsessed with all things with chocolate and hazelnut, I tested out two other recipes in search of the perfect cake. All were good in their own way, but I liked my first try the best. Here’s the taste-off:

Nutella Cake
lightened recipe from How to Be a Domestic Goddess

I had such great results halving the butter and replacing the chocolate with cocoa and sugar that I never bothered to make the full-fat recipe. This cake has virtually no grain; it’s like a solid slab of Nutella whose sweetness is offset by bitter cocoa. To see the interior of the cake, see The Skinny Epicurean.

I tried this recipe with homemade and store-bought chocolate-hazelnut spread. No need to get fancy: Nutella actually makes a better, smoother cake.

Makes 16 rich servings

CAKE:
1/2 cup toasted hazelnuts
1/2 cup plus 1 tbsp sugar
1/4 cup (half stick) soft unsalted butter
1 12-ounce jar of Nutella (chocolate-hazelnut spread)
1/2 cup cocoa
1 tablespoon Frangelico, rum or water
6 large eggs, separated
3/8 tsp cream of tarter or 3/4 tsp vinegar or lemon juice

  1. Preheat the oven to 350 degrees F. Prepare a 9-inch springform pan by lining the bottom with parchment or wax paper and greasing the sides.
  2. In a food processor, grind the hazelnuts with 1 tbsp of sugar until fine.
  3. In a large bowl, beat the butter and Nutella together. Add cocoa, Frangelico (or what you have chosen to use), egg yolks, and the ground hazelnut mixture. Set aside.
  4. In another large bowl, combine the egg whites and cream of tarter and beat till soft peaks form. Gradually sprinkle in 1/2 cup sugar and beat till stiff but not dry. This means that they will hold their peaks, yet still appear glossy and smooth.
  5. Lighten the chocolate mixture by stirring in a quarter of the egg whites, which you can beat in as roughly as you want. Gently fold in the rest of the egg whites a third at a time.
  6. Pour the batter into the prepared pan and cook for 40 minutes or until the cake’s beginning to come away at the sides and a toothpick inserted into the center comes out with a few moist crumbs cling to it. Cool on rack. The top crust will fall in the center like a crater.
  7. With your fingers, gently press down the sides of the cooled cake, so the edges are even with the center. Unmold by sliding a knife around the edges. If desired, trim the top crust with a large serrated knife. Invert the cake on a platter, or leave it on the base if you choose.

DECORATING:
adapted from Chocolate and the Art of Low-Fat Desserts by Alice Medrich
1/2 cup sugar
1 cup unsweetened cocoa powder
1/2 cup plus 1 Tbsp low-fat 1% buttermilk
1/2 tsp vanilla extract
4 ounces (1 scant cup) whole toasted hazelnuts

  1. Combine the sugar and cocoa in a heavy saucepan. Whisk in just enough buttermilk to form a smooth paste. Stir in the remaining buttermilk. Cook over medium heat until the mixture simmers and begins to boil, stirring constantly with a wooden spoon, scraping the sides and bottom of the pan. Boil gently for 2 minutes, stirring constantly to prevent burning. Turn off the heat and stir in the vanilla.
  2. Pour through a fine strainer. Allow to cool. To prevent a skin from forming, cover it with plastic wrap directly on the surface. Chill for several hours or overnight. It will thicken as it cools. It will keep in the refrigerator, covered, for at least 1 week.
  3. To assemble the cake, spread a thin layer of glaze over the top and sides of cake. Allow cake to set, at room temp, for at least 20 min. Spread another layer over the top and sides. Dot the top of the cake with the hazelnuts.
  4. Cake keeps at room temperature for up to one day or in the refrigerator for five.

Notes:

  • Toast the nuts in a 350-degree oven for 10-20 minutes to release their aroma. Stir half way through baking to ensure even browning. Nuts are done when they are fragrant and golden brown. Optional step: to get rid of the bitter skin, rub the cooled nuts in a paper towel.
  • Grinding the hazelnuts with some sugar ensures that those flavorful oils don’t go to waste. The sugar also acts as padding so you can grind the nuts finely without turning them into butter.
  • The boiling time is important in the sauce. This glaze makes a thick smooth covering for a cake, but it is not stiff enough to frost with swirls or peaks. If you cheat on the boiling time, it will not thicken enough (even after chilling) to coat a cake without dripping mostly off the sides, nor will it have the intensity of flavor it needs to be a great chocolate sauce.
  • To make one cup of buttermilk, measure 1 Tbsp vinegar and add enough milk to make one cup total.

Variation:

  • To make about 28 cupcakes, pour the batter into cupcake liners and bake for about 20 minutes.

Chocolate-Hazelnut Torte
adapted from Chocolate and the Art of Low-Fat Desserts by Alice Medrich

Chocolate Hazelnut Souffle Torte

I used hazelnuts in the Chocolate Walnut Torte recipe and got something very similar to the famous Fallen Chocolate Souffle Torte, printed on the preceeding page. While it wasn’t as pudding-like as the Nutella cake, it was delicious in its own right and did not taste low-fat at all. The torte was delicate and even better when warmed. You don’t need to microwave individual slices till hot, but just enough so the chocolate is oozy and melted. Since hazelnuts have less fat than walnuts, you can probably increase the yolks and chocolate to make the cake richer.

Serves 10

Ingredients:
1/3 cup toasted hazelnuts (1-1/3 ounces)
3 Tbsp all-purpose flour
2-1/2 ounces dark chocolate, chopped fine
1/3 cup unsweetened cocoa
1 cup sugar
1/3 cup boiling water
1 egg yolk
1 Tbsp rum (may omit)
1/2 tsp vanilla extract
4 egg whites
scant 1/4 tsp cream of tartar or 1/2 tsp vinegar or lemon juice
about 2 tsp powdered sugar, for dusting

  1. Position the rack in lower third of the oven and preheat to 350 F. Place a round of parchment paper in the bottom of an 8-inch springform pan and spray the sides with vegetable oil spray
  2. In a food processor or blender, grind the walnuts with the flour until very fine. Set aside.
  3. Combine the chopped chocolate, cocoa and 3/4 cupt of the sugar in a large mixing bowl. Pour in boiling water and whisk until the mixture is smooth and chocolate is completely melted. Stir in the egg yolk, rum, and vanilla. Set aside.
  4. Combine the egg whites and cream of tartar in a medium bowl. Beat at medium speed until soft peaks form. Gradually sprinkle in the remaining sugar and continue to beat at high speed until stiff but not dry. Whisk the walnuts into the chocolate. Fold a quarter of the egg whites into the chocolate batter to lighten it. Fold in the remaining egg whites. Scrape the batter into the pan and smooth the top. Bake until a skewer or toothpick inserted into the center of the torte comes out with a few moist crumbs clinging to it, about 25-30 minutes. Cool torte in the pan on a rack. It will sink dramatically in the center as it cools, leaving a raised crust around the edge. Torte may be stored, covered, at room temperature for 1 or 2 days or frozen, well wrapped in foil or plastic, for up to 2 months.
  5. To serve: slide a thin knife around the sides of the pan to release the torte. Remove sides and bottom of springform or invert cake pan to unmold. Remove paper liner from bottom and turn torte right side up on a cake circle or platter. Sieve a little powdered sugar on top.

Nutrition information (if made with walnuts)
calories per serving: 169; fat: 5.9 g; % calories from fat: 29%; protein: 3.5 g; carbohydrates: 28.6 g; cholesterol: 21.2 mg

Chocolate-Hazelnut Cake
from Eating Well, winter 2003

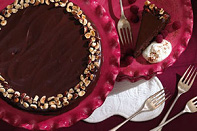
Eating Well chocolate hazelnut cake
Picture courtesy Eating Well

Much of the sweetness and moistness here comes from ground dates. Bread crumbs stand in for some of the hazelnuts to create the nubby texture. This low-fat, low-sugar cake is very good for what it is, but that’s not good enough for me. A mediocre healthy dessert doesn’t deserve to be called dessert. In reality, it’s just a health-ified sweet snack.

The test of a good dessert is how much you need to eat in order to feel satisfied. Because of the dates, this cake has a moist, cloying stickiness that never melts on your tongue. So you keep cutting another slice, hoping that the chocolate hit comes.

Ingredients

CAKE:
1/2 cup chopped pitted dates
1/2 cup unsweetened cocoa powder
1 teaspoon instant coffee granules
1/2 cup boiling water
1/2 cup chopped hazelnuts, plus 2 tablespoons for garnish
2 slices firm white sandwich bread, crusts trimmed
1/3 cup all-purpose flour
1/4 teaspoon salt
2/3 cup sugar, divided
2 tablespoons canola oil
1 teaspoon vanilla extract
1 large egg
3 large egg whites

GLAZE:
1/3 cup unsweetened cocoa powder
2 ounces bittersweet (not unsweetened) or semisweet chocolate, finely chopped (1/3 cup)
1 tablespoon corn syrup
1 teaspoon instant coffee granules
1/4 cup boiling water
1/2 teaspoon vanilla extract
1 cup confectioners’ sugar

To make:

To prepare cake:

  1. Preheat oven to 350°F. Coat a 9-inch round cake pan with cooking spray. Line the bottom with parchment or wax paper.
  2. Combine dates, cocoa and instant coffee in a small bowl. Add boiling water and stir until cocoa has dissolved. Cover and let stand until dates have softened and mixture has cooled to room temperature, about 20 minutes.
  3. Meanwhile, spread hazelnuts in a shallow baking dish and bake until fragrant and lightly toasted, 5 to 10 minutes. Transfer to a plate and let cool.
  4. Grind bread into fine crumbs in a food processor. Measure to make sure you have 1/2 cup. Transfer to a large bowl. (No need to wash the workbowl between steps.)
  5. Place 1/2 cup hazelnuts in the food processor. Add flour and salt; process until nuts are finely ground. Transfer to the bowl with the breadcrumbs.
  6. Scrape the cooled date mixture into the food processor. Add 1/3 cup sugar, oil, vanilla and whole egg; process until smooth, stopping several times to scrape down the sides of the workbowl. Scrape the mixture into the bowl with the breadcrumbs and nuts. Mix gently with a rubber spatula.
  7. In a large clean mixing bowl, beat egg whites with an electric mixer until soft peaks form. Gradually add remaining 1/3 cup sugar, beating until stiff, glossy peaks form. Add one-fourth of the beaten whites to the batter and whisk until blended. Fold in the remaining whites with a rubber spatula just until blended. Scrape the batter into the prepared pan, spreading evenly.
  8. Bake until the top springs back when touched lightly, about 20 minutes. Let cool in the pan on a wire rack for 5 minutes. Spray the rack with cooking spray and invert the cake onto it to cool completely.
  9. Meanwhile, to prepare glaze: Combine cocoa, chocolate, corn syrup and instant coffee in a medium bowl. Add boiling water and stir with a wooden spoon until the chocolate has melted and the mixture is smooth. Stir in vanilla. Cover with plastic wrap and refrigerate until chilled, at least 1 hour.
  10. Gradually add confectioners’ sugar to the chocolate mixture, beating with an electric mixer, slowly at first, then gradually increasing speed, until the glaze is smooth and thickened. (The mixture may seem lumpy at first, but it will smooth out.)
  11. To finish the cake, place it bottom side up on a serving plate. Place several strips of wax paper under the bottom edge to protect the plate from drips. Spoon on glaze and spread it evenly over the top and sides of the cake with an icing spatula or knife. Arrange the remaining 2 tablespoons hazelnuts around the top outside edge. Discard the wax paper before serving. Makes 12 servings.

Per serving: 233 calories; 9g total fat (2 g sat, 5 g mono); 18 mg cholesterol; 38 g carbohydrate; 5 g protein; 4 g fiber; 82 mg sodium.

Comments (12)      Email Email      Print Print