Nutella for Nerds

Will Goldfarb
Photo: Willpowder.net

If making your own chocolate-hazelnut spread weren’t enough, check out Gourmet.com for some molecular magic. Chef Will Goldfarb demonstrates how tapioca maltodextrin turns this creamy spread into “soil.” He also provides a recipe for a Nutella knock-off, but I like mine better. My version is healthier and uses more common ingredients.

Comments (1)      Email Email      Print Print

Poached Prunes: Deceptively Simple, Totally Delicious

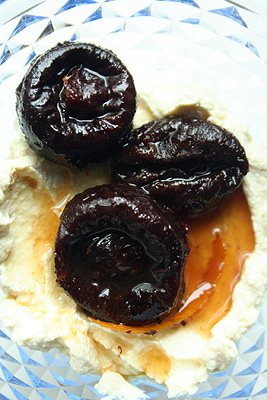
stewed prunes with orange zest

Prunes are nature’s most unhip fruits. Perceived as dry and wrinkly, they elicit snickers and jokes about old people and regularity. But cast the bad reputation aside, and you’ll see that they’re unsung jewels. Sweet as candy, they’re also packed with fiber and vitamin A. They’re not leathery either; prunes are some of the moistest, softest dried fruits around.

Stewed fruits are such common low-fat desserts that I forget how good they are. In this week’s L.A. Times, David Lebovitz provided a recipe for tea-poached prunes with citrus. It’s deceptively simple (just boil prunes in sugar-water for 10 minutes), but the flavors are complex: the rich, plump prunes are brightened up with just-tart enough oranges.

You can eat these by themselves, but they’re a wonderful backdrop for creamed cottage cheese ice cream; plain frozen yogurt; homemade ricotta cheese; or fresh, puréed tofu, above. (If you have a soy milk machine, making tofu is simple. You don’t need to buy a tofu mold or any mysterious chemicals. While the milk is still hot, just stir in a small amount of Epsom salt [which you can get in a drug store] or lemon juice, and drain in a cheesecloth-lined strainer. Epsom salt produces a softer tofu, and lemon juice a tangier one, but they’re more accessible than magnesium chloride, the best coagulant.)

Tea-Poached Prunes with Fresh Orange Segments

Adapted from David Lebovitz‘s recipe in the L.A. Times

Active time: 15 min
Start to finish: 40 minutes
Servings: 4

2-3 tablespoons sugar (depending on your sweet tooth)
1 strip of lemon or orange zest, about 1/2-inch wide and 2 to 3 inches long
2 bags of Earl Grey or any black tea, tags removed
20 to 25 prunes

Accompaniments: Fresh orange segments; creamed cottage cheese ice cream, plain frozen yogurt, homemade ricotta cheese, or puréed tofu

In a small saucepan, combine the sugar, zest and 1 cup of water in a small saucepan. Add the tea bags and bring to a gentle simmer, stirring to dissolve the sugar. Add the prunes and continue to gently simmer for about 10 minutes, or until they’re tender. If the prunes are large or especially dry, they make take longer. If necessary, add a bit more water to keep them covered.

Once the prunes are tender, remove from the heat and allow the mixture to cool to room temperature. Remove the tea bags and gently squeeze them to extract additional flavor before discarding them.

Serve with oranges and the snowy white “cream” of your choice.

Comments (5)      Email Email      Print Print

When life gives you milk…make cheesecake

ricotta cheesecake

I recently inherited a gallon of organic milk and wanted to finish it before it went bad. Drinking it was out of the question. I dislike the taste of plain milk so much that I eat my cereal dry. And why would anyone want to ruin a perfectly good cookie by dunking it in milk?

Not one to waste anything (not even bread cubes), I turned this milk into “ricotta cheese.” Real ricotta isn’t made from milk per se. It’s actually a by-product of other cheeses. Whenever you make cheese, you have the solids (curds) and leftover liquid (whey). The liquid is usually thrown out, but if you re-heat it, you have ricotta. Hence its name, which is Italian for “re-cooked.” You can make a good approximation at home though by heating milk with an acidic ingredient. And poof, that gallon of milk reduces down to a sizable four cups.

Fresh ricotta makes the supermarket tubs seem like spackle in comparison. It’s refreshingly tart, like sour cream. Rather than having a uniform grittiness, fresh ricotta has giant, billowy curds that you can eat while still warm.

Of course I had to make this cheese into dessert, so I used Lidia Bastianich’s torta di ricotta recipe and added some mix-ins. For a dessert, this cheesecake has relatively little sugar and fat but lots of protein. It’s even Passover-friendly, if you use nuts for the “crust” and matzo meal for the flour. The texture is light and fluffy if you like that sort of thing, but I like my cheesecake creamy and dense. If I were to make this again, I would add the eggs whole, instead of whipping the whites separately.

Fresh Ricotta Cheesecake

This cheesecake is light and fresh, with its soufflé-like texture and bright, citrus-accented flavor. If you like your cheesecake dense, try blending whole eggs with the sugar.

Adapted from Lidia’s Italian-American Kitchen by Lidia Bastianich and The 1997 Joy of Cooking

Start to finish: 3 days (includes making the cheese and chilling the cheesecake)
Active time: 2 hours

Ingredients:
Softened butter and fine dry bread crumbs (wheat germ, crushed cereal, or finely ground nuts can be substituted) for the pan
1/4 cup toasted pine nuts (chopped almonds are a good substitute)
1 Tbsp diced candied lemon peel
1 Tbsp diced candied orange peel
2 Tbsp coarsely chopped dark chocolate
1 Tbsp flour
3 cups firm, homemade whole-milk ricotta cheese, recipe follows (If using store-bought cheese, place 3 1/2 cups ricotta in a cheesecloth-lined sieve and place the sieve over a bowl. Cover the ricotta with plastic wrap and place in the refrigerator for at least 8 hours or up to one day.)
5 large cage-free eggs, separated
1 tsp vinegar or lemon juice
3/4 cup sugar
Pinch of salt (a heaping 1/4 tsp if using unsalted ricotta cheese)
Grated zest of 1 large lemon
Grated zest of 1 large orange
1/2 cup heavy cream or whole milk

Special equipment: food processor

Brush an 8-inch spring form pan with enough softened butter to coat lightly. Sprinkle the bread crumbs over the butter to coat generously. Shake out the excess crumbs. Preheat the oven to 375 degrees F.

In a small bowl, combine the nuts, lemon peel, orange peel, chocolate and flour. Set aside.

In a food processor fitted with a metal blade, blend the egg yolks, sugar and salt until pale yellow. Add the drained ricotta, lemon and orange zest and process until smooth. Combine the cream or milk.

In a separate bowl, beat the egg whites and vinegar or lemon juice with a hand mixer until they form firm peaks when a beater is lifted from them.

Add the chocolate-nut mixture to the ricotta mixture and pulse in the food processor once or twice, just until combined.

Add about one fourth of the egg whites to the ricotta mixture and gently stir with a large rubber spatula. Pour the ricotta mixture over the rest of the egg whites (you’re really supposed to add the egg whites to the top of the ricotta, but who wants to dirty another bowl for mixing?) and gently fold the mixture, using a large rubber spatula to scrape from the bottom of the bowl up and over the top. Pour the cake mixture into the prepared pan and bake until the cake is golden brown on top and the edges are set but the center jiggles slightly when the pan is tapped, about 1 hour and 10 minutes.

Cool the cake completely before removing the sides of the pan. Serve the cake at room temperature or chilled for at least 6 hours.

Homemade Ricotta Cheese

Adapted from Michael Chiarello and Italian Food Forever

Start to finish: 1 hr and 10 minutes

Makes 4 cups

Ingredients:
1 gallon whole milk
1/3 cup vinegar (I like the taste of cider vinegar)

Special equipment: cheesecloth, thermometer

Heat the milk in a large, heavy, non-reactive pot until it reaches 185 degrees F, or until the milk makes popping sounds and barely simmers. Be sure to stir the milk frequently with a rubber spatula and cover the whole pan bottom to prevent scorching. (Warning: the heating process can take 40 minutes if you start with cold milk from the fridge.) While the milk is heating, rinse a large piece of cheesecloth or muslin with cold water, then fold it so that it is 6 or more layers, and arrange it in the sieve or colander placed in the sink.

Remove from the milk from the heat and add the vinegar. Stir gently just to mix. The curds and whey will begin to form immediately. The whey looks like cloudy water underneath a mass of thick white curds on the surface.

Working from the side of the pot, gently ladle the whey into the prepared sieve. Go slowly so as not to break up the curds. Finally, ladle the curds into the sieve. Lift the sides of the cloth to help the liquid drain. Resist the temptation to press on the curds. When the draining slows, gather the edges of the cloth, tie them into a bag, and hang the bag from the faucet. Continue to drain until the dripping stops, about 15 minutes. If using the ricotta for cheesecake, drain until it is firm and crumbly, about 30 minutes. Store the ricotta in an airtight container in the refrigerator for up to 1 week.

Comments (9)      Email Email      Print Print

Testing the Levain Bakery Chocolate Chip Cookie Recipe

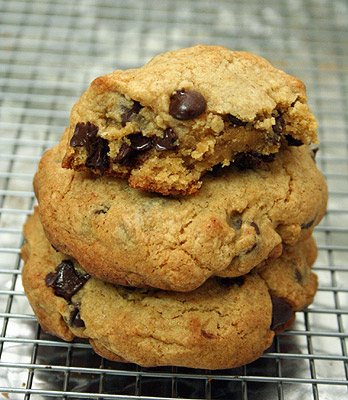
homemade Levain chocolate chip cookies

Two years and 262+ comments later, I finally decided to try the recipe for Levain Bakery’s monstrous chocolate chip cookies. Weighing nearly half a pound, I lusted after them but never dared make them. When they were featured on Bobby Flay’s Throwdown, a torrent of commenters asked me how the recipe was. I shrugged my shoulders but gave educated guesses.

Then, more commenters swooned over the tweaked recipe. With high expectations, I attempted this new version. Sadly, they tasted plain (even after I added 2 tsp vanilla) and had a sandy texture. Sure, there was a nice contrast between the crisp outside and doughy center, but if you piled any chocolate chip cookie dough into a 1/4-cup mound, you’d probably get the same result. My favorite recipe is still the one I’ve been using for nearly 15 years, and it has whole wheat flour. The whole wheat gives it extra flavor, and combined with the brown sugar, a good chew.

Comments (8)      Email Email      Print Print

Hello, winner!

cupcakes Congratulations to Jessica, who won an advance reading copy of Hello Cupcake! What a craftster. When she was 12, she made her sister a farm/bug cake with gummy fish and swirly blue-green icing. I enjoyed reading all of your comments. You are a creative bunch!

Photo: Hello Cupcake! blog

Comments off      Email Email      Print Print

Pay it Forward Giveaway: Hello, Cupcake!

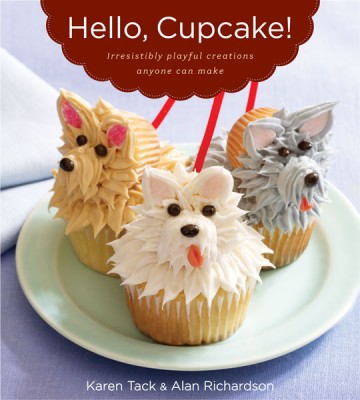
Hello Cupcake book

Happy Easter! In honor of the One who paid it all for me, I’m giving away an advance reading copy of Hello, Cupcake! by Karen Tack, a cooking teacher and food stylist for Gourmet, Parents, Woman’s Day, and several other publications. In this book, she’ll show you how to make an animal farm, “The Starry Night,” and even “spaghetti and meatballs” out of cupcakes.

The book doesn’t come out until April 24, but you can win a copy (a softcover with black-and-white images and almost-finalized text) here if you promise to do a charitable act. To enter, tell me what’s the most creative thing you’ve done with food in the comments section by 12:00 AM EST, Friday, March 28. A winner will be chosen randomly.

cupcake pizza
Photo: Alan Richardson

Can’t wait that long? Get started with Karen’s City Skyline Cupcake and Cupcake Pizza.

Comments (14)      Email Email      Print Print

A Dozen Eggs

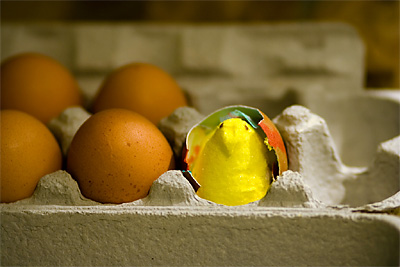
marshmallow Peep in an egg
Photo: Ryan (Metrix X)

Too bad there’s not 12 days of Easter, because if you ate a different type of egg each day, it would take 12 days to explore Gourmet‘s list of unconventional eggs. There’s iguana eggs, dove eggs (I don’t just mean the chocolate kind), and biggest, baddest egg of all. Do you dare try all of them?

My favorite way to use chicken eggs is in flourless chocolate cookies and Valrhona chocolate pavlova.

Speaking of Easter food, I heard through the grapevine that Peeps are very good toasted, because they have an extra layer of crunchy sugar. Why not take it further and make Peep s’mores with bittersweet chocolate? I was going to try them and report back, but I couldn’t justify buying a whole pack of Peeps just to make one s’more. (I don’t eat Peeps otherwise. They’re too sweet.) I’m just putting it out there: if you have too many Peeps, try making some “sandwiches.”

Comments (4)      Email Email      Print Print

St. Patrick’s Day Chocolate Cake

chocolate potato cake

I love potatoes so much that if I were to list the ways I eat them, I would sound a lot like Bubba in Forrest Gump:

Anyway, like I was sayin’, potatoes are the fruit of the earth. You can fry them, bake them, boil them. There’s uh, potato salad, mashed potatoes, screaming potatoes, potato pancakes, potato bread, potato dumplings, potato sticks, potato gratin, criss-cut fries, cream of potato soup, potato curry and potato cake. That—that’s about it.

By cake, I don’t mean latkes. I mean dessert. Mashed potatoes make moist bread, like Nutella babka, but I’d never tried it in cake. I wanted to add it to a favorite chocolate cake recipe, but I wasn’t sure whether it would replace the fat or the flour (because it’s creamy and starchy). Off to the Internet I searched. Some recipes had virtually no chocolate, while others had too much butter. This one, from I Love Chocolate, seemed the most reasonable. Since I didn’t have the Dutch-process cocoa it called for, I used natural cocoa and tinkered with the leavening. Besides, I think natural cocoa has a more complex flavor.

The resulting cake was light and moist. I didn’t think it was chocolatey enough, but maybe it’s because I forgot to add the vanilla. Paired with vegan chocolate frosting, this cake will cause tasters to do a double take. It’s an unusual dessert for St. Patrick’s Day, because it doesn’t scream green (or Guinness). If you really want to go green though, Gourmet.com has plenty of ideas, like apple celery granita.

Irish Chocolate-Potato Cake

Cake adapted from Stephanie Zonis. Frosting adapted from More Great Good Dairy-Free Desserts Naturally by Fran Costigan.

For cake:
2 medium or 1 large potato (to make 1 cup hot, unseasoned mashed potatoes)
2 tsp instant espresso or coffee granules, dissolved in 1 cup hot water
2 cups sifted all-purpose flour
3/4 cup unsweetened natural cocoa powder (not Dutch-processed)
2 tsp plus a pinch of baking soda
1/2 tsp salt
1 stick plus 2 tablespoons unsalted butter, softened
2 cups granulated sugar
1 tsp vanilla extract
4 large eggs

For frosting:
(Makes 2 cups, enough to fill and frost one 9-inch two-layer cake)
Tofu frosting without chocolate is too watery and beany for my tastes. This one, which resembles mousse, is a keeper.

1 (12.3-ounce) aseptic box firm silken tofu (recommended brand: Morinu)
1 tablespoon plus 1 tsp canola oil
1/3 tsp salt
1/4 cup sugar
1/4 cup unsweetened cocoa
1 heaping tsp vanilla extract
6 ounces (about 1 cup) semisweet or bittersweet chocolate, melted
1-3 tablespoons chocolate, vanilla, or plain soymilk, if needed

Equipment: potato ricer/food mill or a fine-mesh sieve, food processor, 9-inch round cake pan, serrated knife, icing spatula

Make mashed potatoes: Boil or steam the potatoes until fork tender, about 15 minutes. When the potatoes are cool enough to handle, peel off the skin. Pass the potatoes through a potato ricer/food mill. Or mash them with a fork and push the mixture through a fine-mesh sieve to get rid of the lumps. (You can make the mashed potatoes a couple days ahead of time.)

Make cake: Position a rack to center of the oven; preheat oven to 350°Â F. Grease 9-inch round pan with butter. Lightly flour the pan, knocking out any excess flour; set aside.

Place mashed potatoes into a medium bowl. With a small whisk, gradually stir in coffee to form a smooth mixture; do not beat mixture excessively. Cool to lukewarm.

Meanwhile, sift together flour, cocoa powder, baking soda and salt. Set aside.

In large bowl, combine the butter, sugar and vanilla with an electric mixer. Beat at a low speed to blend, then beat 2 minutes at medium speed, scraping down bowl and beater(s) with rubber spatula once or twice. Add eggs, 2 at a time, beating in at a low speed until blended. Scrape bowl and beater(s) with rubber spatula. Increase mixer speed to medium; beat 1 minute.

At lowest speed, add sifted dry ingredients in 3 additions and mashed potato-coffee mixture in two additions, beginning and ending with dry ingredients and beating after each addition just until blended. Scrape bowl and beater(s) occasionally with rubber spatula. Batter may still appear curdled after all ingredients have been added.

Pour batter into prepared pan and spread evenly. Bake in preheated oven about 1 hr, rotating pan 180 degrees during baking. Cake is done when toothpick inserted near center emerges with a few moist crumbs still clinging to it. Remove to cooling rack.

During baking, cake center will rise higher than edges, but center will fall slightly as cake cools. Cool completely before frosting. Store at room temperature, covered airtight, for up to 3 days; freeze for longer storage.
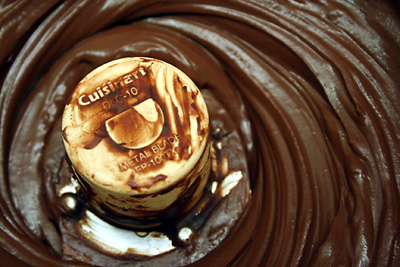
vegan chocolate frosting

Make frosting: Combine the drained tofu, oil, and salt in a food processor, and process about 1 minute until pureed. Use a rubber spatula to clean the sides of the bowl and add the sugar, cocoa, and vanilla. Process 1 to 2 minutes, until the tofu mixture is smooth.

Add the melted chocolate and pulse the processor three or four times to incorporate. Process 1 to 2 minutes until the mixture is very creamy. Refrigerate in the processor for 20 minutes. The cream may need to chill for 1 to 6 hours in order for it to become firm enough to spread.

The degree of firmness will determine the amount of soy milk needed to create the final texture. It should be thick but easy to spread. Dip an icing spatula into the cream to test to the texture. If the cream is too stiff to use, add 3 tablespoons of the soy milk and process 1 minute. Add more soy milk, 1 tablespoon at a time as needed. When the cream is ready to use, spoon it into a bowl and begin to assemble the cake.

Frost the cake: With a serrated knife, level off the top of the cake. Cut the cake into two even layers. (Need more detailed instructions?) Cover one layer with frosting, then add the top layer. Frost the top and sides.
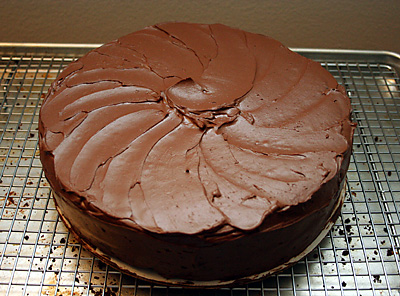
finished chocolate cake

Comments (15)      Email Email      Print Print

It’s All About Meme

Beth, a blogger at CookiePie and a soon-to-be author of a dessert cookbook, tagged me for this meme. Since she was kind enough to think of me, I’ll take a break from my regular food posts and disclose some personal details.

What were you doing 10 years ago?

Practicing for my driver’s license exam.

What were you doing 1 year ago?

Gourmet online screen cap

Working at Court TV (now called TruTV) and dreaming of the food world. Lo and behold, I’m now at Gourmet.com, building web pages, updating the news headlines, pitching food products for the weekly newsletter, and (woohoo!) working on an article for April.

Five snacks you enjoy:

  1. Granola and yogurt
  2. Fruit
  3. Chocolate
  4. Peanut butter anything
  5. Anything else that’s sweet

Five things you would do if you were a millionaire:

  1. Travel to Dubai, all 50 U.S. states and some other cool places
  2. Donate it to charities that fight hunger, AIDs and global warming
  3. Buy an apartment around Union Square in New York
  4. Treat my family and friends
  5. Go to Per Se or some other fancy restaurant

Five bad habits:

  1. Spending too much time on the Internet
  2. Eating too much chocolate
  3. Slouching
  4. Not getting enough sleep
  5. Being unsure of myself at times

Five things you like doing:

  1. Cooking/making dessert
  2. Socializing online
  3. Yoga
  4. Watching the performing arts
  5. Talking to my mom

Five things you would never wear again:

  1. A neon green parka that I wore for St. Patrick’s Day in high school. “Ouch! You’re hurting my eyes!” people said.
  2. Anything yellow (it’s a little too close to my skin color)
  3. 80’s-style leggings
  4. Ill-fitting shoes
  5. A tube top (I’ve never worn one before and don’t plan on it)

Five favorite toys:

  1. Food processor, because it can make almond macaroons, hummus and chocolate-hazelnut butter
  2. Ipod
  3. PC (no Macs!)
  4. Canon digital Rebel camera
  5. Oven

Now I tag Jessie at Cakespy, Niko at Dessert Buzz, Anita at Dessert First, Anna at Cookie Madness and Yoko at Virtual Frolic to participate!

Comments (5)      Email Email      Print Print

A Season for Ice Cream


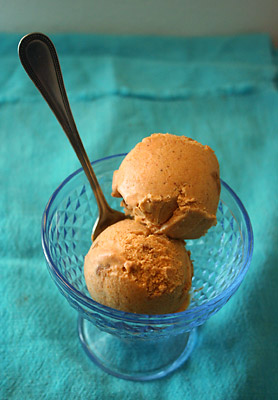
pumpkin pie ice cream

There are two reasons why I shouldn’t eat ice cream right now. First, it’s the dead of winter. Second, it’s not healthy. To both those rules, I say, “I don’t care.” Why are ice cream cravings supposed to turn off just because it’s not summer?

While I’m breaking the rules, why not enjoy pumpkin pie ice cream right now? Thanksgiving’s long gone, but like Maida Heatter says, pumpkin ice cream “has no season.”

Whenever I make macaroons, I always freeze leftover egg yolks so I’ll have them for custard-based ice cream, like the one below. Just remember to add 1 1/2 teaspoons sugar or 1/8 teaspoon salt for every four yolks (and label them!), so they don’t get gelatinous. If you have the opposite problem and have too many whites, you can freeze those too, but I heard they don’t whip as well for meringues.

This version is healthier than regular ice cream, since there’s a high proportion of milk to cream. I encourage you to eat it during the summer, Thanksgiving and yes, the middle of winter.

Pumpkin Pie Ice Cream

Inspired by Frozen Desserts, Chocolate and the Art of Low-Fat Desserts, Gourmet and The Perfect Scoop

Makes about 5 cups

1 1/2 cups whole milk
1 cup firmly packed brown sugar
3 egg yolks
1/2 tsp vanilla extract
1/4 tsp ground cloves
1/4 tsp ground nutmeg
1 tsp ground cinnamon
1 cup pumpkin puree (canned is fine, but make sure it has no added flavorings)
3/4 cup heavy cream
1 tablespoon brandy or vodka
1 1/2 cups crushed graham crackers or gingersnap cookies

In a 2-quart heavy saucepan bring milk, cream, and about half of sugar just to a simmer, stirring until sugar is dissolved. Remove pan from heat.

Have ready a large bowl of ice and cold water. In a bowl with an electric mixer beat yolks, spices and remaining sugar until thick and pale. Add hot milk mixture in a slow stream, whisking, and pour into saucepan. Cook custard over moderately low heat, stirring constantly, until a thermometer registers 170° F, or the mixture coats the back of a spoon. (Do not let boil.) Pour custard through a sieve into a metal bowl set in ice and cold water. Add the brandy/vodka and vanilla and cool. Chill custard, covered, until cold, at least 1 1/2 hours.

Freeze mixture in an ice cream maker. While the ice cream is freezing, scatter a handful of cookies in the bottom of an airtight storage container. When the ice cream is finished churning, quickly fold in the rest of the cookies. Transfer to the storage container and put in freezer to harden, 1 to 3 hours.

Comments (6)      Email Email      Print Print