Archive for Cake

Nutella-Swirl Banana Bread

Nutella-swirl Banana bread

Today is the 8th annual World Nutella Day. As if I needed an excuse to eat Nutella. But if you insist, I made banana bread with a tunnel of love. The trouble with baking Nutella though, is its smoothness and flavor degenerate with heat (as evidenced in my Nutella babka). It’s also candy sweet. So I added a bit of cream for smoothness and chopped chocolate for complexity.

World Nutella Day

Mission accomplished: my cake had lava-like craters of chocolate. I ate three pieces in one sitting, and someone else ate four. It was brown and caramelly because of coconut sugar.

Coconut sugar (my favorite new baking ingredient) is a whole, unrefined sweetener from coconut nectar. It has 412 times the potassium of cane sugar and also contains magnesium, zinc, iron, and B vitamins. It has a low glycemic index too: 35 compared to agave (42) and cane sugar (68). Most importantly, it tastes good, like a tropical toasted marshmallow. You can generally substitute it 1:1 for white sugar. Just know that coconut sugar has some moisture (add more cream of tartar to meringues), and while it resembles brown sugar, the latter has more acidity (adjust leavening accordingly, or only use in place of white sugar). I dig Big Tree Farms because it’s fair trade and not diluted with other sweeteners. Find it at Whole Foods, Amazon, or Vitacost (use the link for $10 off an order of $30 or more).

Thanks to Ms Adventures in Italy and Bleeding Espresso for hosting World Nutella Day. For 700 more recipes, check out the website. Remember, keep calm and eat Nutella.

keep calm and carry a spoon

Nutella-Swirl Banana Bread

Rating: 51

Prep Time: 30 minutes

Cook Time: 1 hour

Total Time: 1 hour, 30 minutes

Nutella-Swirl Banana Bread

Inspired by The Bake Sale Cookbook by Sally Sampson and the Nutella-swirl pound cake from Cake Keeper Cakes

Ingredients

1/2 cup Nutella or other chocolate-hazelnut spread
2 tbsp cream
4 medium overripe bananas, the blacker the better
1 cup coconut or granulated sugar
scant 1/2 cup vegetable oil
2 large eggs, at room temperature
1 tsp vanilla extract
1 1/2 cups all-purpose flour
1 1/2 tsp baking soda
1/2 tsp kosher salt
1/2 cup chocolate chips or finely chopped dark chocolate (60-70%)

Instructions

  1. Preheat oven to 350° F. Grease and flour a 9"x5"x3" loaf pan.
  2. In a small bowl or measuring cup, combine the Nutella and cream. If mixture is stiff, microwave for 10 seconds at 50% power.
  3. In a large bowl, mash the peeled bananas with the sugar. Beat in eggs, oil, and vanilla with an electric mixer on low speed.
  4. In another bowl, whisk together the flour, baking soda, and salt. Add to banana mixture and beat on low speed just until combined.
  5. Pour 1/3 of batter in pan. Take half of the Nutella and cover the batter with tablespoon-sized dollops. Sprinkle half of chocolate on top. Add 1/3 more batter and layer again with remaining Nutella and chocolate. Add the rest of the batter. Zig zag a knife through the pan (just once through, so chocolate streaks remain).
  6. If pan is more than 2/3 full, place a piece of foil below the pan to catch drippings. If pan is more than 3/4 full, prepare for major spillover or add excess to another pan.
  7. Bake for one hour, or until the top springs back when touched and a toothpick inserted in the center comes out without batter (melted chocolate may stick). Chocolate may ooze out, and center may sink when cool. Don't worry, your cake just has character.
  8. Cool and serve from pan (cake will be too delicate to unmold).
http://www.sugoodsweets.com/blog/2014/02/nutella-swirl-banana-bread-recipe/

Related Links:
Homemade Chocolate-Hazelnut Spread
Pierre Herme’s Nutella Tart
Nigella Lawson’s Nutella Torte
Full Nutella Coverage

Comments off      Email Email      Print Print

Favorite (Vegan) Chocolate Cake

Vegan Chocolate Cake

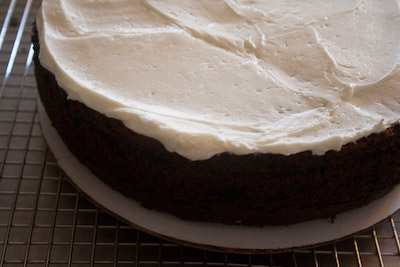
Picking a favorite chocolate cake is like asking a teacher to choose a favorite student, or a parent a child. Narrowing down the categories is hard enough: molten, Nutella torte, layered… But if I could only go with one, it’d be the classic layers. Specifically, this vegan chocolate cake.

Vegan or not, this cake is all about the balance. The first thing you taste is the chocolate—not the sugar (nor any off flavors). The frosting (previously paired with chocolate-potato cake) is like a whipped truffle. Although the cake was developed by the perfectionists at Cook’s Illustrated, I replaced the vegan butter substitute with virgin coconut oil, which has a mellow sweetness and texture akin to real butter.

Although coconut oil is high in saturated fat, it’s not the same kind that’s found in animal products. In fact, the medium-chain fats/lauric acid improve cholesterol ratio levels and may speed up metabolism. I’m not saying you should eat gobs of it, but it’s not as unhealthy as previously thought. Don’t worry, the cake won’t taste like Hawaiian Tropics.

You may be wondering: why can’t I make that easy “dump” cake from Joy of Cooking? Will this recipe really turn out? I used the Joy of Cooking recipe for years, but it’s a snack cake. Something you might eat while watching an action flick. This recipe is something you eat at a fireplace with classical music in the background.

Favorite (Vegan) Chocolate Cake

Rating: 51

Favorite (Vegan) Chocolate Cake

Cake adapted from Cook's Illustrated. Frosting adapted from More Great Good Dairy-Free Desserts Naturally by Fran Costigan.

Vegan or not, this cake is a winner for its delicate texture, deep chocolatiness, and truffle-like frosting.

Ingredients

For the cake:
1 2/3 cups sugar
2 1/2 cups all-purpose flour
1/2 cup oat flour (or whizz oatmeal in a food processor until very fine)
2 teaspoons baking soda
3/4 teaspoon salt
1/3 cup Dutch-processed cocoa
1/3 cup natural cocoa
1 1/2 ounces unsweetened chocolate, chopped
1 cup hot brewed coffee
1 cup light coconut milk
2 tablespoons cider or white wine vinegar
1 1/2 teaspoons vanilla extract
1/2 cup virgin coconut oil
For the frosting:
1 (12.3-ounce) aseptic box firm silken tofu (recommended brand: Morinu)
1 tablespoon plus 1 teaspoon canola oil
1/3 teaspoon salt
1/4 cup sugar
1/4 cup unsweetened cocoa
1 heaping teaspoon vanilla extract
6 ounces (about 1 cup) semisweet or bittersweet chocolate, melted
1-3 tablespoons chocolate, vanilla, or plain soymilk, if needed
Equipment:
food processor
2 9-inch round cake pans
Serrated knife
Icing spatula

Instructions

    Make cake:
  1. Position racks in the middle of the oven and preheat to 350° F. Grease and flour two 9-inch round cake pans.
  2. Sift sugar, flours, baking soda, and salt into a large bowl, then whisk to combine.
  3. In another large bowl, combine cocoas and chocolate. Pour hot coffee over mixture and whisk until smooth.
  4. Combine coconut milk, vinegar and vanilla in large cup. Place coconut oil in a medium bowl and add the coconut-milk mixture in two additions, whisking until smooth after each.
  5. Add the coconut mixture to the chocolate and whisk to combine. Add this mixture to the dry ingredients, folding gently with rubber spatula until just incorporated and no flour streaks remain.
  6. Divide batter evenly between pans and bake until toothpick inserted in the center comes out clean, 20 to 25 minutes, switching pans and rotating them after 12 minutes. Cool cakes in pans to room temperature, about 2 hours.
  7. Make frosting:
  8. Combine the drained tofu, oil, and salt in a food processor, and process about 1 minute until pureed. Use a rubber spatula to clean the sides of the bowl and add the sugar, cocoa, and vanilla. Process 1 to 2 minutes, until the tofu mixture is smooth.
  9. Add the melted chocolate and pulse the processor three or four times to incorporate. Process 1 to 2 minutes until the mixture is very creamy. Refrigerate in the processor for 20 minutes. The cream may need to chill for 1 to 6 hours in order for it to become firm enough to spread.
  10. The degree of firmness will determine the amount of soy milk needed to create the final texture. It should be thick but easy to spread. Dip an icing spatula into the cream to test to the texture. If the cream is too stiff to use, add 3 tablespoons of the soy milk and process 1 minute. Add more soy milk, 1 tablespoon at a time as needed. When the cream is ready to use, spoon it into a bowl and begin to assemble the cake.
  11. Frost the cake:
  12. Level off the top of the cakes (mine always come out domed): With a serrated knife in your dominant hand, keep your cutting arm against your body and bend your forearm so it’s parallel to the cake. Steadily place your free hand on top of the cake and turn it counter-clockwise (if you're left handed, rotate the cake clockwise) into the knife. Do not move your cutting hand. Keep pushing/rotating the cake into the knife, and you’ll get a clean cut.
  13. Top one layer with a cup of frosting (when in doubt, it's easier to work with more frosting than less). Spread the frosting to the edges by rotating your wrist. To prevent stray crumbs, lift the spatula off the cake as few times as possible and gently nudge the frosting rather than making sweeping movements.
  14. Place the second cake layer on top and cover the top and sides with frosting. After one day, store cake in fridge.
  15. Save the leftover frosting for vegan truffles!
http://www.sugoodsweets.com/blog/2013/03/favorite-vegan-chocolate-cake-recipe/

Comments (1)      Email Email      Print Print

Flourless Poppy Seed Cake

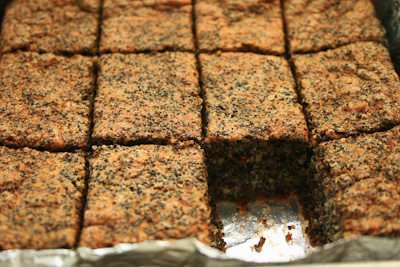
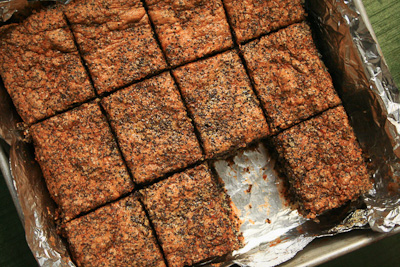
flourless poppy seed cake

Someone explain to me the appeal of poppy seeds. You shouldn’t like them. They get stuck in your teeth. If you eat too many, you’ll test positive for opium (thanks for the lesson, Seinfeld!). Yet poppy seed muffin recipes are as prolific as chain letters, and a bagel wouldn’t be a bagel without those crunchy little pareils. Drug tests and teeth be darned; I like eating gobs of poppy seeds, not just treating them like garnish. This cake recipe is for people like me. If you’re celebrating Passover or are celiac, this recipe is definitely for you too.

I adapted this cake from Chocolate & Zucchini, who riffed on it from Lilo. Clotilde at C&Z calls for almond butter and almond flour. I’m a minimalist and say you can make your own with whole almonds; it’ll taste fresher that way too.

flourless poppy seed cake

Flourless Poppy Seed Cake

Prep Time: 40 minutes

Cook Time: 45 minutes

Total Time: 1 hour, 25 minutes

Yield: 12 servings

Flourless Poppy Seed Cake

Ingredients

160 grams (1 1/3 cup) raw almonds
60 grams (1/4 cup) butter, at room temperature
125 grams (1/2 cup plus 2 tablespoons) light brown sugar
160 grams (1 cup + 2 tablespoons) poppy seeds
finely grated zest from one organic lemon
4 eggs, separated
pinch of salt

Instructions

  1. Preheat oven to 350° F. In an 8-inch round or square cake pan, toast almonds 10-15 min., or until flesh is light brown and fragrant. Cool for about 20 min.
  2. In a food processor, combine 100 grams (a little more than 3/4 cup) almonds and 100 grams (1/2 cup) sugar. Grease the cake pan (for baking later). Process until the almonds resemble a fine meal. Transfer the almond meal to a small bowl and combine with the poppy seeds.
  3. Grind the remaining almonds in the food processor until it resembles nut butter. It will go from a fine meal to forming a ball around the blade to “butter.” If it doesn't seem like you're making progress, keep processing. The heat and friction will smooth out the almonds.
  4. Transfer the almond butter to a medium bowl. Add the butter, lemon zest, and egg yolks and combine with electric beaters till fluffy. Don’t be a smart aleck like me and attempt to mix in the food processor. The heat will scramble the yolks.
  5. Wash the beaters very well (twice if you need to). In a grease-free bowl, combine the egg whites with the salt and beat until frothy. With the beaters still running, gradually add the sugar and beat until the you get glossy, stiff peaks.
  6. Gently add one third of the egg whites to the almond butter mixture and combine with a spatula. Fold in half of the poppy seed mixture. Add another third of the egg whites and fold. Fold in the remaining poppy seeds, then the last of the egg whites, working carefully to keep in as much air as possible. Stop folding when the egg whites are incorporated (mixture can remain lumpy).
  7. Pour into prepared pan and bake for 30 min, until puffy and light brown. Turn oven off and let cake cool inside for 10 min.
  8. Transfer to a cooling rack.
http://www.sugoodsweets.com/blog/2012/04/flourless-poppy-seed-cake/

Comments (2)      Email Email      Print Print

Caramel Apple Upside-Down Cake

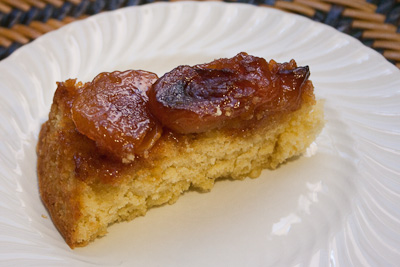
apple caramel upside-down cake

If I mention upside-down cake, you’ll probably picture a neon concoction with pineapple and maraschino cherries. The cake became popular in the early 1900s, when pineapple was first canned. But it’s been with us since the Middle Ages, when cooks used seasonal fruits and cast-iron pans.

Since apples are my favorite way to welcome cold weather (I first made this in the fall, when apples were at their peak. It was so delicious that I had to share.), I used them in upside-down cake. All the recipes I’ve seen call for briefly sautéing the apples, then transferring them to a baking pan. People, you’re losing the yum yums! If you cook something in a skillet, keep the browned bits in there.

I followed the tradition of tarte Tatin by caramelizing apples with butter and sugar in a cast-iron skillet. But instead of topping it with pie dough, I used low-fat yellow cake, from the infallible Alice Medrich. The buttermilk gives the cake tang and tenderness, while the gooey caramel apples glisten like jewels. When I first made this, my friend and I ate a quarter of it, knowing that I’d have to serve it for Thanksgiving the next night. In the following days, three slices easily equaled one serving.

There are dozens of apple varieties, but I recommend Golden Delicious, as it keeps its shape when cooked and isn’t too tart. If you’re lucky enough to score Golden Russets at the farmers market in the fall, they’re even better. Beneath the sandpaper skin lies juicy, gingery flesh.

Caramel Apple Upside-Down Cake

Topping adapted from The 1997 Joy of Cooking; cake adapted from Chocolate and the Art of Low-Fat Desserts by Alice Medrich

Special equipment: a 9-inch cast-iron skillet (preferred), or any pan without non-stick coating. If your pan has plastic handles, cover them  with several layers of foil.

For the caramel apples:
6 medium-large Golden Delicious apples (about three pounds)
1/2 stick butter
1 cup sugar

For the cake:
1 1/2 cups sifted all-purpose flour (6 ounces)
1/4 teaspoon baking powder
1/4 teaspoon baking soda
3/8 teaspoon salt
2 large eggs
1 1/4 teaspoons vanilla extract
1/2 cup 1% fat buttermilk (Substitute: place 1/2 tablespoon vinegar in a measuring cup and fill with milk until it equals 1/2 cup. Let stand for 5 minutes.)
5 tablespoons unsalted butter
1 cup sugar

Make the caramel apples:
Peel, core, and quarter the apples. Melt butter in the pan. Remove from the heat and sprinkle sugar evenly over the bottom.

Tightly arrange the apples, flat side down, in a ring against the sides of the skillet. Fill in the center of the skillet with the remaining apple quarters. Keep in mind that the apples will shrink while cooking. You may have a couple pieces of apples left.

Place the skillet over the highest possible heat and cook, stirring, until the juices turn from butterscotch to deep amber, 10 to 12 minutes. Remove the skillet from the heat. Spear the apples with a fork or the point of a paring knife and flip them onto their uncooked sides. Return the skillet to the heat and boil for two minutes more. Apples will continue to cook even after you turn off the heat.

Make the cake:
Have all ingredients at room temperature. Position a rack in the lower third of the oven and preheat to 325° F.

In a medium bowl, whisk the flour, baking powder, baking soda, and salt together.  In a small bowl, beat the eggs together.  In another small bowl, combine the vanilla and buttermilk. Set all three bowls aside.

Cut the butter into chunks and place in a large bowl. With an electric mixer on low speed, beat till softened, about 1 minute. Gradually add the sugar, beating for about 3 minutes. Gradually drizzle in the eggs, beating at medium-high speed for 2 to 3 minutes. On low speed, beat in a third of the flour mixture, scraping the bowl with a spatula as needed. On medium-high speed, gradually drizzle in half the milk, continuing to scrape the bowl.  On low speed, beat in half of the remaining flour, then the rest of the milk on high speed.  Beat in the remaining flour on low speed just until combined, and continue to scrape the bowl as needed.  The batter may look curdled.

Scrape the batter over the apples and bake for about one hour, or the cake starts to pull away from the sides of the pan, the top is golden brown, and a toothpick inserted through the center comes out clean.

Cool for 10 minutes, then invert onto a plate.  If the caramel has cooled too much and becomes hard, place the pan over a low flame for a couple minutes to loosen the caramel.

Related Links:
More apple desserts
Banana upside-down brownies
The history of upside-down cakes

Comments off      Email Email      Print Print

Chocolate-Peppermint Cake

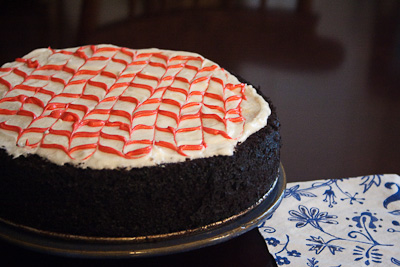
chocolate cake with peppermint frosting

My go-to chocolate cake is from the ancient days of the Food Network, when it was located in Long Island (instead of Chelsea Market in Manhattan), and AOL was synonymous with the Internet. Actually, back in the 90s, you could request recipes by sending a SASE envelope to their offices (in case you didn’t have Internet access). It only took two months before you received the recipe in the mail.

Nowadays, you can look up any recipe on your phone while you’re standing in line at the grocery store, but this recipe still has its charm. It’s everything you’d want in a chocolate cake: rich, moist, dark, and airy. It’s just like the cake mix but better. I’ve updated this classic and added peppermint frosting for the holidays.

Psst! Still figuring out what to give people this year? Here’s dozens of ideas for homemade gifts.

Chocolate Peppermint Cake

Cake adapted from the Food Network’s “How to Boil Water,” hosted by Sean Donnellan; frosting inspired by The 1997 Joy of Cooking

Cake:
1 3/4 cups all-purpose flour
2 cups sugar
3/4 cup unsweetened natural cocoa powder (not Dutch-processed)
1 1/2 teaspoons baking soda
1 1/2 teaspoons baking powder
1 teaspoon salt
2 eggs
1 cup milk
1/2 cup vegetable oil, preferably expeller pressed
1 teaspoon vanilla extract
1 cup boiling water

Frosting:
1 stick unsalted butter
2 cups powdered sugar, sifted
1/8 teaspoon salt
A couple drops of red food coloring (optional)
1/2 teaspoon peppermint oil, or to taste
A couple tablespoons milk, as needed

Make the cake: Preheat oven to 350° F. Prepare one 9-inch cake pan or bundt pan by spreading it with butter, dusting it with flour, and tapping out the extra.

In a large bowl, whisk the flour, sugar, cocoa, baking soda, baking powder, and salt. In a small bowl, beat the eggs, milk, oil, and vanilla on medium speed with a hand mixer, until well mixed. Slowly add the boiling water and mix. Add the wet ingredients to the flour mixture and stir with a wooden spoon, just until smooth.

Pour batter into pan. Bake 50-55 minutes, or until a toothpick inserted in the center comes out clean. Cool completely before frosting.

Make the frosting: In a large bowl, beat the butter on low speed until fluffy, then gradually add the powdered sugar and salt. As soon as it’s incorporated, increase the speed to medium and mix until smooth. Add the food coloring if desired, or set aside a portion to color, so you can pipe a candy stripe design. With a rubber spatula, mix in the peppermint oil (do not use the electric mixer, as it will cause the aroma to dissipate). If needed, thin out the frosting with one tablespoon of milk at a time.

Frost cake: Place the cake on a platter and using an offset spatula, spread the frosting evenly on top, 1/2″ thick. To create the candy stripe design, fill a ziptop bag with half a cup of red frosting, and cut a very small corner off the tip of the bag (when in doubt, but a smaller hole than you think you need; you can always make it bigger if you have to). Pipe red stripes across the cake, 3/4″ apart. Drag a toothpick through the stripes to create the swirled design.

Comments (7)      Email Email      Print Print

Red Velvet Cake with Beets

red velvet cake with beets

Sorry to invoke wrath of Southerners, but red velvet is not a cake flavor. It’s a fancy name for a neon novelty. According to legend, the color comes from the chemical reaction of cocoa powder and acid (nowadays, we enhance it with food coloring). That doesn’t sound right, because most recipes only have two tablespoons of cocoa, which isn’t enough to cause a huge change in hue, much less chocolatiness.

Even though the FDA says that food coloring is nontoxic, I have second thoughts when I have to dump a whole bottle of red #40, ground beetles, or whatever into a cake. I’d rather use non-lab produced ingredients, like beets. And seriously, why so stingy with the cocoa? The cake has to taste like chocolate.

I found a recipe that satisfies both criteria: it’s from the American Cancer Society’s Taste More Birthdays Cake Contest. As the name suggests, it’s semi healthy with less sugar and fat but plenty of vegetables, fruit, and whole grains. The ingredients sound strange, but the earthiness of the beets goes well with the chocolate, and the fruits add tartness. Just tell your friends that you made chocolate-raspberry cake, and they won’t have to know your secret. It’s so moist and rich that I don’t think it needs frosting. My only complaint is that it loses its bright red color after it comes out of the oven.

I adapted the recipe so the prep time’s cut in half (using canned beets saves more than two hours). I also changed the dried fruits so it’s less expensive.

New Red Velvet Cake

Adapted from Alexandra Mudry
(Makes one 9”x14” cake, two 8” round cakes or 24 cupcakes)

Cake:
1 1/2 15-oz. cans unseasoned beets (to make 2 c. purée)
1/2 c. dried dates, pitted and coarsely chopped
1/2 c. prunes, coarsely chopped
1/2 c. unsweetened applesauce
1 c. granulated sugar
1/2 c. expeller-pressed canola oil
3 large cage-free eggs
3 oz. unsweetened chocolate, melted
1 tsp. instant espresso powder or instant coffee
1/2 c. unsweetened natural cocoa powder (not Dutch-processed)
1 c. all-purpose flour
3/4 c. whole wheat flour
1 1/2 tsp. baking soda
1/2 tsp. salt

Place beets in a blender or food processor with 2-3 tbsp. water. Purée beets until smooth. Blend in the dates and prunes. Set aside. (Can be made several days ahead and stored in an airtight container in the refrigerator.)

Preheat oven to 375° F. Spray baking pan(s) with oil and dust with flour. Discard the excess flour (if making cupcakes, just line the tins with paper wrappers).

Combine the oil, eggs and sugar in a mixing bowl. Beat with an electric beater on medium speed until smooth and light colored.

Add the espresso powder to the melted chocolate and stir until combined.

Turning the speed down to low, slowly drizzle the melted chocolate into the mixture. Once the chocolate has been added, turn off the machine and scrape the sides of the bowl.

In a separate bowl, combine the cocoa powder, applesauce and beet purée. Add this mixture to the egg mixture. Beat on medium speed to incorporate.

Sift the remaining dry ingredients together and then gently fold into the mixture (don’t overmix or the cake will become tough).

Pour batter into the pan(s) and bake for 40-45 minutes (or 20-25 for cupcakes), or until a toothpick inserted in the center comes out clean.

Cool and remove from pan(s). If not using immediately, wrap in plastic wrap and refrigerate. Cake can be made a day in advance. (The cake is delicate and crumbly so it’s much easier to work with once chilled. )

Cream Cheese Frosting (optional):
24 oz. (3 pkgs) reduced fat cream cheese, room temperature
1 1/4 c. confectioners’ sugar, sifted
2 tsp. vanilla extract

Lightly beat the cream cheese and vanilla with an electric mixer until smooth, about 1-2 minutes.

Scrape down sides of bowl then add confectioners’ sugar. Cream together until smooth. Don’t overmix or the frosting will become too soft and difficult to spread.

Assembly:
If using a 9” x 14” pan, cut the cake lengthwise down the middle so you have two layers.

Cover with cream cheese frosting.

Serves 10-12 generously.

Vegetables in Dessert:
Heirloom Tomato Cake, Chocolate-Potato Cake, Bean Brownies, Classic Carrot Cake, Potato-Chip Cookies, and more

Comments (11)      Email Email      Print Print

Brown Butter Pound Cake

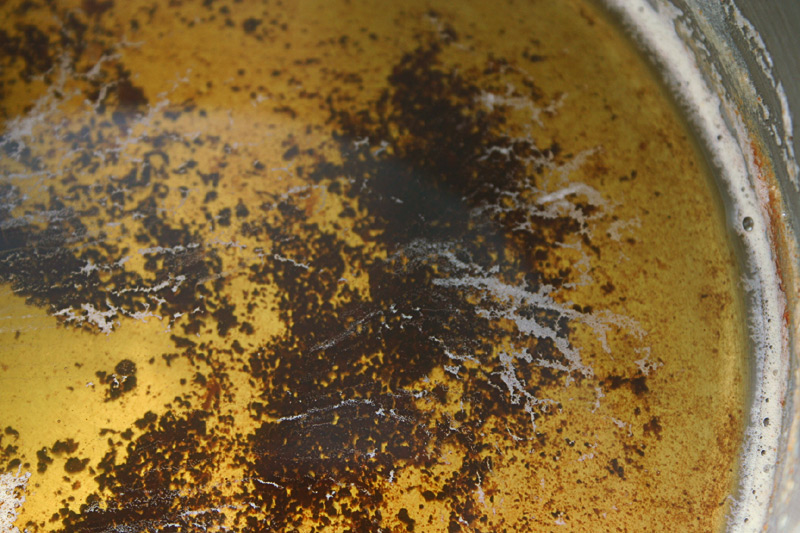
Like most ingredients, butter undergoes a beautiful transformation when it’s heated. I would never dream of using nuts or whole spices without toasting them first, and caramelized sugar intensifies the flavor of homemade chocolate-hazelnut spread. Likewise, brown butter adds another dimension to otherwise familiar foods. There’s a reason why it’s called beurre noisette (hazelnut) in French: it has a seductive, nutty flavor.

brown butter

Brown butter is already in financiers, icing and shortbread. It might as well be the new bacon. But I never had a proper application until trying the sea salt cookies from the Brown Butter Cookie Company. (I’m not being facetious. That’s the name of the company.) Holy goodness, they smelled intoxicating. They tasted even better.

Since pound cake is all about the butter, I thought it would be an excellent vehicle for beurre noisette. As the old tale goes, take a pound each of butter, sugar, eggs and flour, and “beat it all well together for an hour with your hand, or a great wooden spoon.” There you have it: pound cake. Thankfully, the method and the ratios have changed over the years.

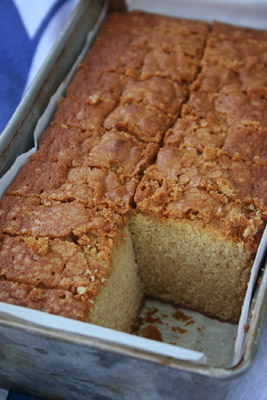
brown butter pound cake

The recipe I tried is traditional in that it doesn’t call for chemical leaveners (ie baking soda). Therefore, don’t cheat on the creaming stage: it’s your only chance to aerate the batter.

My cake had an inviting tan color and a crackly crust, but it was very firm. I don’t know if it was the recipe (I forgot to adjust the liquid. As butter boils down, 25% of it evaporates. No worries though—the version below should be correct.) or my temperamental oven. But it was a good launching pad and as expected, irresistably buttery.

Brown Butter Pound Cake
Adapted from Flo Braker in The Joy of Cooking

1/2 lb (2 sticks) unsalted butter
2 cups sifted (before measuring) cake flour*, or weigh out 196 grams
5 large eggs
1 tsp vanilla
1/4 cup milk
2/3 cup brown sugar
2/3 cup sugar
heaping 1/4 tsp salt

  • Cut the butter into small pieces and put it into a large, cold saucepan. Over medium heat, swirl the butter occasionally as it melts. Foam will rise to the top, and the milk solids will sink to the bottom. Stir the butter more frequently as it starts to color; you don’t want the solids to burn. When the liquid turns golden and releases a nutty aroma (about 10 minutes, but I wasn’t really counting), immediately take it off the heat and pour into a clean bowl. If you burned some of it like I did, strain the butter through a fine mesh sieve or coffee filter. Cover well and refrigerate until the butter is solid, a couple hours.
  • Have all ingredients at room temperature, 68-70° F. Preheat the oven to 325° F. Grease and flour on 9 x 5-inch (8-cup) loaf pan or line the bottom with wax or parchment paper.
  • Resift the flour twice. I know it’s a pain, but you want the cake to be airy, don’t you?
  • In a medium bowl, whisk the eggs, vanilla and milk.
  • In a large bowl, but the butter until creamy, about 30 seconds. Gradually add the sugars and salt. Scrape the sides of the bowl and beat on high speed until lightened in color and texture, 3 to 5 minutes. Gradually drizzle in the egg mixture, about 1 tablespoon at a time, and beat until light and fluffy, 3 to 4 minutes.
  • Add the flour in 3 parts, beating on low speed or stirring with a rubber spatula until smooth and scraping the sides of the bowl as necessary.
  • Scrape the batter into the pan and spread evenly. Bake until a toothpick inserted into the center comes out clean, 1 hour to 1 hour 10 minutes. Let cool.

*In a jiffy, here’s how to substitute 1 cup unsifted cake flour: measure 2 tablespoons cornstarch and add enough all-purpose flour till it equals 1 cup. Some people think cornstarch tastes chalky, so you can also substitute 7/8 cup (that’s 1 cup minus 2 tablespoons) all-purpose flour.

More on brown butter:
San Francisco Chronicle tutorial
Brown Butter Cookie Company
Pastry chef Michael Laiskonis’s financiers
Lottie + Doof’s shortbread
Martha Stewart’s brown sugar pound cake with brown butter icing

Comments (6)      Email Email      Print Print

Avocado Cake

The first time I tried avocado in a dessert, it was in a milkshake at an eclectic restaurant. I loved avocados; I loved sugar. Why not? Then my cousin pointed out, “Ew! You’re going to drink pure fat!” By the time the shake came, I could only muster a sip. My mom, ever the good sport, finished it for me.

avocado popsicle

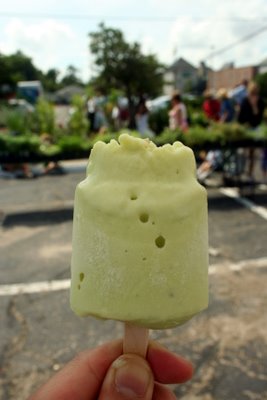
Ten or so years later, I encountered an avocado Popsicle at the New Orleans farmers market. By now I knew that avocados were common in Southeast Asian and Latin American desserts and wasn’t grossed out. This Popsicle was like ice cream on a stick; it was refreshing on that blistering day.

avocado cake

When my aunt recently visited me, she brought along gifts: Harbor Sweets chocolate, Trader Joe’s freeze-dried mangosteens, lettuce and avocados. (She was just being practical with the veggies.) That avocado was getting softer by the day, and like all surplus food, I had to turn it into dessert. I almost went with avocado pancakes, but they’re savory. So I went with this tender cake from Accidental Hedonist. As Kate says, “Done correctly, it’s a cake that can sit with pride next to your zucchini bread or pumpkin cake.” It doesn’t taste gross, but it’s faintly vegetal in a good way, like carrot cake.

It’s so good that I might substitute puréed avocado for butter in other recipes. It’s kind of healthy too: avocado’s high in omega 3s, vitamin E and fiber. If you’re worried that people will be put off by the green color, just tell them you made a pistachio cake, which sounds far fancier. Trust me, it’s worth saving your avocados for.

Recipe is at Accidental Hedonist
You can skip the walnuts and dried fruit if you wish. To make 20 cupcakes, bake for about 20 min. in a 350° F oven.

Related links:
More Vegetables in Dessert: Heirloom Tomato Cake, Chocolate-Potato Cake, Bean Brownies, Classic Carrot Cake and Potato-Chip Cookies
Gourmet’s Test Kitchen Challenge: Avocado Marshmallows v. Avocado Crème Brûlée
More on my Trip to New Orleans and the Relief Work That We Did

Comments (5)      Email Email      Print Print

You Say Tomato, I Say Cake

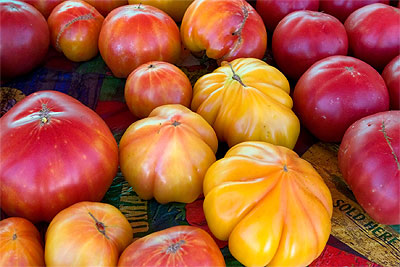
heirloom tomatoes
Photo: Clay Irving

The things people bake these days: cake with pork and beans and tomato soup! Scary ingredients, yes (why would you use canned soup when fresh tomatoes are falling off the vine?), but scary concept, no.

If you like carrot cake, fudgy brownies (with a secret ingredient), or zucchini bread, Carole Walter’s tomato cake isn’t far off. For the best results, use heirloom tomatoes. The uglier the better. You won’t taste the tomato, but instead you’ll get a moist “spice cake.” It is one of my favorite cakes, and it has relatively little butter. Sorry, no pictures. I made this a couple years ago.

Sugarsweet Tomato Nut Torte

From Great Cakes by Carole Walter

(Serves 8 to 10)

3/4 pound very ripe tomatoes
1 tablespoon cider vinegar
1 1/2 cups walnuts
1/3 cup (2/3 stick) unsalted butter
1/2 cup unbleached all-purpose flour, unsifted
1 cup sifted unbleached all-purpose flour
1 teaspoon baking soda
1/2 teaspoon salt
1 teaspoon ground cinnamon
1/2 teaspoon ground nutmeg
4 large eggs
1 1/4 cups dark brown sugar, lightly packed
2 teaspoons freshly grated navel orange rind (optional)
1 teaspoon vanilla extract

1. Cut an X in the skin on the bottom of each tomato. Remove the cores, place the tomatoes in a bowl and add boiling water to cover. Allow to stand for 1 minute, then rinse in cold water and peel off the skins. Cut each tomato in half across the core and squeeze gently to remove seeds and juice. Puree the pulp in a food processor. You should have about 1 cup of puree. Stir in the vinegar and set aside.

2. Position a rack in the lower third of the oven and preheat to 325 degrees. Butter a 9-inch springform pan and line the bottom with parchment paper.

3. Put walnuts and 1/2 cup unsifted flour in the container of the processor fitted with the steel blade and pulse 8 to 10 times, until nuts are chopped to medium size. Transfer to a bowl and set aside.

4. In a small pan, melt the butter over low heat. Set aside to cool to tepid. Sift together the 1 cup sifted flour, baking soda, salt, and spices in a triple sifter. Set aside.

5. Place the eggs in the large bowl of an electric mixer fitted with beaters or whip attachment. Beat on medium-high speed until thickened and light in color, about 1 1/2 to 2 minutes. Gradually add the brown sugar over 2 to 3 minutes and beat for 3 minutes longer. The mixture will be very thick.

6. Reduce mixer speed to medium-low. Blend in the orange rind and vanilla. Add the flour mixture alternately with the tomato puree, dividing the dry ingredients into 3 parts and the puree into 2 parts, starting and ending with the flour. Scrape sides of bowl as needed. The batter will be very loose.

7. Quickly pour in the butter, then add the nuts, beating just until blended.

8. IMMEDIATELY pour the batter into the prepared pan. Center the pan on the rack and bake in the preheated oven 55 to 60 minutes, until cake is golden brown, springy to the touch, and the sides, begin to come away from the pan. A toothpick inserted into the center should come out dry.

9. Remove from oven and set the pan on a cake rack to cool completely. Release the outer rim of pan, invert the cake onto the rack, and peel off the parchment paper. Place top side up on a serving platter. Just before serving, dust the top with confectioners’ sugar. If you like, split the cake into two layers with a long thin knife, then fill and frost with whipped cream made with 1 1/2 cups heavy sweet cream. Garnish with chopped walnuts.

Comments (6)      Email Email      Print Print

A Lovely Winner

Congratulations to Niko of Dessert Buzz for winning a free galley of CakeLove! While most people love cake because of the frosting, his favorite part is the contrasting textures. Extra points for originality, but I did pick a random winner.

Comments (2)      Email Email      Print Print