Coconut, Chocolate, and Caramel Tart (aka the “Samoa”)

What do you do with a cup of leftover cream and a handful of almonds? Per usual, I turned it into a dessert but had to beg people to eat this Chez Panisse tart (a famous dessert that looks deceptively plain). I was met with skepticism: “You used old cream to make a tart? And it has a stick of butter too? Gee, thanks.” Some people didn’t bother trying it. Others eyed it suspiciously and insisted on only taking a nubbin. But once they tasted it, they couldn’t stop raving:
“Man, so delish. Not sure what I was thinking about taking a smaller piece. I inhaled it.”
“It’s divine.”
“Jess, you can clean out your cupboard any time you want.”
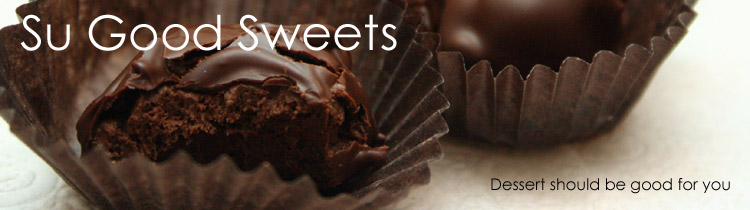
Imagine extra-rich dulce de leche, crunchy almonds, and a crumbly crust. You might be a chocolate person. You might be a nut-free person. Doesn’t matter. You’ll still like this dessert.
The recipe’s solid, so I made it a second time but as a homemade Samoa (my favorite Girl Scout cookie). All I did was add coconut, chocolate, and cacao nibs for crunch. It’s much easier than rolling out individual cookies, cutting the dough, dipping the baked cookie, and drizzling it with chocolate (although Chow’s version looks promising).
This tart has a lot of steps, but the dough is very forgiving. As I was shaping it, I worried that the heat from my hands would turn it into mush. And it came out fine! For tips, I recommend David Lebovitz’s photo tutorial (it’s for the original tart, but my recipe’s close enough). And do yourself a favor: spread it out over two days (one for making the dough, another for baking).

Coconut, Chocolate, and Caramel Tart
Inspired by Chez Panisse Desserts by Lindsey Shere
16 servings
Special equipment:
9- or 10-inch tart pan
parchment paper
heatproof spatula
For the dough:
1 cup (140 g) flour
1 tablespoon sugar
1/4 teaspoon salt
1/2 cup (4 oz, 115 g) chilled unsalted butter, cut into little cubes
1 tablespoon ice water
1/2 teaspoon vanilla extract
- Whisk the flour, sugar, and salt in a bowl.
- Add the butter and mix with your fingers, a fork, or pastry blender until the butter’s in very small pieces, the size of rice.
- Add the water and vnailla and mix until the dough is smooth and comes together.
- Press into a flat disk, wrap in plastic and chill thoroughly.
- When ready to put the pastry in the pan, grease the bottom of the pan and line it with a circle of parchment paper. Let the dough come to room temperature and press the dough into a tart shell using the bottom of your hand. Try to get the dough flat on the bottom, and push it evenly up the sides with your thumbs. It doesn’t need to be perfect, but you want to make sure the sides don’t collapse. If that happens, you can take it out midway during baking, and push the dough back up the sides.
- Put the tart crust in the freezer and chill thoroughly.
- When ready to bake the crust, preheat the oven to 375° F.
- Bake the crust for 20-30 minutes, until it is set and light golden-brown.
- Remove from the oven and patch any holes with leftover dough (or use a water-flour paste).
For the tart filling:
1 cup (250 ml) heavy cream
1 cup (200 g) sugar
1/8 teaspoon salt
1 cup unsweetened flaked coconut, preferably lightly toasted
1 teaspoon vanilla extract
- To bake, place the tart pan on top of a baking sheet (in case the filling leaks).
- Heat the cream, sugar, and salt in a big, wide heavy pot (use one that’s at least 4 qts) until it begins to boil.
- Continue to cook and when it starts to foam up, remove it from the heat and stir in the coconut and vanilla.
- Scrape the filling into the crust. If there’s too much filling, save it; if the tart leaks, you can re-fill the crust.
- Make sure everything’s evenly distributed and there’s no clumps of coconut. Put the tart into the oven.
- After ten minutes, check the tart.
- Take a heatproof silicone spatula, hold it diagonally, and tap the entire surface of the tart to break up the top layer. Do not break the pastry underneath; you just want to break up surface crust that’s forming. This step is very important to cook the filling evenly and prevent it from looking wrinkled.
- Continue to cook, checking the tart every 5-8 minutes, and break up any dry crust that may be forming, easing off as the filling sets up. As it begins to caramelize, stop tapping it and let the tart finish cooking on its own.
- Remove the tart from the oven when the filling is light brown (like the color of caramel sauce) and there are no large, gooey pockets of white filling, about 30 minutes.
For topping:
1/4 cup cacao nibs
1/2 cup finely chopped dark chocolate
- Immediately cover the tart with cacao nibs (you want it to stick to the still-hot caramel).
- Let the tart cool a few minutes on a cooling rack and sprinkle chocolate on top. The entire surface should be covered. Don’t be shy. Add more chocolate if you have to. (There should be at least twice as much chocolate/nibs than pictured above.)
- Check and see if the tart has fastened itself to the tart ring. Slide a knife (or a curved vegetable peeler, which will slide between the ridges) along the edges of the crust to loosen it from the ring.
- When completely cool, remove the ring by resting the tart on top of a solid object and gently coax the ring off. Slip a large spatula underneath it the tart to remove the bottom of the pan. Cut into slivers (best done with a serrated knife).
Make-ahead: The dough can be made in advance, and chilled (up to 4 days) or frozen longer. The dough can be frozen once it’s pressed in the tart pan. Wrap in plastic if you don’t plan to bake it within 48 hours. Once baked, store the tart at room temperature. Wrap in plastic wrap if keeping for more than one day. It’s best eaten on the first day but will keep for up to 4 days.


