Archive for Light Delights

Drink to your health: banana hot cocoa

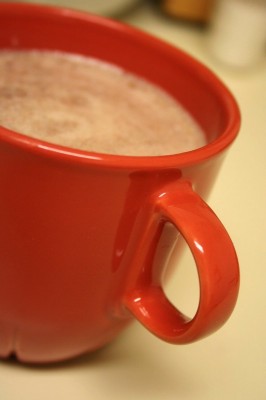
banana hot cocoa

Caffeine addicts drink coffee every day, while the health-conscious turn to tea or wine.  As for me, my daily drink is hot cocoa.

It’s no secret that cocoa contains more antioxidants than green tea and vegetables:

"Like some other plant foods, chocolate is chock-full of a wide range of antioxidant compounds called polyphenols, including the procyanidins epicatechin and catechin. Fruit, vegetables, wine, and tea have polyphenolic flavonoids as well but, amazingly, polyphenols are found in much higher abundance in chocolate and cocoa. The amount of polyphenols in milk chocolate is equivalent to that of five servings of fruits and vegetables. The following is the measurement of the polyphenol content in 1.25 ounces of cocoa products:

  • Milk chocolate 300 mg
  • Dark chocolate 700 mg
  • Cocoa powder 1,300 mg

Polyphenols are antioxidants that help the body’s cells resist damage from free radicals, which are formed in normal body processes as well as by environmental pollution, poor diet, alcohol and drug use, and smoking. Free radicals can damage cells, thereby causing cancer and accelerated aging of the body systems. Polyphenols in cocoa also minimize the oxidation of low-density lipoprotein (LDL) cholesterol, a major factor in the promotion of coronary disease such as heart attack and stroke. Reducing the oxidation rate of LDL cholesterol may be just as important as reducing the level of LDL cholesterol. Polyphenols also help inhibit platelet aggregation and activation, meaning they help prevent platelets from clumping together, therefore reducing the risk of arteriosclerosis. Cocoa polyphenols also seem to thin the blood, which slows the rate of coagulation, reducing the risk of heart attack and stroke." – "Today" Show Food Editor Phil Lempert

As if women didn’t have enough excuses to eat chocolate, they’re now popping morsels into their mouths and proclaiming, "I’m eating health food!"  But remember, just one ounce of semisweet chocolate has 8 grams of fat, with 5 being saturated (25% of the daily recommended value).  50% of its calories come from fat, and nutritionists recommend a diet of 30% of calories from fat.  Eating too much chocolate can cancel out its health benefits.

Chocolate is a mixture of cocoa solids, cocoa butter, sugar and vanilla.  Guess where all the nutrients and flavor come from?  I can in good conscience chug hot cocoa and proclaim it a health drink.

This banana hot cocoa was inspired by a recipe from Jacques Torres.  I swapped the chocolate with cocoa powder, so it’s lower in fat but not in flavor.  Since bananas are naturally sweet, you can also get away with using less processed sugar, and the banana/chocolate flavor is a classic combo.  Plus, bananas make it "arteriosclerotically thick," which is how NY Times writer Ed Levine described City Bakery’s legendary drink.

This drink packs a power punch: calcium and protein from the milk, potassium from the bananas and of course antioxidants from the cocoa.  Save your overripe bananas for this chocolately treat.

Banana Hot Cocoa

Inspired by a recipe from Jacques Torres
Serves 2

Ingredients:
1 large overripe banana, mashed with a fork
2 tablespoons unsweetened cocoa powder
2 teaspoons sugar
2 cups milk

Directions:
Combine all ingredients except milk in a heavy saucepan. Stir in enough milk to make a paste.  Whisk in the remaining milk.  Scald the mixture over a medium-low flame.  Pour into a blender to make the drink smooth and frothy on top.  Pour into cups and enjoy!

If you’re feeling lazy, you can just microwave the mixture for about 3 minutes, or until hot.  You can skip the blender and leave the drink chunky.

Notes: I like my hot cocoa strong, with a 1:1 ratio of cocoa and sugar.  Most hot cocoa recipes call for a 1:2 ratio, so you can increase the sugar to your tastes.

Comments (4)      Email Email      Print Print

IMBB 20: Chocolate Chestnut “Su-fle” Cake

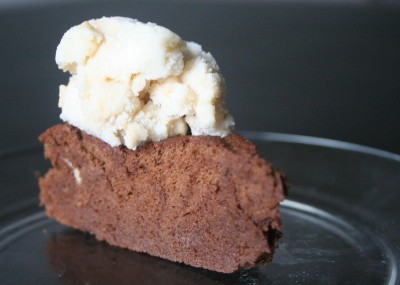
chocolate chestnut souffle cake

It’s a shame what Jeffrey Steingarten has done. The Vogue food writer’s two versions of lobster soufflé take 10 hours to prepare, enough to scare away even expert cooks.

For Is My Blog Blog Burning 20: Has my Blog Fallen?, Kitchen Chick sought to convince people that soufflés aren’t so difficult to make after all. Souffles are simply custards that have been leavened with beaten egg whites. Although souffles are notorious for collapsing quickly, soufflé cakes are easy to make because they’re meant to be served in their non-peak state.

The chestnuts in this low-fat “su-fle” (ha ha, get it?) cake add wonderful creaminess. You won’t taste the chestnuts unless someone points them out, but they definitely contribute to the cake’s texture. On the first day, it resembles chiffon cake but on the second day, its flavor develops and resembles mousse. Your patience will be rewarded!

Chocolate Chestnut Soufflé Cake

Adapted from Chocolate and the Art of Low-Fat Desserts by Alice Medrich

Ingredients:
4 ounces bittersweet or semisweet chocolate, chopped fine
1/2 cup plus 1/2 tablespoon unsweetened Dutch process cocoa
3/4 cup sugar
1/2 cup boiling water
1/2 cup chestnut spread (sweetened chestnut puree) (picture)
2 egg yolks
1 Tbsp rum
1 tsp vanilla extract
4 egg whites
1/4 tsp cream of tarter or 1/2 tsp vinegar or 1/2 tsp lemon juice
1/4 cup all-purpose flour
1 to 2 tsp powdered sugar, for dusting
vanilla ice cream, vanilla frozen yogurt, whipped cream, creme fraiche, sour cream, or sweetened pureed cottage cheese (optional but recommended)

Instructions:

  1. Position the rack in the lower third of the oven and preheat to 350F. Place a round of parchment paper on the bottom of the pan and grease the sides.
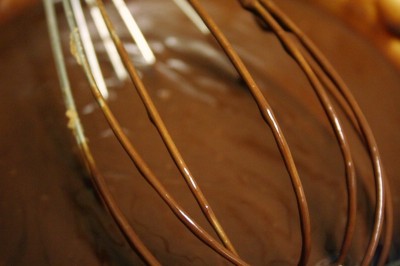
  2. Combine the chopped chocolate, cocoa and half of the sugar in a large mixing bowl. Pour in boiling water and whisk until the mixture is smooth and chocolate is completely melted.  Stir in the chestnut spread, egg yolks, rum and vanilla.  Set aside.
    chocolate mixture
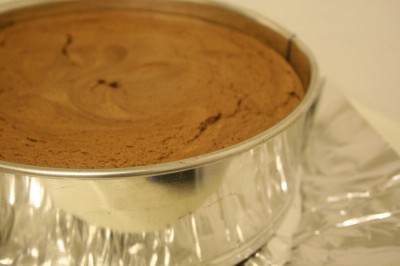
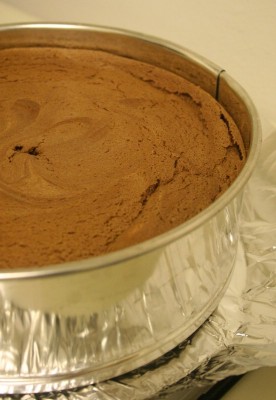
  3. Combine the egg whites with the cream of tarter, lemon juice or vinegar. Beat at medium speed until soft peaks form. Gradually sprinkle in the remaining sugar and continue to beat at high speed until stiff but not dry. Whisk the flour into the chocolate mixture. Fold in a quarter of the egg whites. At this point, you don’t have to be too careful because you’re just lightening the chocolate so it will be easier to combine later. Then, carefully fold in the remaining whites. (Cut a spoon or spatula into the bottom of the bowl and plop the chocolate on top of the whites. Turn the bowl 90 degrees and repeat until no white streaks remain. The batter doesn’t have to be perfectly uniform in color. When in doubt, err on the side of undermixing so you keep the volume in the whites.) Scrape the batter into the pan and smooth the top. Bake until a skewer or toothpick inserted into the center comes out with a few moist crumbs clinging to it, about 30 to 35 minutes. Cool torte in the pan on a rack. rise
    [Rise…]It will sink in the center as it cools.
    fall
    […and fall]Cake may be prepared to this point and stored, covered at room temperature or refrigerated for 2 days or frozen, well wrapped, for up to 2 months.
  4. To serve: Slide a thin knife or spatula around the sides of the pan to release the cake.  
    Remove the sides and bottom of springform or invert cake onto a platter. Remove the paper liner from the bottom and turn the torte right side up. Dust with powdered sugar and serve with a dollop of dairy, if desired.

Notes/tips:

  • While this cake did not taste low-fat, I didn’t think it was rich enough. I used mildly sweetened chestnut puree and forgot to add the cocoa, so your results may vary.
  • For a milk chocolate-flavored cake, use unsweetened chestnut puree and do not add cocoa.
  • You may make your own chestnut puree by boiling canned roasted chestnuts with enough water to cover and brown sugar (I used 2 Tbsp for 14 ounces of chestnuts. My puree was slightly sweet but not like a confection.) for 45-60 minutes, or until most of the water is absorbed and the nuts are soft. Puree the mixture with 1/2 tsp vanilla in a food processor until creamy.
  • I’m not big on garnishes, but a dollop of a plain dairy product really enhances the chestnut’s creaminess.  Regular yogurt is not recommended though, because it’s too tangy.
  • Eggs are easier to separate when they are cold (the yolks are less prone to break), but the whites whip better when they’re at room temperature.
  • Cream of tarter, an acid, stabilizes the whites to insure against overbeating. You’ve overbeaten the whites when a white glob floats on top of a watery mess. For a couple bucks, you can buy one ounce of cream of tarter, a uni-tasker. Or, you can buy a big bottle of vinegar for less than a dollar and save it for a ton of other uses.  😉 Simply substitute twice the amount of vinegar or lemon juice for cream of tarter in all of your whipped egg white recipes.

Tagged with: IMBB # 20 + Souffle

Comments (6)      Email Email      Print Print

Frozen Banana Pops

frozen banana

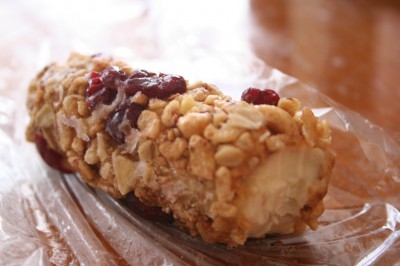
Frozen bananas are creamy like ice cream, fun to eat like popsicles, but easier to make than both.  They’re also lower in fat and sugar than store-bought frozen treats.  Paired with the right toppings, these desserts can actually be part of a healthy breakfast!

These might be my favorite fruit to freeze, besides grapes.  You’ll actually look forward to blackened bananas because the mushy ones stay soft when frozen.  There’s really no need to throw away bananas that ripen too quickly; besides banana pops, you can also make the ubiquitous banana bread or banana souffles.
 
Banana Pops
adapted from a Food Network recipe by Cat Cora

4 large bananas
2 cups fruit-flavored yogurt, Nutella or peanut butter (For easiest spreading, dilute nut butters with enough vanilla or plain yogurt so it’s the consistency of thick cake batter)
1 cup combination of chopped dried fruit, granola, crushed cereal, crushed cookies or crushed candy

Peel the bananas, cut in half crosswise, and dip them in the yogurt. Roll them in the toppings to coat. Freeze until firm. Serve when firm.

Comments (4)      Email Email      Print Print

IMBB 17: GreenTea Biscotti


It’s that time of month again: Is My Blog Burning, in which bloggers around the world cook around a common theme. This time, Clement of A la Cuisine! has chosen tea as the themed ingredient.

I developed this recipe for Mariko of Super Eggplant, who loves green tea. You see, I sent her a care package for Blogging by Mail. Two events collide in one day!

I took a trusty chocolate chip biscotti recipe from Chocolate and the Art of Low-Fat Desserts, added green tea leaves, and swapped the semisweet chocolate with white chocolate, since green tea has a delicate flavor. Going with the white theme, I also substituted mild almonds for the walnuts.

Be sure to use white chocolate that lists cocoa butter as the main ingredient. In cheap brands, partially hydrogenated oil poses as white chocolate. And you wonder why most people don’t like white chocolate! Would you substitute brown-colored vegetable shortening for dark chocolate? I don’t think so. Use the real stuff!

These low-fat biscotti become wonderfully fragrant a day after baking. They are delightfully crunchy but not jaw-breakingly hard, if you don’t overbake them.

Green Tea Biscotti
Adapted from Alice Medrich’s Chocolate and the Art of Low-Fat Desserts
Makes about 4 dozen cookies

Ingredients:
2 cups sifted all-purpose flour
1/2 tsp baking soda
1/4 tsp salt
1 Tbsp pulverized green tea leaves, from about 3 tea bags
2 eggs
3/4 cups sugar
1 tsp vanilla extract
2 Tbsp brewed green tea
1/2 cup chopped toasted almonds (optional)
2/3 cup white chocolate chips

  1. Preheat the oven to 300 degrees F. Line the baking sheet with greased foil.
  2. Place the flour, baking soda, salt, and tea leaves in a small bowl. Stir with a whisk to combine. Set aside.
  3. In a medium bowl, beat the eggs with the sugar, vanilla, and brewed tea until well combined. Beat in the flour just until combined. Stir in the nuts and white chocolate chips. The mixture will be thick and sticky.
  4. Use a large spoon to scoop the batter onto the baking sheet, dividing it evenly into 3 long, skinny, rope-shape loaves, each one foot long, or 2 loaves 16 to 17 inches long, depending on your baking sheet. The loaves must be 2 1/2 inches apart. You’ll get slightly messy. Use the back of the spoon or a spatula to even up the “loaves” and neaten the edges. Bake for 35 minutes. Remove from oven and cool for 10 minutes on the pan. Leave the oven turned on.
  5. Carefully peel the loaves from the foil and transfer them to a cutting board. Use a sharp serrated knife to slice the loaves diagonally into 1/2-inch slices. Arrange the slices directly on the oven racks. Bake for 20 to 25 minutes, or until the cookies are crisp and dry. Or arrange the cookies on 2 baking sheets. Bake for 12 minutes, rotating the sheets from top to bottom and back to front about halfway through the baking time. Turn cookies over and bake for 12 to 15 minutes, rotating sheets as before.
  6. Cool biscotti completely before storing. They become more tender about 2 or 3 days stored in an airtight container. They keep for several weeks.

Notes:
This is a developing recipe, and the tea flavor, although present, is not as strong as I would like. Any ideas for improvement? I can’t add more brewed tea, or else the dough will be too sticky. There’s only so much you can do to concentrate the tea: you can’t brew three bags in 2 tablespoons of water.

Using matcha (green tea powder) rather than leaves may concentrate the flavor. From what I’ve researched, 1/2 Tbsp matcha = 1 Tbsp tea leaves.

Comments (9)      Email Email      Print Print

Blondies have more fun

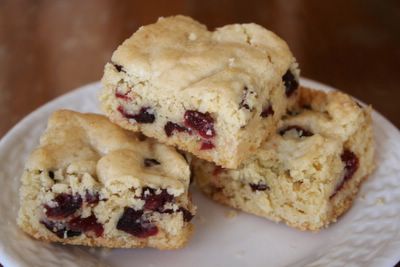
Now for a deep philosophical question: is a brownie still a brownie without the chocolate? No, in that case it would be a blondie. These bars are perfect when you’re craving the dense and chewy texture of a brownie but don’t want chocolate. Yes, a girl can get sick of chocolate after ingesting too much chocolate mousse. I lightened the recipe by using 5 tbsp of butter rather than a whole stick. These bars have plenty of fat from the almonds, so they were still wonderfully moist, although they might not keep as long. But do you really expect to have them laying around for a whole week? They even develop the characteristic skin you get from boxed brownie mix, except these don’t have nasty-tasting artificial ingredients.

Fruity Almond Blondies
Adapted from Alice Medrich’s Cookies and Brownies

Ingredients:
3/4 cup whole almonds, with or without skins
1 cup all-purpose flour
1/8 tsp salt
3/4 tsp baking powder
5 tbsp unsalted butter
3/4 cup plus 2 tbsp sugar
1 large egg
1/4 tsp almond extract or 1/2 tsp vanilla extract
1/2 cup dried tart cherries, cranberries, chopped apricots or any dried tart fruit

Equipment:
8-inch square pan, lined across the bottom and up two opposite sides with parchment paper or foil

Preheat the oven to 350 F. Toast the almonds for 15-20 minutes, or until brown. Stir halfway between baking to ensure even coloring.

Move the rack to the lower third of the oven and continue to heat the oven.

Process the almonds with the flour in a food processor, until the almonds are fine. Add the salt and baking powder and pulse to mix.

Toss the fruit with one tablespoon of the flour mixture so they won’t sink to the bottom of the bar. Set aside.

Melt the butter in a medium saucepan. Remove from the heat and stir in the sugar. Using a wooden spoon, beat in the egg and almond/vanilla extract. Stir in the flour mixture, followed by the dried fruit. Spread the batter evenly in the pan.

Bake for 20 to 25 minutes, or until the edges are golden brown and have pulled away from the sides of the pan and the top is light golden brown. Cool in the pan. Run a knife along the unlined sides of the pan. Lift the ends of the paper or foil liner and transfer to a cutting board. Cut into 16 squares.

Can be stored, airtight, for at least one week.

Notes: Dream up your own creation by substituting any nuts or dried fruits! Pine nuts would give an Italian twist, pistachio is popular among food blogs like Chocolate and Zucchini and The Food Section, and walnuts would make a richer bar. Tart fruit is recommended to offset the sweetness of the bar.

Comments (1)      Email Email      Print Print

Lazy Sunday Pavlova

Since today was Easter (see what Easter means to me), my friend Heather hosted a potluck lunch at her cozy Upper West Side apartment.

Lunch felt like an old-fashioned affair. There was no agenda to worry about and no reason to rush. It was a lazy Sunday afternoon shared by a group of friends.

Heather decorated the table with pastel napkins, plates and egg-shaped name tags. Instead of candy, the “eggs” held a different kind of suprise. When it came time to eat, we flipped over the name tags and read Bible verses from the back of them. It was like group theater meets a holiday celebration.

Then we said grace and slowly savored sweet potato vichyssoise (that’s soup for you non-culinary minded folk), salad with raspberry-glazed pecans, spiced potatoes, bread and my baked brown rice pilaf. For dessert, we paired date bars and my pavlova (recipe courtesy Nigella Lawson’s Forever Summer) with tea.

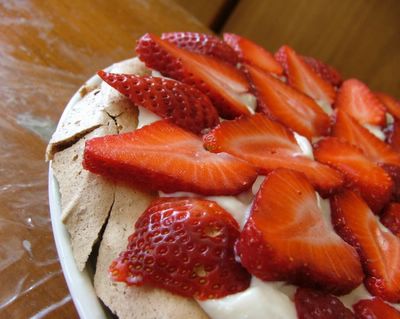
The pavlova had a crisp, meringue crust. The inside was a mixture between squidgy (as Nigella says) marshmallow and creamy, airy mousse. The whole thing was studded with bittersweet chocolate chunks, which gave it little jolts of richness.

It was super easy to make and rustic yet sophisticated. Don’t worry when the edges crack; it adds to the pavlova’s character. Besides, there’s nothing that can’t be repaired (er, covered up) with dollops of whipped cream and elegantly arranged fruit.

Notes/tips:
You can top the pavlova with any kind of semi-firm fruit, such as raspberries, kiwi, or blueberries. I chose strawberries because one pound is only $1 in Chinatown! (My favorite place to get fresh produce is the intersection of Canal and Walker. There’s lots of food stands, which ensures competitive pricing. Also, the fish so fresh that it’s odorless.)

Do not spread the batter all the way to the edges of the nine-inch circle, because it expands as it bakes.

To lighten the dessert, you can replace the whipped cream topping with yogurt cheese. Simply drain vanilla yogurt (with no gelatin) with a cheesecloth, coffee filter or paper towel fitted over a strainer overnight in the fridge. One cup yogurt yields about 1/3 cup cheese.

Or, if you’re lactose intolerant like Heather, take one 12-ounce block of extra-firm silken tofu (recommended brand: Morinu) , combine with 2 tbsp sugar, and blitz it in a blender till smooth. Refrigerate overnight to firm it up. It’s not the same as whipped cream, but I don’t think anyone knew they were eating tofu today.

The pavlova is extremely sweet, so I recommend adding an extra tbsp of cocoa to make it 1/4 cup. I would also decrease the sugar from 1 1/2 cups to 1 1/4 cups or even 1 cup.

Since the pavlova only has two ounces of chocolate, use the best chocolate you can find to make the flavor stretch further.

It’s easier to separate eggs when they’re cold but easier to beat when they’re at room temperature.

Comments (4)      Email Email      Print Print

Is My Blog Burning: Black-Eyed Pea Cake


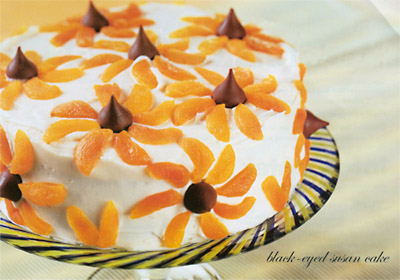
Photo: Vegetarian Times-Feb. 2005

For my first post, I’ve decided to participate in Is My Blog Burning?, a designated day where bloggers cook with a common ingredient or method. This time, the theme is beans. I think a dessert can be made from virtually any ingredient, so why not try a bean cake?

When I first saw the Black-Eyed Bean Cake recipe in the Feb. 2005 issue of Vegetarian Times, I wondered if I could substitute Asian red beans (azukis) for the black-eyes and red dates for the apricot puree to make a Chinese-ified cake. Before getting too adventurous though, I tested the original recipe to see if it was any good.

I had doubts about this recipe because a couple days earlier, I made the Fungi (cornmeal mush) from the same issue. I expected it to be a mixture between cornbread and oatmeal, but instead I got tasteless, watery goop. I’ll usually eat anything, but I seriously considered throwing the Fungi out. After boiling it on the stove for another 40 minutes (the recipe said I’d only need to boil it for two min.), the mixture reduced to one-third its volume and was quite good. It got nice and firm, like polenta.

Anyway, on to the recipe!

Black-Eyed Susan Cake
adapted from Vegetarian Times, Feb. 2005

Serves 12

Cake
2 cups dried apricots
2 cups cooked, drained and rinsed black-eyed peas
1/4 cup canola oil
1 cup packed light brown sugar
3 large eggs
1 cup whole wheat flour
2 tsp. ground cinnamon
1/2 tsp. ground cloves
1 1/2 tsp. baking soda
1/2 tsp. baking powder
2/3 cup golden or regular raisins
1 cup chopped pecans, optional

Frosting
1/3 of 8-oz. pkg. fat-free cream cheese
2 1/2 cups confectioners’ sugar
2 tsp. lemon zest
1 tsp. vanilla extract

Optional Decoration
12 chocolate drops or stars
32 dried apricots

  1. If using dried beans, measure out a little more than 1/2 a cup. (1 cup dried=3 1/2 cups cooked, so if you do some algebra, you’ll actually need .57 cups). Sort through the peas and pick out tiny stones and stray seeds. This is best done by spreading them on a table with a pot in your lap and pulling the good peas into the pot. To soak dried black-eyed peas, rinse them, and place them in a pot. Add enough water to cover them plus at least 4 inches more. Add 1/4 tsp. baking soda to the water, and stir. (This pulls out the sugars that cause gas in the intestines.) Let them sit overnight. Rinse thoroughly. The beans will cook perfectly in fewer than 90 minutes. Add salt after cooking.
  2. Preheat oven to 375F (350F if using glass or dark-colored pans). Grease and flour 2 8-inch cake pans, or grease and line pans with circles of parchment.
  3. To make Cake: Cook apricots in 2 cups water, about 12 minutes, until very soft. Measure out 1 cup apricots and liquid, and set aside. Put remaining apricots and liquid in blender, and puree. Add peas, and puree.
  4. Put oil, brown sugar and eggs in mixing bowl; beat on high 3 minutes. Mixture will look creamy. Whisk flour, cinnamon, cloves, baking soda and baking powder in separate bowl. Mix in raisin and pecans, if using. (Hint: tossing nuts, fruit, or chocolate chips with flour keeps them from sinking to the bottom of the cake.)
  5. Pour egg mixture over puree, and fold together. Gently fold in flour mixture. Pour into prepared cake pans.
  6. Bake 35 to 40 minutes, or until toothpick inserted in center of cake comes out clean. Remove from pans, and cool completely on wire rack. Ooh, nice and crusty! While this cake was baking, the entire kitchen smelled like gingerbread.
  7. To make Frosting: Using an electric mixer, beat cream cheese until creamy. Beat in remaining ingredients. Frosting should be soft; it will firm upon sitting.
  8. Place one cake layer on plate, and spread reserved apricots evenly over it. Top with second layer. Spread frosting evenly over top and sides of cake.
  9. To decorate, cut apricots into slices. Place chocolate drop on cake, and arrange 8 apricot “petals” around it (skin side up). Repeat until cake is covered.

PER SERVING: 290 CAL; 6G PROT; 6G TOTAL FAT (1 G SAT. FAT); 55G CARB; 55MG CHOL; 200MG SOD; 5G FIBER; 35G SUGARS

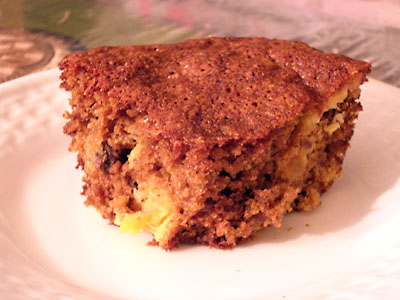
I didn’t make the filling or the frosting…Growing up, my mom always complained that frosting was too sweet. So out of habit, I made my cake plain.

My handblender didn’t puree the apricot-bean mixture all the way, so you can see a chunk of apricot in the front and a white stripe of beans on the right.

The verdict: the texture was very good. The cake was moist and not dense (as is the problem with whole-wheat baked goods). I could not tell it was low-fat. Aside from the couple streaks, you can’t tell there’s beans in it either. This cake would be a good joke to play on friends. Imagine their faces when you tell them the secret ingredient!

EDIT:

I was unimpressed with the flavor on the first day, but on the second day, the flavors intensified. The cake got even more moist, but it wasn’t soggy or damp. My only complaint is that it’s a bit sweet, and I can’t really taste the spices. The cake is kind of like spice cake without the spices or carrot cake with extra brown sugar and no carrots.

Maybe to spice up the flavor, I’ll spread some apple butter (recipe featured at 101 Cookbooks) on the cake.

2nd EDIT:

On further investigation, I found out that I added too much sweetener. Brown sugar is simply white sugar plus molasses. I made my own brown sugar for this cake. According to the Grandma’s molasses package, 1 c brown sugar = 1 c white sugar + 1/2 c molasses. Or, it’s 2 parts white sugar, 1 part molasses. In previous experience, I found this ratio to be overkill, so I used 4 parts white sugar to 1 part molasses. On the Grandma’s molasses site though, it recommends 9 parts white sugar to 1 part molasses. Also, Baking 911 recommends 1-2 tbsp molasses for 1 cup of white sugar (or, 8-16 parts white sugar to 1 part molasses). Bottom line: I used waaaay too much molasses.

Partly because of my traumatic experience with the cornmeal mush, I still have qualms with Vegetarian Times recipes. Case in point: this recipe doesn’t tell you how much salt to add to the beans. I put a pinch. Evidently I needed more to bring out the spice flavors. Also, I seriously doubt 375F is a good temperature for the cake. Since I had an 8×8 glass pan (I halved the recipe), which conducts heat better than aluminum, I lowered the temperature to 350F. The edges browned very quickly, and I baked at 325F for the last five minutes.

So, this is a good cake, but it’s not to die for. I like the wholesome ingredients though. If you ever want to eat cake for breakfast, you can “fool” yourself by making healthy muffins with this recipe.

Maybe I’ll try the Chinese variation, but not anytime soon. My desk is exploding with “to try” recipes, and they’re from trusted sources.

Comments (8)      Email Email      Print Print