Archive for Is My Blog Burning?

IMBB 27: The Joy of Soy
Is My Blog Burning - Soy

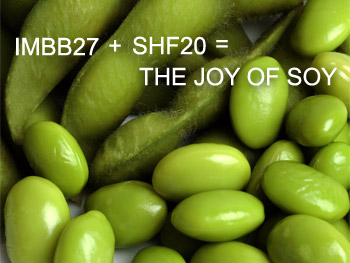
I know of no other food that is as versatile as soy. In its natural state above, it resembles green peas. It can also stand in for milk (as soy milk), custard (as silken tofu), cheese (as firm tofu), meat (as tofu or tempeh), flour (as okara), nuts (as roasted soy nuts) and salt (as soy sauce or miso). High in protein, fiber and antioxidants but relatively low in fat, soy is a staple in my kitchen.

dried soybeans
Dried soybeans

For the monthly themed cooking events, Is My Blog Burning and Sugar-High Friday, Reid at ‘Ono Kine Grindz has asked bloggers to make soy cuisine.

After making soy-sauce candied walnuts, I decided to experiment more with soy sauce in desserts. Soy sauce essentially tastes like caramel-flavored salt, so the idea isn’t too far-fetched.

For my first creation, I made chocolate caramels with soy milk and soy sauce. Out of my two experiments, this one seemed like the safest bet. As the Kikkoman website says, “Kikkoman Soy Sauce…..In Chocolate? Absolutely! Naturally brewed soy sauce can enhance more than just savory flavors — its salty brewed flavor depresses the extra sweetness typical of chocolate syrups and enhances the richness of the cocoa powder. It also helps to blend dairy notes and highlights the fruit top notes of the cocoa. The result: a deep, nutty, roasted chocolate flavor with a rich color.”

These low-fat caramels were tasty for what they were, but they were slightly grainy. I don’t know whether it’s because I used homemade soy milk, which naturally has pulp. Or perhaps the granulated sugar crystallized, in which case more honey was needed. Also, soy milk curdles at the slightest introduction of acid, which was in the natural cocoa powder. You may fare better with commercially prepared soy milk, which is smoother and has thickeners.

My candy also did not set up, even in the freezer. I’ve clarified the instructions, so cook the candy until it reaches the softball stage–248 degrees F. I think these would have tasted better with plain old salt, but if you’re adventurous, add the soy sauce in the end, so you don’t cook out its delicate flavor.

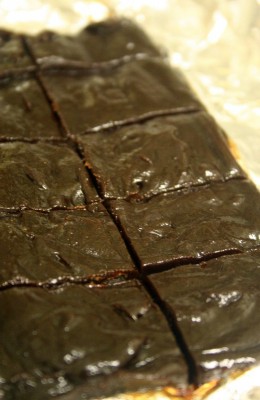
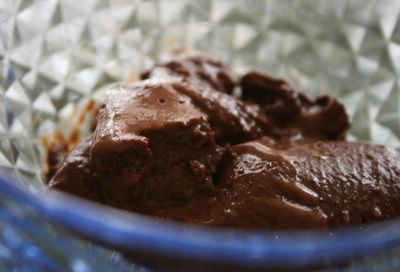
chocolate soy caramels

Chocolate Caramels

Adapted from The Soy Dessert and Baking Book

This is a great way to sneak nutrients into candy.

Ingredients:
½ c sugar
1 c vanilla soy milk
1 Tbsp unsalted butter
1 tsp honey
2 Tbsp cocoa powder, sifted
1 tsp soy sauce or 1/4 tsp salt

Method:
Line a loaf pan with greased foil.

Over medium heat, melt sugar in a sauce pan, stirring until it has completely dissolved and is light golden in color. Gradually stir in soy milk and bring mixture to boil. Reduce heat to low and simmer 10-15 min., uncovered. Add butter, honey and cocoa and salt (if you’re not using soy sauce) and continue boiling and stirring for another 10-15 min., or until mixture thickens (about 248F) and shrinks away from the bottom and sides of the pan. Stir in soy sauce (if using). Pour into the greased pan and cool 10 min. While still warm, cut caramels into approximately 18 pieces. Wrap in individual candy wrappers. The leftovers freeze well.

Now, what could possibly be weirder than chocolate and soy sauce? How about a dessert where the soy sauce doesn’t have “milk” or chocolate to hide behind? A dessert with just three ingredients? (Two if you don’t count the orange zest, which I didn’t use. Or one if you don’t count the sugar, which is mandatory in dessert.) It’s soy sauce sorbet, which Kikkoman features on its website, along with soy sauce chocolate sauce and soy fruit charlotte.

At first bite, the sorbet has an off-putting fermented flavor, but it gets better as you eat it. It’s the easiest way to make a refreshing “caramel” sorbet without having to caramelize the sugar. Serving it with chocolate sauce does double duty. The chocolate sauce offsets the sorbet’s saltiness, while soy sauce brings out the chocolate flavor.
The sorbet is slightly icy, like a granita. You can add more sugar if you want it smoother.

Now that my experiments are done, I declare soy sauce too weird to put in desserts. At least I tried. If you like Sam Mason-style desserts (ancho caramel or miso ice cream, anyone?) from WD-50, these might be up your alley.

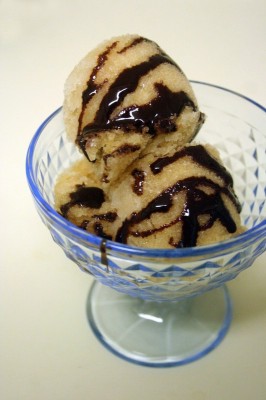
soy sauce ice cream

Soy Sauce Sorbet

Adapted from a recipe by Chef Michael Bloise, Wish at The Hotel at South Beach (Miami Beach, FL)

Yield: 6 cups

4 cups water
1 1/3 cups sugar
2/3 cup low-sodium soy sauce (or substitute 1/3 cup regular soy sauce plus 1/3 cup water)
4 teaspoons grated orange zest
2 Tbsp vodka (optional but recommended to keep the sorbet from freezing hard)

Stir together all ingredients until sugar is dissolved. Freeze in an ice cream freezer according to manufacturer’s directions. Serving suggestion: Chef Bloise serves a small scoop of Soy Sauce Sorbet with ginger carrot cake.

and round-up.

Comments off      Email Email      Print Print

Chewy Chocolate Chip Cookies and Chocolate-Covered Macaroons

Traditionally, cookie swap parties are held shortly before Christmas and allow people to sample a plethora of cookies. Each participant brings several batches of their favorite cookies and distributes them. The more people the better: you can potentially go home with 10 varieties! This month’s Is My Blog Burning, has the same concept, but it’s gone online. If you need holiday baking ideas, check out Jennifer (of The Domestic Goddess) and Alberto’s (of Il Forno) round-up.

I’ve decided to combine a bit of the old with a bit of the new. First is a chewy chocolate chip cookie that has been a family Christmas tradition for a decade. The second cookie is my signature macaroon, enrobed in chocolate.

As I’ve said before, chocolate chip cookies spurred my love for baking. When I was around 12, my mom and I whipped up a recipe that a co-worker had given her. It called for a half-half mixture of butter and vegetable shortening. Our kitchen was sparse and we didn’t have shortening. But we saw the word “vegetable” and figured we could substitute vegetable oil. (I still don’t use vegetable shortening for health, texture and taste reasons.) Because of the oil, the chocolate chips slipped of the dough, which we accepted.

At the time, we also didn’t own baking sheets, so we made our own by cutting up paper grocery bags. To place them in the oven, we slid them off a giant piece of cardboard, much like a cook uses a pizza peel. We didn’t know that cooling racks existed either, so we lined the stove with newspaper and laid the “cookie sheets” on top.

Despite these untraditional techniques, the cookies were delicious. Because they were made with 100% whole wheat flour, they were different from the traditional Toll House variety. But they were good in their own right: chewy, soft and satisfying. We’ve made these year after year for the holidays.

Below is the adapted version (I believe cookies should be 100% butter), and you can use a mixture of flours to lighten the texture (but I can’t tell you the ratio because I want to keep my secrets!).

Chewy Whole-Wheat Chocolate Chip Cookies
Makes 3 dozen cookies

1/2 c sugar
1/2 c brown sugar
1 stick butter, at room temperature
1 tsp baking soda
1 egg
1 tsp vanilla
1 1/2 c whole wheat flour
1/2 c chopped toasted nuts (optional)
1 c chocolate chips

Heat oven to 375° F. In a medium bowl, mix the sugars, butter, egg, and vanilla with a wooden spoon until smooth. In a separate bowl, stir the flour and baking soda. Add the flour mixture, chocolate chips and nuts to the wet ingredients. Drop by rounded teaspoons onto ungreased baking sheets.

Bake for 8-9 min, or just until edges begin to brown.

Notes:

I recommend these chocolate chips:
Whole Foods 365 Everyday Value-Outrageous semisweet flavor. At 1.99 for 12 oz., it’s actually cheaper than the brands below and better! It has only the real stuff: cocoa liquor, sugar, cocoa butter, vanilla and soy lecithin (an emulsifier). Chocolate manufacturers often cheat by substituting vegetable or milk fat and vanillin.
Nestle Toll House Semi-Sweet Morsels-classic semisweet flavor with a bit of an acidic edge (which I like). The chips soften after baking, so they melt right in your mouth when you bite into them.
Mrs. Fields-slightly more multi-faceted flavor than Nestle’s.
Ghirardelli Semi-Sweet Chocolate Chips-a dependable brand with a smoother flavor than Nestle’s. Despite the fancy name and packaging, they’re at the bottom of the “recommended” list.

Not recommended:
Hershey’s Semi-Sweet Chocolate Chips-flat flavor that resembles milk chocolate.
Guittard Semi-Sweet Chocolate Chips-they may make gourmet chocolate, but their chocolate chips aren’t as rich as Nestle’s.
Pathmark supermarket brand-an ideal ingredient list (cocoa liquor, sugar, cocoa butter, vanilla and soy lecithin) and cheap price attracted me to the product, but it was waxy and fake tasting.

Chocolate-Covered Macaroons

chocolate-covered macaroons

Although everyone loves chocolate chip cookies, the cookie that most people ask me to make is the French-style macaroon. While the American version consists of coconut and is often dry and mealy, the French version uses ground almonds and has a chewy bite underneath a crisp shell.

My only complaint is that macroons have a short shelf life. I can’t ship my them, lest someone wants to pay for overnight delivery. In my latest attempt to prolong the shelf life, I dipped my macaroons in chocolate (thanks to David Lebovitz’s blog for the idea!). I figured the chocolate would create a barrier to keep the cookies moist.

In my experiment, I ate one cookie a day and studied how the texture degraded over time. Sadly, the cookies still dried out after two days, but fresh chocolate-dipped macaroons are as decadent, if not more addictive, than truffles!

Adapted from Alice Medrich’s Cookies and Brownies

Makes 3 dozen sandwich cookies, about 1 1/2-inches wide

Ingredients
7 ounces blanched almonds (1 1/3 cups whole or 1 2/3 cups slivered)
1 1/2 cups sugar
3 to 4 large egg whites
A variety of jams, frosting, lemon curd, caramel sauce, Nutella, fudge sauce or ganache
12 oz. of dark chocolate (chocolate chips are not recommended, as they don’t melt as well)

Equipment
2 cookie sheets, greased, or lined with parchment paper

In a food processor with a steel blade, process the almonds and sugar until the almonds are very fine and the mixture begins to pack together around the sides of the bowl, at least 3 minutes. With the processor on, slowly drizzle only enough of the egg white to form a ball of dough around the blade. Keep the processor on. Add only enough additional egg white so the dough has the consistency of very thick, sticky mashed potatoes and no longer forms a ball.

Pipe or drop rounded teaspoons (equivalent to 2 level teaspoons) 2 inches apart on the cookie sheets. Gently press down on the top of each cookie to smooth it out. Let the cookies stand for 30 minutes .

Preheat the oven to 300° F. Position the racks in the upper and lower thirds of the oven. Bake for 20 to 25 minutes, or until the edges of the cookies barely begin to color. Rotate the pans from front to back and top to bottom about halfway through the baking time to ensure even baking. Slide the parchment onto racks. Cool the cookies completely before detaching them.

Spread the filling on the flat side of half of the cookies and top with the remaining cookies.

Drop the cookies into melted tempered chocolate. Couverture, or covering chocolate, is easiest to use because the extra cocoa butter makes the chocolate more fluid. It’s NOT confectionery or compound chocolate, which has vegetable fat and is not as rich. One way to temper is to melt 3/4 of the chocolate (9 oz. in this case) on top of a double boiler and add in small pieces of the reserved chocolate until the mixture registers 88° F on an instant-read thermometer. Use an immersion blender to smooth the mixture and circulate the good crystals. Tempering is done so that the final product has a good gloss and snap. To test the temper, spread some chocolate on the tip of a knife—it should set up within a minute.

If you plan on consuming the cookies right away or don’t mind occasional white streaks in the coating, simply drop the cookies into melted chocolate.

Roll the cookies around until all sides are coated with chocolate, and fish them out with a fork. Place on wax or parchment paper to harden. Consume within two days.

If you have leftover chocolate, grab everything in your cupboard and start dipping! Or, mix with milk to make hot chocolate. Or, pour it onto parchment paper to harden and use for another time.

Comments (9)      Email Email      Print Print

IMBB 20: Chocolate Chestnut “Su-fle” Cake

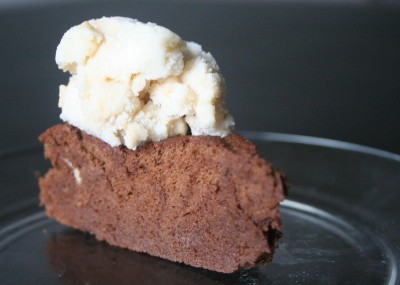
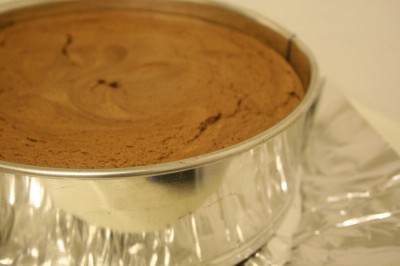
chocolate chestnut souffle cake

It’s a shame what Jeffrey Steingarten has done. The Vogue food writer’s two versions of lobster soufflé take 10 hours to prepare, enough to scare away even expert cooks.

For Is My Blog Blog Burning 20: Has my Blog Fallen?, Kitchen Chick sought to convince people that soufflés aren’t so difficult to make after all. Souffles are simply custards that have been leavened with beaten egg whites. Although souffles are notorious for collapsing quickly, soufflé cakes are easy to make because they’re meant to be served in their non-peak state.

The chestnuts in this low-fat “su-fle” (ha ha, get it?) cake add wonderful creaminess. You won’t taste the chestnuts unless someone points them out, but they definitely contribute to the cake’s texture. On the first day, it resembles chiffon cake but on the second day, its flavor develops and resembles mousse. Your patience will be rewarded!

Chocolate Chestnut Soufflé Cake

Adapted from Chocolate and the Art of Low-Fat Desserts by Alice Medrich

Ingredients:
4 ounces bittersweet or semisweet chocolate, chopped fine
1/2 cup plus 1/2 tablespoon unsweetened Dutch process cocoa
3/4 cup sugar
1/2 cup boiling water
1/2 cup chestnut spread (sweetened chestnut puree) (picture)
2 egg yolks
1 Tbsp rum
1 tsp vanilla extract
4 egg whites
1/4 tsp cream of tarter or 1/2 tsp vinegar or 1/2 tsp lemon juice
1/4 cup all-purpose flour
1 to 2 tsp powdered sugar, for dusting
vanilla ice cream, vanilla frozen yogurt, whipped cream, creme fraiche, sour cream, or sweetened pureed cottage cheese (optional but recommended)

Instructions:

  1. Position the rack in the lower third of the oven and preheat to 350F. Place a round of parchment paper on the bottom of the pan and grease the sides.
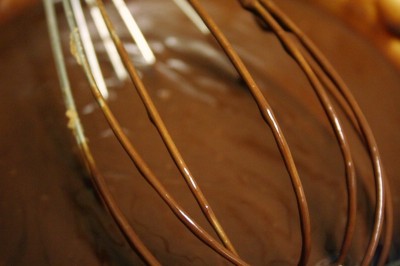
  2. Combine the chopped chocolate, cocoa and half of the sugar in a large mixing bowl. Pour in boiling water and whisk until the mixture is smooth and chocolate is completely melted.  Stir in the chestnut spread, egg yolks, rum and vanilla.  Set aside.
    chocolate mixture
  3. Combine the egg whites with the cream of tarter, lemon juice or vinegar. Beat at medium speed until soft peaks form. Gradually sprinkle in the remaining sugar and continue to beat at high speed until stiff but not dry. Whisk the flour into the chocolate mixture. Fold in a quarter of the egg whites. At this point, you don’t have to be too careful because you’re just lightening the chocolate so it will be easier to combine later. Then, carefully fold in the remaining whites. (Cut a spoon or spatula into the bottom of the bowl and plop the chocolate on top of the whites. Turn the bowl 90 degrees and repeat until no white streaks remain. The batter doesn’t have to be perfectly uniform in color. When in doubt, err on the side of undermixing so you keep the volume in the whites.) Scrape the batter into the pan and smooth the top. Bake until a skewer or toothpick inserted into the center comes out with a few moist crumbs clinging to it, about 30 to 35 minutes. Cool torte in the pan on a rack. rise
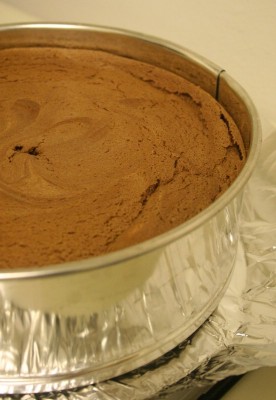
    [Rise…]It will sink in the center as it cools.
    fall
    […and fall]Cake may be prepared to this point and stored, covered at room temperature or refrigerated for 2 days or frozen, well wrapped, for up to 2 months.
  4. To serve: Slide a thin knife or spatula around the sides of the pan to release the cake.  
    Remove the sides and bottom of springform or invert cake onto a platter. Remove the paper liner from the bottom and turn the torte right side up. Dust with powdered sugar and serve with a dollop of dairy, if desired.

Notes/tips:

  • While this cake did not taste low-fat, I didn’t think it was rich enough. I used mildly sweetened chestnut puree and forgot to add the cocoa, so your results may vary.
  • For a milk chocolate-flavored cake, use unsweetened chestnut puree and do not add cocoa.
  • You may make your own chestnut puree by boiling canned roasted chestnuts with enough water to cover and brown sugar (I used 2 Tbsp for 14 ounces of chestnuts. My puree was slightly sweet but not like a confection.) for 45-60 minutes, or until most of the water is absorbed and the nuts are soft. Puree the mixture with 1/2 tsp vanilla in a food processor until creamy.
  • I’m not big on garnishes, but a dollop of a plain dairy product really enhances the chestnut’s creaminess.  Regular yogurt is not recommended though, because it’s too tangy.
  • Eggs are easier to separate when they are cold (the yolks are less prone to break), but the whites whip better when they’re at room temperature.
  • Cream of tarter, an acid, stabilizes the whites to insure against overbeating. You’ve overbeaten the whites when a white glob floats on top of a watery mess. For a couple bucks, you can buy one ounce of cream of tarter, a uni-tasker. Or, you can buy a big bottle of vinegar for less than a dollar and save it for a ton of other uses.  😉 Simply substitute twice the amount of vinegar or lemon juice for cream of tarter in all of your whipped egg white recipes.

Tagged with: IMBB # 20 + Souffle

Comments (6)      Email Email      Print Print

IMBB 19: I can’t believe I ate dog food

IMBB 19: Vegan

This month’s theme for Is My Blog Burning is "I Can’t Believe I Ate Vegan!" (the idea is to trick someone into eating delicious vegan food) but it might as well be called "I Can’t Believe I Ate Dog Food!"

Instead of preparing human vegan food, I fulfilled an unusual order for my bakery, Su Good Sweets.  Marlon, a vegan coworker, also has vegan dogs, but he’s dissatisfied with the chemical-laden vegan dog foods on the market.  So, he hired me to bake dog food.  The steps involved mixing pounds of flour, rolling out the dough and baking it twice.  I got to practice my pie crust, biscotti and crouton-making skills all at once.

Well, did Marlon’s dogs know the difference?  Yes, but in a good way.  Marlon was pleased that the smell wasn’t as strong as conventional dog food, and it kept his dogs’ teeth clean.

Since the dog food was also human grade, I tried the finished product.  It’s bland, but I’d snack on it if I were starved: it has a healthy balance of whole grains and protein.

No Soy Kibble

adapted from Vegedog
(Maintenance Only)

Makes 3 1/2 days’ worth of food

1/3 cup (2 oz. [80ml/50g]) yeast powder
2 Tbs. (25ml/32g) Vegedog™
4 tsp. (20ml/18g) baking powder
3/4 tsp. (4ml/4g) lecithin granules (picture)
2/3 tsp. (3ml/4g) salt (this could be omitted and replaced with soy sauce)

Thoroughly mix the above ingredients before adding the following ingredients.

6 1⁄2 cups (2 lbs. [1550ml/915g]) whole wheat flour
1 1⁄3 cups (7 oz. [330ml/200g]) vital wheat gluten (75% protein) (picture)
Mix all ingredients together.

1. Preheat oven to 325°F (160ËšC).
2. Add the above dry ingredient mixture to:

1⁄3 cup oil (70ml/65g)
4 cups (700ml) water (as necessary)
1 1⁄2 Tbs (20ml/25g) soy sauce (if salt was omitted from the dry ingredients)

For more flavor: Substitute a sugar-free prepared pasta sauce for the water or add tomato paste along with any necessary water.

3. Stir with a large strong spoon to form soft dough.
4. Flour your hands and counter. Knead the dough well until smooth and elastic. Divide the dough into two halves. Roll out each to fit a large cookie sheet (12”x17” [300 x 400mm]). Work the dough into the corners and prick with a fork to prevent bubbles.

Bake for 20 minutes.
5. Turn the sheets and rotate them from top to bottom.
6. Bake for 20 more minutes (don’t brown the edges). Remove from oven.
7. With a large chef’s knife cut each slab into 9-12 parts on a cutting board by cutting horizontally into three strips, and then each vertically 2 or three times. Cut each resulting rectangle into kibble sized pieces (like a miniature checkerboard) by cutting first in one direction, and then the other direction. Toy breeds like small sized pieces, and larger breeds will like much larger pieces.
Hint: a small cushion strip placed on top of your knive can protect your palm as you press down. An auto door edge protector cut to size works well.
8. Place kibble pieces on cookie sheets, breaking apart pieces that stick together.
9. Dry the kibble in a 325°F oven for about half an hour. Hot sunshine works as well. The pieces should be brittle and not yield to finger pressure.
10. Refrigeration is unnecessary for properly dried kibble. Store in covered containers for convenience. Some dogs may prefer kibble slightly coated with mashed vegetables, sauces, and yeast.

Nutrition info: Protein 24.2%, Fat 8.1%.

Thanks to Sam at Becks & Posh for hosting the event!

Tagged with: IMBB # 19 + Vegan

Comments (5)      Email Email      Print Print

IMBB 17: GreenTea Biscotti


It’s that time of month again: Is My Blog Burning, in which bloggers around the world cook around a common theme. This time, Clement of A la Cuisine! has chosen tea as the themed ingredient.

I developed this recipe for Mariko of Super Eggplant, who loves green tea. You see, I sent her a care package for Blogging by Mail. Two events collide in one day!

I took a trusty chocolate chip biscotti recipe from Chocolate and the Art of Low-Fat Desserts, added green tea leaves, and swapped the semisweet chocolate with white chocolate, since green tea has a delicate flavor. Going with the white theme, I also substituted mild almonds for the walnuts.

Be sure to use white chocolate that lists cocoa butter as the main ingredient. In cheap brands, partially hydrogenated oil poses as white chocolate. And you wonder why most people don’t like white chocolate! Would you substitute brown-colored vegetable shortening for dark chocolate? I don’t think so. Use the real stuff!

These low-fat biscotti become wonderfully fragrant a day after baking. They are delightfully crunchy but not jaw-breakingly hard, if you don’t overbake them.

Green Tea Biscotti
Adapted from Alice Medrich’s Chocolate and the Art of Low-Fat Desserts
Makes about 4 dozen cookies

Ingredients:
2 cups sifted all-purpose flour
1/2 tsp baking soda
1/4 tsp salt
1 Tbsp pulverized green tea leaves, from about 3 tea bags
2 eggs
3/4 cups sugar
1 tsp vanilla extract
2 Tbsp brewed green tea
1/2 cup chopped toasted almonds (optional)
2/3 cup white chocolate chips

  1. Preheat the oven to 300 degrees F. Line the baking sheet with greased foil.
  2. Place the flour, baking soda, salt, and tea leaves in a small bowl. Stir with a whisk to combine. Set aside.
  3. In a medium bowl, beat the eggs with the sugar, vanilla, and brewed tea until well combined. Beat in the flour just until combined. Stir in the nuts and white chocolate chips. The mixture will be thick and sticky.
  4. Use a large spoon to scoop the batter onto the baking sheet, dividing it evenly into 3 long, skinny, rope-shape loaves, each one foot long, or 2 loaves 16 to 17 inches long, depending on your baking sheet. The loaves must be 2 1/2 inches apart. You’ll get slightly messy. Use the back of the spoon or a spatula to even up the “loaves” and neaten the edges. Bake for 35 minutes. Remove from oven and cool for 10 minutes on the pan. Leave the oven turned on.
  5. Carefully peel the loaves from the foil and transfer them to a cutting board. Use a sharp serrated knife to slice the loaves diagonally into 1/2-inch slices. Arrange the slices directly on the oven racks. Bake for 20 to 25 minutes, or until the cookies are crisp and dry. Or arrange the cookies on 2 baking sheets. Bake for 12 minutes, rotating the sheets from top to bottom and back to front about halfway through the baking time. Turn cookies over and bake for 12 to 15 minutes, rotating sheets as before.
  6. Cool biscotti completely before storing. They become more tender about 2 or 3 days stored in an airtight container. They keep for several weeks.

Notes:
This is a developing recipe, and the tea flavor, although present, is not as strong as I would like. Any ideas for improvement? I can’t add more brewed tea, or else the dough will be too sticky. There’s only so much you can do to concentrate the tea: you can’t brew three bags in 2 tablespoons of water.

Using matcha (green tea powder) rather than leaves may concentrate the flavor. From what I’ve researched, 1/2 Tbsp matcha = 1 Tbsp tea leaves.

Comments (9)      Email Email      Print Print

IMBB 15: Chocolate Mousse Truffles

This month, Elise at Simply Recipes is hosting the online foodie event, Is My Blog Burning. The theme this time is “Has my blog jelled?” – meaning people across the world will cook with gelatin, pectin, or agar agar and blog about it. Check out her round-up of all the recipes and try something!In America, gelatin is synonymous with Jell-O. It’s fun to look at the jiggly dessert, but it’s nothing more than extra sweet fruit juice that’s been chemically altered to hold its shape. Time and again, I’m seduced by the clear, sparkling colors, but the taste never matches up. And the texture’s rubbery.

I resolve to elevate gelatin from its kitschy roots. Stop using it to make wobbly pineapple-marshmallow ambrosia! There are better applications out there, like chocolate truffles.

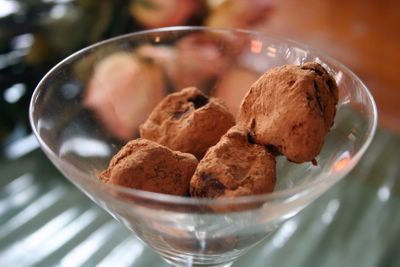
Chocolate goddess Alice Medrich has found a way to freeze mousse and make them into luxurious truffles. These have just 2.7 grams of fat each and less than half the calories of regular truffles!

Chocolate Truffles
From Chocolate and the Art of Low-Fat Desserts by Alice Medrich
Makes about 45 truffles
Start working at least 1 day ahead

Chocolate truffle mousse center:
7/8 tsp. gelatin
1 egg, separated
1/4 cup unsweetened dutch process cocoa
1/4 cup plus 1/6 cup sugar
5/8 cup low-fat 1% milk
2 oz. bittersweet or semisweet chocolate, chopped fine
1/2 tsp. vanilla extract
1/16 tsp. cream of tartar

Coating:
16 oz. bittersweet or semi-sweet chocolate, chopped
1/3 cup unsweetened dutch process cocoa

Make the mousse:

  1. Sprinkle the gelatin over 1/8 cup cold water in a small cup. Let stand, untouched, for at least 5 minutes, or until needed.
  2. Place egg yolks in a medium bowl near the stove and have a small whisk ready on the side. Combine the cocoa with 1/6 cup of sugar in a 1- to 1 1/2-quart saucepan. Stir in enough milk to form a paste, then add in the remaining milk. Bring mixture to a simmer over medium heat, stirring frequently with a wooden spoon, reaching the bottom and sides of the pan to prevent burning. Stir the chocolate mixture continuously once it begins to simmer. Simmer gently, still stirring, for about 1 1/2 minutes.
  3. Turn off the heat and whisk a small amount of the hot mixture into the egg yolks. Scrape the mixture back into the pot and whisk well to combine. It’s now safe to eat and will thicken without anymore cooking. Stir in the softened gelatin, chopped chocolate, and vanilla. Let stand for a minute or so, and whisk again until chocolate’s completely melted and the mixture’s perfectly smooth.
  4. Set the saucepan in a large bowl of ice water to cool and thicken. Stir and scrape the sides occasionally. If the mixture begins to cool too quickly, remove from ice bath, whisk and set aside. Should the mixture actually set, place the pan in a bowl of hot water and stir just until resoftened.
  5. Make the meringue: Simmer 1 inch of water in a large skillet. Combine cream of tartar and 1 tsp of water in a 4- to 6-cup heatproof bowl. Whisk in the egg whites and 1/4 cup of sugar. Place an instant-read thermometer near the stove in a mug of very hot water. Place the bowl in the skillet. Stir the mixture briskly and constantly with a heat-proof spatula, scraping the sides and bottom often to avoid scrambling the whites. After 1 minute, remove the bowl from the skillet. Quickly insert thermometer, tilting bowl to cover the stem by at least 2 inches. If it’s less than 160 F, rinse the thermometer in the skillet water and return it to the mug. Place bowl in the skillet again. Stir as before until temperature reaches 160 F when bowl is removed. Beat on high speed until cool and stiff.
  6. Fold about a quarter of the cooled chocolate mixture into the beaten egg whites. Scrape the egg white mixture back into the remaining chocolate mixture. Fold to combine.
    Note: if you don’t mind raw egg whites, you don’t need to cook the whites beforehand. Simply beat the whites and cream of tartar in a bowl (water is unnecessary). When the mixture forms soft peaks, slowly sprinkle in the sugar and beat until stiff. Because this cooked meringue is firmer and deflates less than ordinary meringue, there’s a reversal in the conventional procedure for folding it with another mixture. If using regular meringue, lighten the mousse by folding a bit of the meringue in the chocolate mixture.
  7. Transfer to a bowl, cover, and freeze until firm enough to scoop, 5 hours or longer.

Form truffle centers:

  1. Get ready a bowl of hot water, a melon baller or spoon, a pan lined with wax paper, and the firm mousse. Dip the melon baller into the water and wipe dry. Form a scant 1-inch ball. Place it on the pan. Dip, wipe, and scoop centers until the mixture’s gone. Freeze centers at least 12 hours, or overnight. Centers may be prepared to this point and frozen for up to 2 weeks.

Coat the truffles:

  1. Melt chocolate in the top of a double boiler over barely simmering water, stirring frequently to prevent overheating. Or microwave on Medium (50% power) for about 3 minutes, stopping to stir several times. Chocolate is ready when it is completely melted and smooth and between 115 and 120 F.
  2. Pour cocoa into a shallow dish. Have ready another shallow dish for the completed truffles. Remove a third to a half of the frozen centers from the freezer and place them in a shallow dish next to the container of melted chocolate.
  3. With your right hand (left if you are left-handed), fingers together and slightly cupped, scoop a large handful of melted chocolate into your left hand. Rub both hands together to coat them with a thick layer of chocolate. Try not to get the chocolate on your fingers. Quickly pick up a frozen center with your left hand and roll it gently between your hands with a circular motion and as little pressure as possible, just long enough to cover it with a coating of chocolate. Add chocolate to your hands as you need it Immediately place the coated center in the cocoa dish. If you see any uncoated spots, dip a finger into the chocolate and patch the truffle. Have someone else shake the dish, roll the truffle in cocoa, and transfer it to a clean dish. Repeat until all the centers are coated, adding chocolate to your hands between each one. (If you’re alone, just divide the cocoa between 2 dishes. Place 2 or 3 truffles in the cocoa before stopping to shake the dish. Continue to add truffles and shake until the first cocoa dish is crowded with truffles, then start on the second.) Truffles may be stored in a tightly covered container in the freezer for up to 6 weeks. Serve frozen.

Notes:

  • Work quickly to keep the melted chocolate from hardening on your hands as you handle the frozen centers. Just keep the center moving–never let it rest in one place in your hands–and get it out of your hands as fast as possible.
  • You will have both chocolate and cocoa left over because the dipping technique requires that you work with more than you need. Place the leftovers in small plastic bags (strain the cocoa first). Store in the freezer (since they might have little of the melted truffle mixture) until needed for another recipe. Or heat the leftovers with milk and sugar to taste for decadent hot chocolate.
  • This should go without saying, but do not use a Hershey’s bar, chocolate chips or Baker’s chocolate. Use something decent, like Lindt, or Ghirardelli. Or splurge on Valrhona. I used the Valrhona that my brother gave me for my birthday.

Variations:
Add raspberry jam, peanut butter, coffee, Nutella, chile powder, cinnamon, or chopped nuts to the mousse mixture. Coat the truffles with chopped nuts, coconut, or sesame seeds.

Other applications for the low-fat filling:

Chocolate mousse: Double the mousse recipe and refrigerate it for four hours. Serve in 6-8 goblets. For an extra sensual experience, chop the chocolate coarsely, into 1-cm pieces, so it doesn’t dissolve completely in the hot milk mixture. The remaining chocolate bits will melt as they hit your tongue.

The mousse strikes a perfect balance between foaminess and creaminess.

It’s so rich that I could only eat a tablespoon at a time. Then I remembered how good it was and helped myself to some more and felt sick afterwards. Why oh why did I subject myself to such torture?

Bittersweet chocolate marquis: Double the mousse recipe and freeze it in a 4 to 5-cup loaf pan. Serve in 1/2-inch slices with creme anglaise (custard sauce) or strained raspberry puree. It’s richer than super-premium ice cream.

Chocolate gelato: Double the mousse recipe and freeze it in a container. No ice cream maker is necessary. Soften it in the fridge 15 minutes before serving and scoop into bowls. Gelato is softer and more flavorful than ice cream. This will explode in your mouth!

Frozen chocolate truffle sandwich cookies: Layer a thin coating of frozen mousse between two macaroon cookies and serve straight from the freezer.

Layered cake: Use the mousse immediately as a filling in your favorite cake. Refrigerate and serve when set.

Charlotte: Line a large bowl or round cake pan with plastic wrap. Then line the bottom and sides with ladyfingers or sponge cake and fill it with the mousse (triple the recipe above). Cover the top with berries and another layer of ladyfingers. Refrigerate 4 hours or until firm and invert the charlotte onto a serving platter.

Buche de Noel: Make your favorite sponge cake in a jelly-roll pan. Line it with the frozen mousse (triple the recipe above) and roll it into a cylinder. Cover the cake with meringue and freeze until ready to serve. Bake the cake in a 425 F oven until golden brown, about 4-6 minutes. Serve immediately.

Comments (4)      Email Email      Print Print

Is My Blog Burning: Fluffernutter Cupcakes


Cupcakes take the cake! At least that’s what Maki at I Was Just Really Hungry says for this month’s edition of Is My Blog Burning.

Cupcakes take me back to my childhood, when the best thing about celebrating classmates’ birthdays was the obligatory cupcakes. Ha, forget about wishing them a good birthday. Just give me the cupcake…a cake I don’t have to share with anyone else.

Remember the good old days, before schools banned cupcakes? At least Texas reversed its decision.

And perhaps no other food encompasses childhood like the Fluffernutter sandwich. Before artisan breads became stylish, before we had to worry about eating whole grains, stick-to-the-roof-of-your-mouth peanut butter and marshmallow fluff on soft white bread was perfectly acceptable.

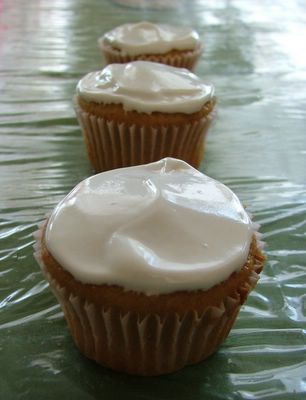
So I made a Fluffernutter sandwich in cupcake form. These are semi-healthy, since most of the fat comes from the peanuts. Most cupcake recipes call for a stick of butter each for the batter and frosting. This recipe has 1/8 of a stick of butter!

The first thing I noticed about these cupcakes was the intense peanut butter smell. Although they weren’t as moist as the cakes from Sugar Sweet Sunshine (which can be remedied by adding butter of course), they were a satisfying snack for a sweet ‘n’ salty craving.

Fluffernutter Cupcakes
(adapted from The Joy of Cooking)
Makes 15-18 cupcakes

For the peanut butter cupcakes:
1 1/4 cups all-purpose flour
3/4 cup packed light or dark brown sugar
1 1/2 tsp baking powder
1/2 tsp salt
3/4 cup milk
1/3 cup creamy peanut butter
1 large egg
1 tbsp unsalted butter, softened
1 tbsp vegetable oil
1 tsp vanilla
3/4 cup semisweet chocolate chips (optional)

Preheat oven to 350 F. Line muffin pans with paper liners.

Combine all ingredients in a food processor. Pulse for a few seconds to mix. Scrape the sides of the bowl and the blade and pulse until smooth. The entire mixing process should not take more than 5 seconds.

If you don’t have a food processor, whisk all the dry ingredients in a bowl and set aside. Cream the butter, oil and peanut butter with an electric mixer until smooth. Add the sugar. When incorporated, add the egg and vanilla. Scrape down the sides of the mixing bowl frequently with a rubber spatula to keep the batter smooth. On low-speed, alternately add the dry mixture in three additions with the milk in two additions, beginning and ending with the dry mixture. Stir in chocolate chips, if using. Hint: toss the chips with a bit of flour to keep them from sinking to the bottom of the cake.

Fill the muffin cups about two-thirds full. Hint: for mess-free, consistent portion control, use an ice cream scoop.

Bake until a toothpick inserted in the center of a cupcake comes out clean, 25-30 minutes.

Remove from the pan and let cool completely on a rack before frosting. Hint: put more frosting than you think you need on a spatula/knife and place it in the middle of the cake. Without lifting the spatula, spread the frosting to the edges by rotating your wrist.

For the marshmallow (aka seven-minute) frosting:
(adapted from The Joy of Cooking)
Makes 2 cups

2 1/2 tbsp water
1/8 tsp cream of tartar
2/3 cup sugar
1 large egg white
1/2 tbsp light corn syrup
1 tsp vanilla

Have the egg whites at room temperature, 68-70 F. Whisk everything except the vanilla together in a large stainless-steel bowl. Whipe excess sugar off the side of the bowl, as it will be difficult to dissolve later.

Set the bowl in a wide, deep skillet filled with about 1 inch of simmering water. Make sure the water level is at least as high as the depth of the egg whites in the bowl.

Beat the whites on low speed until the mixture reaches 140F on an instant-read thermometer. Do not stop beating while the bowl is in the skillet, or the egg whites will be overcooked. If you cannot hold the thermometer stem in the egg whites while continuing to beat, remove the bowl from the skillet just to read the thermometer, then return the bowl to the skillet. Beat on high speed for exactly 5 minutes.

Remove the bowl from the skillet and add the vanilla.

Beat on high speed for 2-3 more minutes to cool. Use the day it is made.

Since I won a pack-rat/frugal food food award, here’s suggestions for leftover frosting:
Dollop hot cocoa with it
Make Fluffernutter sandwiches out of it
Melt it with 1-2 tbsp butter and stir in rice krispies/oatmeal (1-2 cups) to make bars
Spoon it on top of ice cream

Variations:

Chocolate Peanut Butter Cupcakes
Frost with chocolate frosting for a richer cupcake.

Chocolate Frosting:
(adapted from The Joy of Cooking)
Makes about 2 cups

1 cup plus 2 tbsp sugar
1 cup unsweetened cocoa
1 cup milk
1 tsp vanilla
6 ounces milk chocolate, finely chopped (You can substitute dark chocolate for adult tastes. Or you can simply use 3 ounces dark chocolate to cut the fat and keep the flavor)

Combine sugar and cocoa small, heavy saucepan. Gradually add just enough milk to make a paste, and then stir in the rest.

Cook, stirring constantly with a wooden spoon and reaching into the corners of the pan, over medium heat until the mixture comes to a boil Boil gently, sirring, for about 2 minutes. Remove from the heat and add vanilla.

Let cool for 5 minutes. Stir in chocolate until melted and smooth. Cover the surgace of the frosting with a piece of wax or parchment paper and let cool until spreadable.

This keeps, refrigerated, for up to 1 week. Or freeze for up to 6 months.

Peanut Butter Jelly Cupakes
Swirl 1/3 cup melted jelly in the batter. Or, fill muffin cups 1/3 of the way up, spoon in 1 tsp jelly, and top with batter to fill the cups 2/3 full.

Nutella-Peanut Butter Cupakes
Frost cupcakes with Nutella. Melt the Nutella with a couple tablespoons milk, or it will be too thick and tear the cupcakes.

Honey Nut Cupcakes
Substitute sugar with 1/2 cup + 1 2/3 tbsp honey and reduce milk to 1/2 cup + 2 tbsp. Also add 1/8 tsp baking soda. Note that honey browns faster than sugar, so the cakes will probably cook faster. Thanks to Good Eats for the adaptation. I have no idea if it works.

Frost with:
Honey Cream Cheese Frosting
(Adapted from The Joy of Cooking)

8 ounces cream cheese
5 tbsp unsalted butter (optional)
2 tsp vanilla
1 1/2 to 2 cups honey (feel free to change based on your tastes)

Have the cream cheese cold and the butter at room temperature, 68-70 F.

In a medium bowl, beat cheese, butter and vanilla just until blended. Add the honey one-third at a time and beat just until smooth and the desired consistency. If the frosting is too stiff, beat for a few seconds longer. Do not overbeat.

This keeps, refrigerated, for about 1 week. Or freeze for up to 3 months. Soften and stir until smooth before using.

Comments (12)      Email Email      Print Print

Is My Blog Burning: Black-Eyed Pea Cake


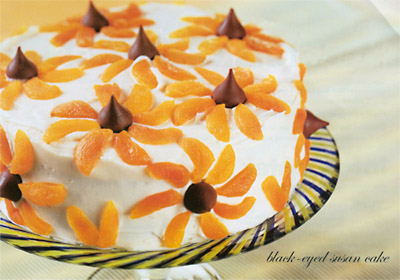
Photo: Vegetarian Times-Feb. 2005

For my first post, I’ve decided to participate in Is My Blog Burning?, a designated day where bloggers cook with a common ingredient or method. This time, the theme is beans. I think a dessert can be made from virtually any ingredient, so why not try a bean cake?

When I first saw the Black-Eyed Bean Cake recipe in the Feb. 2005 issue of Vegetarian Times, I wondered if I could substitute Asian red beans (azukis) for the black-eyes and red dates for the apricot puree to make a Chinese-ified cake. Before getting too adventurous though, I tested the original recipe to see if it was any good.

I had doubts about this recipe because a couple days earlier, I made the Fungi (cornmeal mush) from the same issue. I expected it to be a mixture between cornbread and oatmeal, but instead I got tasteless, watery goop. I’ll usually eat anything, but I seriously considered throwing the Fungi out. After boiling it on the stove for another 40 minutes (the recipe said I’d only need to boil it for two min.), the mixture reduced to one-third its volume and was quite good. It got nice and firm, like polenta.

Anyway, on to the recipe!

Black-Eyed Susan Cake
adapted from Vegetarian Times, Feb. 2005

Serves 12

Cake
2 cups dried apricots
2 cups cooked, drained and rinsed black-eyed peas
1/4 cup canola oil
1 cup packed light brown sugar
3 large eggs
1 cup whole wheat flour
2 tsp. ground cinnamon
1/2 tsp. ground cloves
1 1/2 tsp. baking soda
1/2 tsp. baking powder
2/3 cup golden or regular raisins
1 cup chopped pecans, optional

Frosting
1/3 of 8-oz. pkg. fat-free cream cheese
2 1/2 cups confectioners’ sugar
2 tsp. lemon zest
1 tsp. vanilla extract

Optional Decoration
12 chocolate drops or stars
32 dried apricots

  1. If using dried beans, measure out a little more than 1/2 a cup. (1 cup dried=3 1/2 cups cooked, so if you do some algebra, you’ll actually need .57 cups). Sort through the peas and pick out tiny stones and stray seeds. This is best done by spreading them on a table with a pot in your lap and pulling the good peas into the pot. To soak dried black-eyed peas, rinse them, and place them in a pot. Add enough water to cover them plus at least 4 inches more. Add 1/4 tsp. baking soda to the water, and stir. (This pulls out the sugars that cause gas in the intestines.) Let them sit overnight. Rinse thoroughly. The beans will cook perfectly in fewer than 90 minutes. Add salt after cooking.
  2. Preheat oven to 375F (350F if using glass or dark-colored pans). Grease and flour 2 8-inch cake pans, or grease and line pans with circles of parchment.
  3. To make Cake: Cook apricots in 2 cups water, about 12 minutes, until very soft. Measure out 1 cup apricots and liquid, and set aside. Put remaining apricots and liquid in blender, and puree. Add peas, and puree.
  4. Put oil, brown sugar and eggs in mixing bowl; beat on high 3 minutes. Mixture will look creamy. Whisk flour, cinnamon, cloves, baking soda and baking powder in separate bowl. Mix in raisin and pecans, if using. (Hint: tossing nuts, fruit, or chocolate chips with flour keeps them from sinking to the bottom of the cake.)
  5. Pour egg mixture over puree, and fold together. Gently fold in flour mixture. Pour into prepared cake pans.
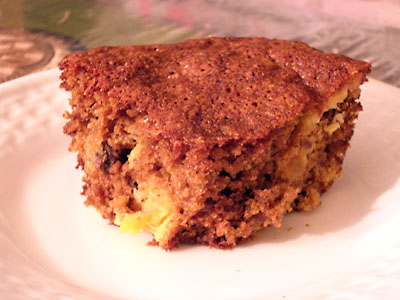
  6. Bake 35 to 40 minutes, or until toothpick inserted in center of cake comes out clean. Remove from pans, and cool completely on wire rack. Ooh, nice and crusty! While this cake was baking, the entire kitchen smelled like gingerbread.
  7. To make Frosting: Using an electric mixer, beat cream cheese until creamy. Beat in remaining ingredients. Frosting should be soft; it will firm upon sitting.
  8. Place one cake layer on plate, and spread reserved apricots evenly over it. Top with second layer. Spread frosting evenly over top and sides of cake.
  9. To decorate, cut apricots into slices. Place chocolate drop on cake, and arrange 8 apricot “petals” around it (skin side up). Repeat until cake is covered.

PER SERVING: 290 CAL; 6G PROT; 6G TOTAL FAT (1 G SAT. FAT); 55G CARB; 55MG CHOL; 200MG SOD; 5G FIBER; 35G SUGARS

I didn’t make the filling or the frosting…Growing up, my mom always complained that frosting was too sweet. So out of habit, I made my cake plain.

My handblender didn’t puree the apricot-bean mixture all the way, so you can see a chunk of apricot in the front and a white stripe of beans on the right.

The verdict: the texture was very good. The cake was moist and not dense (as is the problem with whole-wheat baked goods). I could not tell it was low-fat. Aside from the couple streaks, you can’t tell there’s beans in it either. This cake would be a good joke to play on friends. Imagine their faces when you tell them the secret ingredient!

EDIT:

I was unimpressed with the flavor on the first day, but on the second day, the flavors intensified. The cake got even more moist, but it wasn’t soggy or damp. My only complaint is that it’s a bit sweet, and I can’t really taste the spices. The cake is kind of like spice cake without the spices or carrot cake with extra brown sugar and no carrots.

Maybe to spice up the flavor, I’ll spread some apple butter (recipe featured at 101 Cookbooks) on the cake.

2nd EDIT:

On further investigation, I found out that I added too much sweetener. Brown sugar is simply white sugar plus molasses. I made my own brown sugar for this cake. According to the Grandma’s molasses package, 1 c brown sugar = 1 c white sugar + 1/2 c molasses. Or, it’s 2 parts white sugar, 1 part molasses. In previous experience, I found this ratio to be overkill, so I used 4 parts white sugar to 1 part molasses. On the Grandma’s molasses site though, it recommends 9 parts white sugar to 1 part molasses. Also, Baking 911 recommends 1-2 tbsp molasses for 1 cup of white sugar (or, 8-16 parts white sugar to 1 part molasses). Bottom line: I used waaaay too much molasses.

Partly because of my traumatic experience with the cornmeal mush, I still have qualms with Vegetarian Times recipes. Case in point: this recipe doesn’t tell you how much salt to add to the beans. I put a pinch. Evidently I needed more to bring out the spice flavors. Also, I seriously doubt 375F is a good temperature for the cake. Since I had an 8×8 glass pan (I halved the recipe), which conducts heat better than aluminum, I lowered the temperature to 350F. The edges browned very quickly, and I baked at 325F for the last five minutes.

So, this is a good cake, but it’s not to die for. I like the wholesome ingredients though. If you ever want to eat cake for breakfast, you can “fool” yourself by making healthy muffins with this recipe.

Maybe I’ll try the Chinese variation, but not anytime soon. My desk is exploding with “to try” recipes, and they’re from trusted sources.

Comments (8)      Email Email      Print Print