Archive for Eat Your Vegetables

No-Bake Rhubarb Cheesecake

no-bake cheesecake

How hot is it in New York in the summer? So hot I used a man just for his shadow. So hot you be frying bacon on the sidewalk. At least that’ what  some say. For me, it’s so hot that merely going into the kitchen is reason to shower.

So when I craved cheesecake, I whined, “I don’t wanna turn on the oven, don’t wanna!” Enter sweetened condensed milk: malty, smooth, and the antidote for baked custard. This cheesecake is sweeter than most, so the crust doesn’t need additional sugar, and it balances rhubarb (or any tart fruit). Yes, that pinkish celery thing that actually doesn’t need strawberries. It’s floral and fruity on its own, kind of like pink lemonade. How’s that for a vegetable (and a no-bake dessert)?

More No-Bake Desserts:
Plain Frozen Yogurt
Banana Pudding
Chocolate Sorbet
Grape Sorbet
Larabars

No-Bake Rhubarb Cheesecake

Rating: 41

Prep Time: 30 minutes

Total Time: 3 hours, 30 minutes

Yield: 9-inch cheesecake

Serving Size: 1/8 slice

No-Bake Rhubarb Cheesecake

When it's so hot you can fry bacon on the sidewalk, this refreshing no-bake cheesecake promises to be a smooth and tart treat.

Rhubarb compote adapted from Vegetarian Cooking for Everyone. Crust adapted from Joy of Cooking_1997. Cheesecake adapted from Divas Can Cook.

Ingredients

For rhubarb compote:
3 cups 1/2-inch pieces of rhubarb
3 tablespoons sugar
juice of 1/2 lemon
For crust:
1 1/2 cups graham cracker crumbs
6 tablespoons (3/4 stick) unsalted butter, melted
For cheesecake:
2 8-oz. packages cream cheese (brands other than Philadelphia don't have the same tang), at room temperature
1 14-oz. can sweetened condensed milk
juice of 1 lemon
1 teaspoon vanilla extract

Instructions

    Make rhubarb compote:
  1. Place rhubarb, sugar, and lemon juice in a heavy pan. Cook over low heat until the rhubarb has softened, about 10 minutes.
  2. Cool completely and store in the fridge.
  3. Make pie crust:
  4. Stir graham cracker crumbs and butter in a bowl until evenly moistened.
  5. Pat into a deep-dish 9-inch pie pan.
  6. Freeze for 20 min.
  7. Make cheesecake filling:
  8. Meanwhile, beat cream cheese on medium speed in a large bowl. When softened, add sweetened condensed milk and mix till smooth. Beat in lemon juice and vanilla.
  9. Pour cream cheese mixture into prepared pie crust and refrigerate until firm, or at least three hours.
  10. When ready to serve, spread rhubarb compote over cheesecake.

Notes

Save leftover rhubarb for (frozen) yogurt, vanilla ice cream, or pudding.

http://www.sugoodsweets.com/blog/2013/07/no-bake-rhubarb-cheesecake-recipe/

Comments off      Email Email      Print Print

Pumpkin Gooey Butter Cake from Scratch

Paula Deen Pumpkin Gooey Butter Cake
Photo: Tina Vega/Flickr

Gooey butter cake is exactly what it sounds like: sticky, chewy, creamy—and a heart attack on a plate. But once you try it, you’ll ignore your judgment and want to eat it all. According to legend, the cake originated around the 1930s, when a baker in St. Louis added the wrong proportions of ingredients to a coffee cake (although there are differing stories). The result was a toffee-esque goo that was held by a dense, cakey crust.

My favorite version’s from Paula Deen—she of Krispy Kreme bread pudding fame. Her pumpkin gooey butter cake’s a combination of pumpkin pie and cheesecake, with no fussy crust to roll out. The problem with most butter cake recipes though, is they call for boxed cake mix. Or if they’re from scratch, you have to wait for a yeast dough to rise.

I adapted a from-scratch cake recipe for the crust and slightly reduced the sugar and fat (it’s still a gut bomb, but I did what I could).

St. Louis Pumpkin Gooey Butter Cake (from scratch)
Crust inspired by Food & Wine; filling inspired by Paula Deen

Crust:
2 cups all-purpose flour
3/4 cup sugar
2 teaspoons baking powder
2/3 teaspoon salt
1/2 cup dry milk powder (optional)
1 teaspoon vanilla extract
1 egg
1 stick butter, melted

Filling:
1 (8-ounce) package Neufchâtel cheese (reduced-fat cream cheese), softened
1 (15-ounce) can pumpkin purée
3 eggs
1 teaspoon vanilla extract
1 stick butter, melted
1 3/4 cup sugar
1 teaspoon cinnamon
1 teaspoon nutmeg

  • Preheat oven to 350° F and lightly grease a 13″x9″ glass baking pan.
  • To make the crust: Combine the flour, sugar, baking powder, salt, and dry milk (if using) in a bowl. Add the egg and butter and mix until just combined with an electric mixer. Pat the mixture into the bottom and one inch up the sides of the pan.
  • To make the filling: In a large bowl, beat the cream cheese and pumpkin until smooth. Add the eggs, vanilla, and butter, and beat together. Next, add the sugar, cinnamon, nutmeg, and mix well. Spread pumpkin mixture over the crust and bake 1 hour. Don’t overbake, as the center should be a little gooey.

View more Thanksgiving and fall dessert ideas.

*Note: the picture above is of Paula Deen’s original recipe. I lost my pic of the cake, but it looks similar.

Comments (3)      Email Email      Print Print

“Secret Ingredient” Blondies

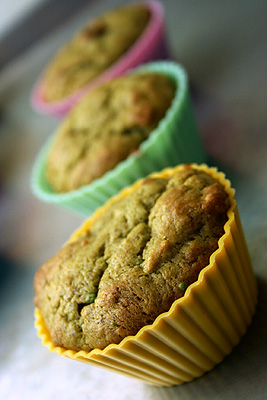
zucchini blondies

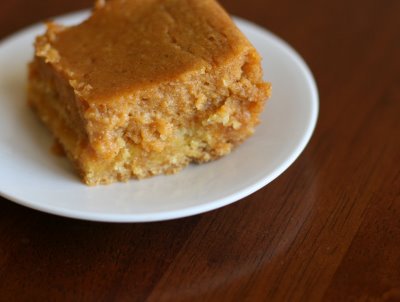
By now I’ve made cakes from avocado, beets, and potatoes, so a dessert with zucchini sounds relatively ordinary. But if we venture outside zucchini bread, we can have some fun.

I found a recipe for zucchini blondies after seeing a surplus of the squash at my market. (Since when is zucchini “in season” in the spring? Should I be worried?) It sounded strange, but I had a lot of zucchini, and it gets boring and mushy when you sauté it the traditional way.

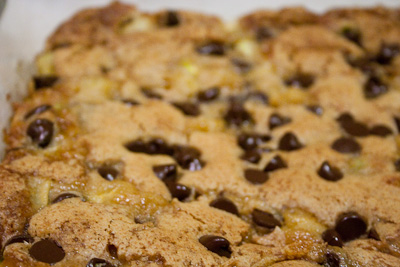
This recipe was surprisingly good (believe me, I don’t like everything I make). Because the zucchini adds moistness, these blondies are extra gooey and virtually impossible to over bake. Just be sure to chop the zucchini very small, as the recipe instructs. Otherwise, the blondies will seem overly vegetal. For you fainthearted, I’m sure you could substitute bananas, which would go well with the butterscotch-like batter.

Zucchini Blondies

Adapted from Smith & Hawken: The Gardeners’ Community Cookbook by Victoria Wise

Oil or soft butter, for greasing the baking pan
5 tablespoons butter, melted with 1 tablespoon water
1 cup (packed) dark brown sugar
1 large egg
1 teaspoon vanilla extract
1 cup all-purpose flour
1 teaspoon baking powder
1/8 teaspoon baking soda
1/2 teaspoon salt
1 medium zucchini, peeled and chopped into 1/4-inch pieces (6 ounces)
1/2 cup coarsely chopped walnuts or pecans
1/3 cup chocolate or butterscotch chips

Preheat the oven to 350° F with a rack in the middle. Lightly grease a 9-inch square metal baking pan.

Pour the melted butter into a large mixing bowl. Add the sugar and mix well. Add the egg and vanilla, and beat until blended.

Whisk the flour, baking powder, baking soda, and salt in a medium bowl. Add to the butter mixture. When almost combined, stir in the zucchini and nuts to make a stiff batter.

Spread the batter in the baking pan and sprinkle the chocolate chips on top. Bake for 30 minutes, or until a toothpick inserted in the center comes out almost clean with a little batter clinging.

Remove from the oven, and when cool, and slice into 16 squares. Serve warm or at room temperature. Keeps, covered, for 3 days at room temperature. Or wrap each piece individually and freeze for longer.

Vegetables in Dessert:
Heirloom Tomato CakeChocolate-Potato CakeBean BrowniesClassic Carrot CakePotato-Chip Cookies, and more

Comments (3)      Email Email      Print Print

Red Velvet Cake with Beets

red velvet cake with beets

Sorry to invoke wrath of Southerners, but red velvet is not a cake flavor. It’s a fancy name for a neon novelty. According to legend, the color comes from the chemical reaction of cocoa powder and acid (nowadays, we enhance it with food coloring). That doesn’t sound right, because most recipes only have two tablespoons of cocoa, which isn’t enough to cause a huge change in hue, much less chocolatiness.

Even though the FDA says that food coloring is nontoxic, I have second thoughts when I have to dump a whole bottle of red #40, ground beetles, or whatever into a cake. I’d rather use non-lab produced ingredients, like beets. And seriously, why so stingy with the cocoa? The cake has to taste like chocolate.

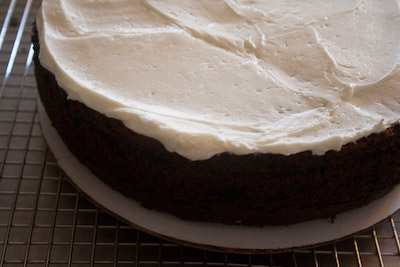
I found a recipe that satisfies both criteria: it’s from the American Cancer Society’s Taste More Birthdays Cake Contest. As the name suggests, it’s semi healthy with less sugar and fat but plenty of vegetables, fruit, and whole grains. The ingredients sound strange, but the earthiness of the beets goes well with the chocolate, and the fruits add tartness. Just tell your friends that you made chocolate-raspberry cake, and they won’t have to know your secret. It’s so moist and rich that I don’t think it needs frosting. My only complaint is that it loses its bright red color after it comes out of the oven.

I adapted the recipe so the prep time’s cut in half (using canned beets saves more than two hours). I also changed the dried fruits so it’s less expensive.

New Red Velvet Cake

Adapted from Alexandra Mudry
(Makes one 9”x14” cake, two 8” round cakes or 24 cupcakes)

Cake:
1 1/2 15-oz. cans unseasoned beets (to make 2 c. purée)
1/2 c. dried dates, pitted and coarsely chopped
1/2 c. prunes, coarsely chopped
1/2 c. unsweetened applesauce
1 c. granulated sugar
1/2 c. expeller-pressed canola oil
3 large cage-free eggs
3 oz. unsweetened chocolate, melted
1 tsp. instant espresso powder or instant coffee
1/2 c. unsweetened natural cocoa powder (not Dutch-processed)
1 c. all-purpose flour
3/4 c. whole wheat flour
1 1/2 tsp. baking soda
1/2 tsp. salt

Place beets in a blender or food processor with 2-3 tbsp. water. Purée beets until smooth. Blend in the dates and prunes. Set aside. (Can be made several days ahead and stored in an airtight container in the refrigerator.)

Preheat oven to 375° F. Spray baking pan(s) with oil and dust with flour. Discard the excess flour (if making cupcakes, just line the tins with paper wrappers).

Combine the oil, eggs and sugar in a mixing bowl. Beat with an electric beater on medium speed until smooth and light colored.

Add the espresso powder to the melted chocolate and stir until combined.

Turning the speed down to low, slowly drizzle the melted chocolate into the mixture. Once the chocolate has been added, turn off the machine and scrape the sides of the bowl.

In a separate bowl, combine the cocoa powder, applesauce and beet purée. Add this mixture to the egg mixture. Beat on medium speed to incorporate.

Sift the remaining dry ingredients together and then gently fold into the mixture (don’t overmix or the cake will become tough).

Pour batter into the pan(s) and bake for 40-45 minutes (or 20-25 for cupcakes), or until a toothpick inserted in the center comes out clean.

Cool and remove from pan(s). If not using immediately, wrap in plastic wrap and refrigerate. Cake can be made a day in advance. (The cake is delicate and crumbly so it’s much easier to work with once chilled. )

Cream Cheese Frosting (optional):
24 oz. (3 pkgs) reduced fat cream cheese, room temperature
1 1/4 c. confectioners’ sugar, sifted
2 tsp. vanilla extract

Lightly beat the cream cheese and vanilla with an electric mixer until smooth, about 1-2 minutes.

Scrape down sides of bowl then add confectioners’ sugar. Cream together until smooth. Don’t overmix or the frosting will become too soft and difficult to spread.

Assembly:
If using a 9” x 14” pan, cut the cake lengthwise down the middle so you have two layers.

Cover with cream cheese frosting.

Serves 10-12 generously.

Vegetables in Dessert:
Heirloom Tomato Cake, Chocolate-Potato Cake, Bean Brownies, Classic Carrot Cake, Potato-Chip Cookies, and more

Comments (11)      Email Email      Print Print

Avocado Cake

The first time I tried avocado in a dessert, it was in a milkshake at an eclectic restaurant. I loved avocados; I loved sugar. Why not? Then my cousin pointed out, “Ew! You’re going to drink pure fat!” By the time the shake came, I could only muster a sip. My mom, ever the good sport, finished it for me.

avocado popsicle

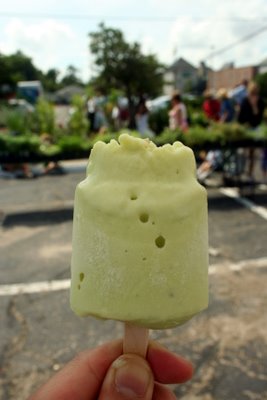
Ten or so years later, I encountered an avocado Popsicle at the New Orleans farmers market. By now I knew that avocados were common in Southeast Asian and Latin American desserts and wasn’t grossed out. This Popsicle was like ice cream on a stick; it was refreshing on that blistering day.

avocado cake

When my aunt recently visited me, she brought along gifts: Harbor Sweets chocolate, Trader Joe’s freeze-dried mangosteens, lettuce and avocados. (She was just being practical with the veggies.) That avocado was getting softer by the day, and like all surplus food, I had to turn it into dessert. I almost went with avocado pancakes, but they’re savory. So I went with this tender cake from Accidental Hedonist. As Kate says, “Done correctly, it’s a cake that can sit with pride next to your zucchini bread or pumpkin cake.” It doesn’t taste gross, but it’s faintly vegetal in a good way, like carrot cake.

It’s so good that I might substitute puréed avocado for butter in other recipes. It’s kind of healthy too: avocado’s high in omega 3s, vitamin E and fiber. If you’re worried that people will be put off by the green color, just tell them you made a pistachio cake, which sounds far fancier. Trust me, it’s worth saving your avocados for.

Recipe is at Accidental Hedonist
You can skip the walnuts and dried fruit if you wish. To make 20 cupcakes, bake for about 20 min. in a 350° F oven.

Related links:
More Vegetables in Dessert: Heirloom Tomato Cake, Chocolate-Potato Cake, Bean Brownies, Classic Carrot Cake and Potato-Chip Cookies
Gourmet’s Test Kitchen Challenge: Avocado Marshmallows v. Avocado Crème Brûlée
More on my Trip to New Orleans and the Relief Work That We Did

Comments (5)      Email Email      Print Print

You Say Tomato, I Say Cake

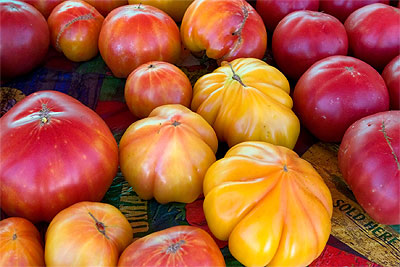
heirloom tomatoes
Photo: Clay Irving

The things people bake these days: cake with pork and beans and tomato soup! Scary ingredients, yes (why would you use canned soup when fresh tomatoes are falling off the vine?), but scary concept, no.

If you like carrot cake, fudgy brownies (with a secret ingredient), or zucchini bread, Carole Walter’s tomato cake isn’t far off. For the best results, use heirloom tomatoes. The uglier the better. You won’t taste the tomato, but instead you’ll get a moist “spice cake.” It is one of my favorite cakes, and it has relatively little butter. Sorry, no pictures. I made this a couple years ago.

Sugarsweet Tomato Nut Torte

From Great Cakes by Carole Walter

(Serves 8 to 10)

3/4 pound very ripe tomatoes
1 tablespoon cider vinegar
1 1/2 cups walnuts
1/3 cup (2/3 stick) unsalted butter
1/2 cup unbleached all-purpose flour, unsifted
1 cup sifted unbleached all-purpose flour
1 teaspoon baking soda
1/2 teaspoon salt
1 teaspoon ground cinnamon
1/2 teaspoon ground nutmeg
4 large eggs
1 1/4 cups dark brown sugar, lightly packed
2 teaspoons freshly grated navel orange rind (optional)
1 teaspoon vanilla extract

1. Cut an X in the skin on the bottom of each tomato. Remove the cores, place the tomatoes in a bowl and add boiling water to cover. Allow to stand for 1 minute, then rinse in cold water and peel off the skins. Cut each tomato in half across the core and squeeze gently to remove seeds and juice. Puree the pulp in a food processor. You should have about 1 cup of puree. Stir in the vinegar and set aside.

2. Position a rack in the lower third of the oven and preheat to 325 degrees. Butter a 9-inch springform pan and line the bottom with parchment paper.

3. Put walnuts and 1/2 cup unsifted flour in the container of the processor fitted with the steel blade and pulse 8 to 10 times, until nuts are chopped to medium size. Transfer to a bowl and set aside.

4. In a small pan, melt the butter over low heat. Set aside to cool to tepid. Sift together the 1 cup sifted flour, baking soda, salt, and spices in a triple sifter. Set aside.

5. Place the eggs in the large bowl of an electric mixer fitted with beaters or whip attachment. Beat on medium-high speed until thickened and light in color, about 1 1/2 to 2 minutes. Gradually add the brown sugar over 2 to 3 minutes and beat for 3 minutes longer. The mixture will be very thick.

6. Reduce mixer speed to medium-low. Blend in the orange rind and vanilla. Add the flour mixture alternately with the tomato puree, dividing the dry ingredients into 3 parts and the puree into 2 parts, starting and ending with the flour. Scrape sides of bowl as needed. The batter will be very loose.

7. Quickly pour in the butter, then add the nuts, beating just until blended.

8. IMMEDIATELY pour the batter into the prepared pan. Center the pan on the rack and bake in the preheated oven 55 to 60 minutes, until cake is golden brown, springy to the touch, and the sides, begin to come away from the pan. A toothpick inserted into the center should come out dry.

9. Remove from oven and set the pan on a cake rack to cool completely. Release the outer rim of pan, invert the cake onto the rack, and peel off the parchment paper. Place top side up on a serving platter. Just before serving, dust the top with confectioners’ sugar. If you like, split the cake into two layers with a long thin knife, then fill and frost with whipped cream made with 1 1/2 cups heavy sweet cream. Garnish with chopped walnuts.

Comments (6)      Email Email      Print Print

St. Patrick’s Day Chocolate Cake

chocolate potato cake

I love potatoes so much that if I were to list the ways I eat them, I would sound a lot like Bubba in Forrest Gump:

Anyway, like I was sayin’, potatoes are the fruit of the earth. You can fry them, bake them, boil them. There’s uh, potato salad, mashed potatoes, screaming potatoes, potato pancakes, potato bread, potato dumplings, potato sticks, potato gratin, criss-cut fries, cream of potato soup, potato curry and potato cake. That—that’s about it.

By cake, I don’t mean latkes. I mean dessert. Mashed potatoes make moist bread, like Nutella babka, but I’d never tried it in cake. I wanted to add it to a favorite chocolate cake recipe, but I wasn’t sure whether it would replace the fat or the flour (because it’s creamy and starchy). Off to the Internet I searched. Some recipes had virtually no chocolate, while others had too much butter. This one, from I Love Chocolate, seemed the most reasonable. Since I didn’t have the Dutch-process cocoa it called for, I used natural cocoa and tinkered with the leavening. Besides, I think natural cocoa has a more complex flavor.

The resulting cake was light and moist. I didn’t think it was chocolatey enough, but maybe it’s because I forgot to add the vanilla. Paired with vegan chocolate frosting, this cake will cause tasters to do a double take. It’s an unusual dessert for St. Patrick’s Day, because it doesn’t scream green (or Guinness). If you really want to go green though, Gourmet.com has plenty of ideas, like apple celery granita.

Irish Chocolate-Potato Cake

Cake adapted from Stephanie Zonis. Frosting adapted from More Great Good Dairy-Free Desserts Naturally by Fran Costigan.

For cake:
2 medium or 1 large potato (to make 1 cup hot, unseasoned mashed potatoes)
2 tsp instant espresso or coffee granules, dissolved in 1 cup hot water
2 cups sifted all-purpose flour
3/4 cup unsweetened natural cocoa powder (not Dutch-processed)
2 tsp plus a pinch of baking soda
1/2 tsp salt
1 stick plus 2 tablespoons unsalted butter, softened
2 cups granulated sugar
1 tsp vanilla extract
4 large eggs

For frosting:
(Makes 2 cups, enough to fill and frost one 9-inch two-layer cake)
Tofu frosting without chocolate is too watery and beany for my tastes. This one, which resembles mousse, is a keeper.

1 (12.3-ounce) aseptic box firm silken tofu (recommended brand: Morinu)
1 tablespoon plus 1 tsp canola oil
1/3 tsp salt
1/4 cup sugar
1/4 cup unsweetened cocoa
1 heaping tsp vanilla extract
6 ounces (about 1 cup) semisweet or bittersweet chocolate, melted
1-3 tablespoons chocolate, vanilla, or plain soymilk, if needed

Equipment: potato ricer/food mill or a fine-mesh sieve, food processor, 9-inch round cake pan, serrated knife, icing spatula

Make mashed potatoes: Boil or steam the potatoes until fork tender, about 15 minutes. When the potatoes are cool enough to handle, peel off the skin. Pass the potatoes through a potato ricer/food mill. Or mash them with a fork and push the mixture through a fine-mesh sieve to get rid of the lumps. (You can make the mashed potatoes a couple days ahead of time.)

Make cake: Position a rack to center of the oven; preheat oven to 350°Â F. Grease 9-inch round pan with butter. Lightly flour the pan, knocking out any excess flour; set aside.

Place mashed potatoes into a medium bowl. With a small whisk, gradually stir in coffee to form a smooth mixture; do not beat mixture excessively. Cool to lukewarm.

Meanwhile, sift together flour, cocoa powder, baking soda and salt. Set aside.

In large bowl, combine the butter, sugar and vanilla with an electric mixer. Beat at a low speed to blend, then beat 2 minutes at medium speed, scraping down bowl and beater(s) with rubber spatula once or twice. Add eggs, 2 at a time, beating in at a low speed until blended. Scrape bowl and beater(s) with rubber spatula. Increase mixer speed to medium; beat 1 minute.

At lowest speed, add sifted dry ingredients in 3 additions and mashed potato-coffee mixture in two additions, beginning and ending with dry ingredients and beating after each addition just until blended. Scrape bowl and beater(s) occasionally with rubber spatula. Batter may still appear curdled after all ingredients have been added.

Pour batter into prepared pan and spread evenly. Bake in preheated oven about 1 hr, rotating pan 180 degrees during baking. Cake is done when toothpick inserted near center emerges with a few moist crumbs still clinging to it. Remove to cooling rack.

During baking, cake center will rise higher than edges, but center will fall slightly as cake cools. Cool completely before frosting. Store at room temperature, covered airtight, for up to 3 days; freeze for longer storage.
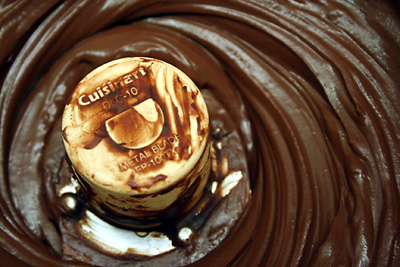
vegan chocolate frosting

Make frosting: Combine the drained tofu, oil, and salt in a food processor, and process about 1 minute until pureed. Use a rubber spatula to clean the sides of the bowl and add the sugar, cocoa, and vanilla. Process 1 to 2 minutes, until the tofu mixture is smooth.

Add the melted chocolate and pulse the processor three or four times to incorporate. Process 1 to 2 minutes until the mixture is very creamy. Refrigerate in the processor for 20 minutes. The cream may need to chill for 1 to 6 hours in order for it to become firm enough to spread.

The degree of firmness will determine the amount of soy milk needed to create the final texture. It should be thick but easy to spread. Dip an icing spatula into the cream to test to the texture. If the cream is too stiff to use, add 3 tablespoons of the soy milk and process 1 minute. Add more soy milk, 1 tablespoon at a time as needed. When the cream is ready to use, spoon it into a bowl and begin to assemble the cake.

Frost the cake: With a serrated knife, level off the top of the cake. Cut the cake into two even layers. (Need more detailed instructions?) Cover one layer with frosting, then add the top layer. Frost the top and sides.
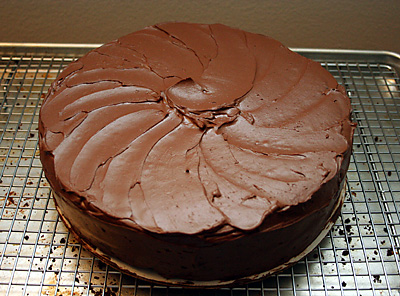
finished chocolate cake

Comments (15)      Email Email      Print Print

A Season for Ice Cream


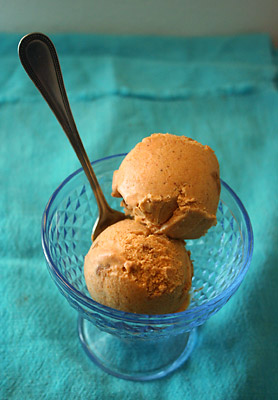
pumpkin pie ice cream

There are two reasons why I shouldn’t eat ice cream right now. First, it’s the dead of winter. Second, it’s not healthy. To both those rules, I say, “I don’t care.” Why are ice cream cravings supposed to turn off just because it’s not summer?

While I’m breaking the rules, why not enjoy pumpkin pie ice cream right now? Thanksgiving’s long gone, but like Maida Heatter says, pumpkin ice cream “has no season.”

Whenever I make macaroons, I always freeze leftover egg yolks so I’ll have them for custard-based ice cream, like the one below. Just remember to add 1 1/2 teaspoons sugar or 1/8 teaspoon salt for every four yolks (and label them!), so they don’t get gelatinous. If you have the opposite problem and have too many whites, you can freeze those too, but I heard they don’t whip as well for meringues.

This version is healthier than regular ice cream, since there’s a high proportion of milk to cream. I encourage you to eat it during the summer, Thanksgiving and yes, the middle of winter.

Pumpkin Pie Ice Cream

Inspired by Frozen Desserts, Chocolate and the Art of Low-Fat Desserts, Gourmet and The Perfect Scoop

Makes about 5 cups

1 1/2 cups whole milk
1 cup firmly packed brown sugar
3 egg yolks
1/2 tsp vanilla extract
1/4 tsp ground cloves
1/4 tsp ground nutmeg
1 tsp ground cinnamon
1 cup pumpkin puree (canned is fine, but make sure it has no added flavorings)
3/4 cup heavy cream
1 tablespoon brandy or vodka
1 1/2 cups crushed graham crackers or gingersnap cookies

In a 2-quart heavy saucepan bring milk, cream, and about half of sugar just to a simmer, stirring until sugar is dissolved. Remove pan from heat.

Have ready a large bowl of ice and cold water. In a bowl with an electric mixer beat yolks, spices and remaining sugar until thick and pale. Add hot milk mixture in a slow stream, whisking, and pour into saucepan. Cook custard over moderately low heat, stirring constantly, until a thermometer registers 170° F, or the mixture coats the back of a spoon. (Do not let boil.) Pour custard through a sieve into a metal bowl set in ice and cold water. Add the brandy/vodka and vanilla and cool. Chill custard, covered, until cold, at least 1 1/2 hours.

Freeze mixture in an ice cream maker. While the ice cream is freezing, scatter a handful of cookies in the bottom of an airtight storage container. When the ice cream is finished churning, quickly fold in the rest of the cookies. Transfer to the storage container and put in freezer to harden, 1 to 3 hours.

Comments (6)      Email Email      Print Print

Mmm, pumpkin hummus

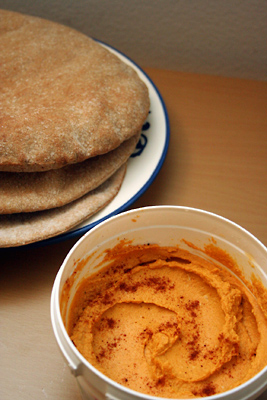
pumpkin hummus

It takes a lot to steer me away from sweets. Once in a while, something so good comes along that I can’t wait to eat it first thing in the morning. One such food is hummus, which I’ve gobbled down at breakfast. It’s so versatile. It can be a dip, sandwich filling, and if thinned out enough, pasta sauce or salad dressing. You don’t even have to stick to the combo of chickpeas and sesame butter. Cashew butter is an excellent substitute: according to Venturesome Vegetarian Cooking, it makes everything creamy and sweet. (Full disclosure: I’ve worked with the author before, but this book packs the easiest, most delicious vegan recipes out there.)

Since it’s fall, I made pumpkin hummus with cashew butter. I’ve eaten it for breakfast several times, and I hope you do too! This version can be used for sweet or savory applications. If you want it “sweeter,” add cinnamon. It will taste like pumpkin pie dip but without any added sugar. If you’re looking for more Thanksgiving recipes, give this one a try.

Pumpkin Hummus

1 cup raw cashews
1 1/2 cups pumpkin puree (canned is fine)
1 tablespoon olive oil
1/8 teaspoon ground nutmeg
1/2 teaspoon paprika
1/8 teaspoon salt

  1. Toast the cashews in a preheated 350F oven until golden brown, about 15 minutes. Check the nuts halfway through and stir them to ensure even browning.
  2. In a food processor, grind the cashews for several minutes and scrape down the bowl occasionally, until they turn into nut butter.
  3. Add the remaining ingredients and process until smooth. If desired, add a couple tablespoons of water to thin the mixture out.
  4. Serve with chips, crackers, bread, sliced vegetables or apples.

Variations:
Pumpkin pie: Add 1/2 teaspoon ground cinnamon and omit the paprika.
Savory: Increase the salt to 1/4 teaspoon and add 1/8 teaspoon ground cumin and a dash of cayenne pepper.

Notes:
If you don’t want to toast and grind your cashews, substitute 1/2 cup minus 1 tablespoon cashew butter and reduce the salt.

Like a lazy cook, I eyeballed the salt and spices, so you don’t have to follow the amounts exactly. Just add them to taste.

Comments (3)      Email Email      Print Print

Caramel surprise chocolate chip cookies

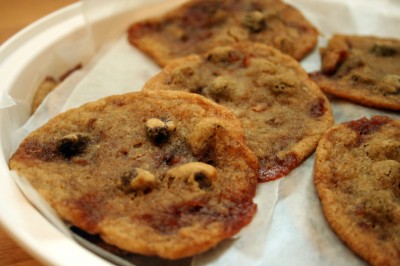
garlic brittle chococlate chip cookies

Before you think I’ve gone nuts for pairing chocolate with garlic again, I have an excuse. These cookies were a birthday present for my roommate, who loves garlic. She stores several cups of garlic in the fridge and even pre-minces it so it’s ready when the moment strikes.

Since my idea of a gift always involves sugar, I made garlic brittle chocolate chip cookies, inspired by the Gilded Fork. The garlic is pre-cooked and added to caramelized sugar, so it has a sweet, nutty flavor. If you’ve ever had roasted garlic, you know that garlic loses its bite after a long period of cooking.

Because I’m a sucker for new recipes, I made the cookie dough from a review copy of Elizabeth Falkner’s Demolition Desserts. The first chapter is devoted to chocolate chip cookies. (The premise sounds better than it is. I hoped for a chocolate chip cookie primer, giving variations on chewy, cakey and crisp cookies, like Alton Brown did so well in Good Eats. Elizabeth’s chapter is a compilation of really different cookies, like traditional chocolate chip and chocolate-chocolate chip, without a thorough explanation.)

These cookies didn’t turn out, and it had nothing to do with the garlic (they didn’t taste nasty, but I don’t think the garlic was necessary). They were as thin as credit cards and extremely floppy. The dough didn’t seem to cook.

Lessons learned:

  • When adding hard candy to cookie dough batter, reduce the sugar in the dough accordingly. Elizabeth’s dough had 3/4 cup more sugar than the Gilded Fork recipe. Too much sugar prevents the dough from setting up. You’ll burn the sugar before the dough’s done.
  • Corn syrup creates a pliant, chewy cookie. I found this out because the brittle had a little corn syrup. Finally, the secret to chewy cookies is revealed!
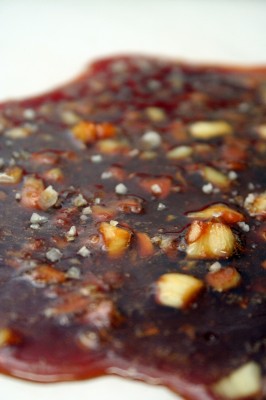
  • For the deepest flavored brittle, cook the sugar just before it burns. My caramel never registered hot enough to reach the “hard crack” stage, so I kept cooking it. I only pulled it off the heat right when I smelled a little of it burning. Luckily, I got a smoky, molasses-flavored brittle.
  • Grey sea salt rocks. I used salt from Guérande in Brittany, France, which has a deep, almost smoky flavor. The large, irregular crystals melt on your tongue slowly, so the flavor pops. From now on, I’ll add it to all my cookie doughs. At $8 a pound it’s seems frou frou, but if you use it strategically, the canister lasts you a while.

garlic brittle

The idea of brittle in cookies is promising, but this recipe needs some work. Next time, I’ll use cacao nibs instead. No more garlic and chocolate for me. If you’re feeling adventurous, maybe diced fried bacon would go well in the brittle, too.

Garlic Brittle Chocolate Chip Cookies

Garlic Brittle Chocolate Chip Cookies

Ingredients

For Garlic Brittle:
8-10 garlic cloves, depending on size
1 cup sugar
1/4 cup corn syrup
2 tablespoons unsalted butter, at room temperature
1 teaspoon vanilla
1/4 teaspoon fancy coarse salt, such as grey salt
For Cookies:
1 stick (4 ounces) unsalted butter, chilled
1/2 cup granulated sugar
3/4 cup brown sugar
1 large egg
1 1/2 cups minus 1 tablespoon all-purpose flour
1/2 teaspoon baking soda
1/4 teaspoon baking powder
1/4 teaspoon salt
1 cup chocolate chips
1 batch garlic brittle

Instructions

    Make Garlic Brittle:
  1. Blanch the garlic in boiling water for about 5 minutes. Drain, peel, and mince the garlic. Cool completely. (This step mellows the taste of raw garlic.)
  2. Line a baking sheet with a Silpat, parchment, or wax paper. In a large, heavy saucepan, combine the sugar and corn syrup over medium heat. Stir until the sugar dissolves, about 5 minutes. Continue to boil until the mixture reaches 300° F (hard crack stage) on a candy thermometer and is dark golden brown.
  3. Immediately remove from the heat and add the butter and vanilla, stirring until the butter melts and is completely blended. Add the garlic, and stir to coat completely.
  4. Carefully pour the hot mixture onto the prepared baking sheets and spread evenly with a heatproof, rubber spatula. Sprinkle with salt. Cool completely, about 1 hour, and break into small chunks.
  5. Make Cookies:
  6. With an electric mixer, beat the butter with the granulated and brown sugars until just combined and sandy (do not whip). Mix in the egg until just combined, about 3 seconds. Add the flour, baking soda, baking powder, and salt and mix until just incorporated. Mix in the chocolate chips and garlic brittle.
  7. Refrigerate the dough for at least 30 min., preferably overnight.
  8. Preheat the oven to 350° F. Line a large cookie sheet with parchment paper or a Silpat (do not attempt with greased foil, which makes the cookies spread, or wax paper unless you like the taste of crayons). Drop one-inch balls of dough a few inches apart. Bake until just golden around the edges, about 13-17 min. Rotate the pans from top to bottom and front to back after 7 min. Transfer the cookie sheet to a rack to cool completely.

Notes

Brittle adapted from Gilded Fork; cookie dough adapted from Elizabeth Falkner’s Demolition Desserts

http://www.sugoodsweets.com/blog/2007/10/caramel-surprise-chocolate-chip-cookies/

Comments (5)      Email Email      Print Print