One Person’s Trash is Another’s Nutella Bread Pudding


Nutella bread pudding

When eating out, I am notorious for bringing home every piece of uneaten food. I’ve asked waiters to wrap cranberry compote (what else will go with leftover pumpkin pancakes?) and the bread basket. This weekend, I took home leftover bread cubes from the fondue at Artisanal. If you’re paying for quality, why let it go to waste?

Laugh all you want, but if you threw that bread in the trash, you would have missed out on Nutella bread pudding. It’s like baked French toast with swirls of chocolate. Bread pudding is perfect for stale artisanal bread, the kind that’s marked 50% off at the end of the day (although white sandwich bread will do). Hot out of the oven, you get the contrast of a jiggly, spongy bottom and a crunchy, crouton-like top. Bread pudding is also divine cold, in a cold pizza/morning hangover type of way. Not that I would know.

In New Orleans, my friend Erik spent a grueling night scrubbing burnt bread and custard off a pan because we didn’t use a water bath. At the risk of offending Erik, I never use a water bath for bread pudding at home. I like the crusty edges.

Not only is this recipe a delicious way to clean out your pantry (I used soy milk and leftover Nutella babka), but it’s low in fat, too.

Nutella Bread Pudding

Adapted from Emeril Lagasse and Pure Dessert by Alice Medrich

Oil, for greasing pan
1/4 cup Nutella
8 slices day-old crusty bread or Nutella babka (about 4 cups when cut into 1/2-inch cubes)
4 large eggs
1/2 cup firmly packed brown sugar
1 teaspoon pure vanilla extract
2 cups milk (soy is fine)

Preheat the oven to 350 degrees F.

Grease an 8 by 8-inch square pan with oil.

Spread Nutella on four slices of bread and top with remaining pieces of bread. Cut the sandwiches into 1/2-inch cubes.

In a large bowl, whisk together eggs, sugar and vanilla until very smooth. Stir in milk and add the bread. Let the mixture sit for 30 minutes, stirring occasionally.

Pour the mixture into the prepared pan. Bake until the pudding is set in the center, about 55 minutes. Let cool for 15 minutes. Slather the top with more Nutella, if desired. Bread pudding is best hot out of the oven, or refrigerated after a day. Microwaving it makes it rubbery.

Comments (11)      Email Email      Print Print

Truffle Showdown: Simple is Best

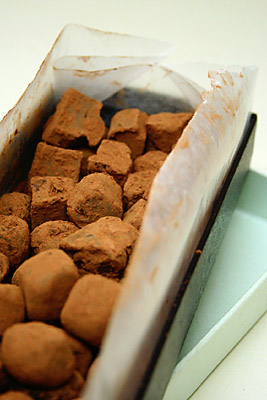
chocolate truffles

At its simplest, chocolate truffle recipes are like this: Pour hot cream over chocolate. Stir. Roll into balls. Eat. If only it were that simple. Some recipes include corn syrup, butter or egg yolks for richness. There’s also the mysterious water ganache, where you combine hot water with chocolate. It breaks all the rules, since recipes warn you that one drop of water will ruin an entire bowl of chocolate. This is true, but if you have a lot of water (1 tablespoon of water per 2 ounces of chocolate), it’s not a problem. In some cases, it’s advantageous, because water doesn’t distract from the chocolate flavor like cream can.

To find the best truffle recipe for Valentine’s Day, I tested three recipes: vegan truffles adapted from Enlightened Chocolate, Alice Medrich’s truffles that started her chocolate empire, and Robert Linxe’s cream truffles (of La Maison du Chocolat, my favorite chocolate shop in New York).

The vegan truffles were six ounces of semisweet chocolate combined with 1/2 cup hot water, 1/4 cup oil (unrefined nut oil was recommended, but I used olive oil) and 1 1/4 tsp vanilla extract. Since I was curious whether this water ganache thing would work, I tasted the mixture before adding the oil and vanilla. Not bad, but it was plain. After adding the rest of the ingredients, it tasted funky. The alcohol flavor from the vanilla extract lingered. Note to self: never eat “raw” vanilla extract.

Alice’s truffle recipe from Bittersweet was the richest, since it contained egg yolks and butter (but water instead of cream). It was very good, but not necessarily worth the trouble of cooking and straining the yolks.

Robert’s recipe was the simplest: pour 2/3 cup hot cream over 8 ounces finely chopped chocolate. I skipped the chocolate coating and just tossed the truffles in cocoa powder. They had the freshest and truest chocolate flavor, even though I used sub-par cream that was several months old. It just goes to show: sometimes simplest is best.

Simplest Chocolate Truffles

Adapted from Robert Linxe of La Maison du Chocolat
Makes about 60 truffles (do not double recipe)

These truffles are very soft, so store them in a cool area.

8 ounces chocolate (preferably 60% cacao)
2/3 cup heavy cream
Cocoa powder for dusting (about 1/2 cup)

Finely chop the chocolate.

Bring heavy cream to a boil in a small heavy saucepan. Make sure your pan is small, so you’ll lose the least amount of cream to evaporation, and heavy, which will keep the cream from scorching. Optional: Linxe boils his cream three times — he believes that makes the ganache last longer. If you do this, compensate for the extra evaporation by starting with a little more cream. 

Pour the cream over the chocolate, mashing any big pieces with a rubber spatula.

Then stir with a whisk in concentric circles (don’t beat or you’ll incorporate air), starting in the center and working your way to the edge, until the ganache is smooth. Pour into an 8″ x 8″ pan lined with wax or parchment paper.

Let stand at room temperature until thick enough to hold a shape, about 1 hour.

Turn out the ganache on a cocoa-dusted cutting board. With a sharp knife, slice the ganache into half-inch cubes. Dust your palms with cocoa powder and roll the ganache balls. Toss the truffles with more cocoa powder. Shake truffles in a sieve to eliminate excess cocoa. Store in a well-sealed container.

Comments (16)      Email Email      Print Print

Happy Nutella Day

World Nutella Day Today is World Nutella Day, my favorite food holiday of the year! It’s a day to cook with, eat and fantasize about chocolate-hazelnut spread. Try making your own or putting some in babka. Don’t forget to vote for my chocolate-hazelnut butter in Culinate’s Death by Chocolate contest. Everyone who votes can win a free trip for two to Napa’s Chocolate Festival on Feb. 23.

For more Nutella recipes, see the roundups, part one and two.

Comments (3)      Email Email      Print Print

Nutella Babka

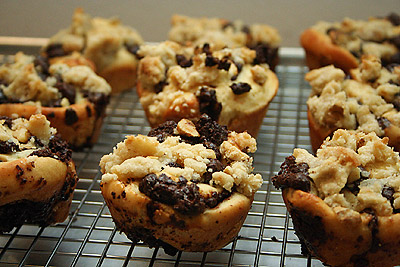
Babka muffins

For years, I’ve fantasized about the perfect chocolate babka. Maybe it’s because my parents always packed me plain Cheerios and All Bran sticks for breakfast. Babka would have been out of the question. Too much chocolate. Too much sugar. Too much butter.

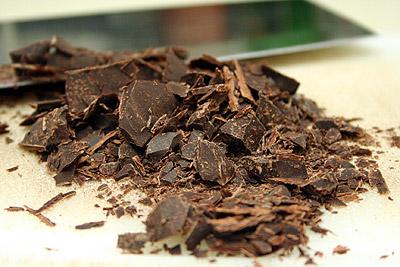
But anything else would be poser babka. My idea of babka involves a danish-like dough and layers of chocolate in every bite. There’s so many versions of babka, though, that it’s easy to get lost. The Russians, Polish and Jewish all have their variations. Fortunately, Smitten Kitchen pointed me to Martha Stewart’s recipe, which has 2 1/4 pounds of chocolate and 5 sticks of butter. It makes three loaves, so one loaf “only” has 3/4 pound of chocolate and a 1 2/3 sticks butter.
chocolate

World Nutella DayI know I wanted chocolate and butter but not that much. I significantly reduced the butter, but to keep the dough moist and soft, I added mashed potatoes. (You can enrich any bread with mashed potatoes, as long as it’s about 1/3 the weight of the flour. Potato starch works magic in the dough.) Since World Nutella Day is Feb. 5, I attempted a Nutella babka.

This recipe is a work in progress. This potato bread version isn’t as rich as danish, but with all that chocolate, I don’t mind. If you want real babka, by all means, use 1 2/3 stick of butter (and omit the mashed potatoes.) Also, baking Nutella breaks down its smooth texture and hazelnut flavor, so the filling wasn’t quite how I wanted it.

The version pictured above was baked in muffin tins, but I recommend using a loaf pan. You want the filling to stay moist, and if it’s exposed to too much heat, it will turn grainy and possibly burn.

Nutella Babka

Adapted from Martha Stewart

Makes 1 loaf

This babka has never-ending folds of chocolate. I like to unravel every spiral and chew through the long strip. It’s more fun to eat, and it lasts longer that way. Please excuse the funny measurements; I scaled down the recipe so it makes a more manageable amount.

For dough:
1/2 cup cooked mashed potato (see instructions below)
1/2 cup lukewarm buttermilk or potato water, 110 degrees
1 2/3 teaspoons active dry yeast
1/4 cup plus a pinch of sugar
1 large egg, room temperature
2/3 large egg yolk, room temperature
2 cups all-purpose flour, plus more for work surface
1/3 teaspoon salt
2 tablespoons (1/4 stick) unsalted butter, cut into 1-inch pieces, room temperature

For filling:
7 ounces (about 1 1/6 cup) very finely chopped bittersweet chocolate (or 6 ounces 60% chocolate and 1 ounce unsweetened chocolate)
1/4 cup plus 2 tablespoons Nutella
2 1/2 teaspoons ground cinnamon

For glaze:
1 teaspoon milk
Some reserved egg from the dough

For streusel:
1/2 cup powdered sugar (or 1/4 cup granulated sugar)
1/3 cup plus 1/9 cup all-purpose flour
1/4 teaspoon salt
1/2 cup lightly toasted hazelnuts, coarsely chopped
4 tablespoons (1/2 stick) unsalted butter, room temperature

Make dough:
Peel, cube and boil (until soft) one small potato, weighing about 3 ounces, in just enough water to cover. Strain out the potato pieces and mash them with a fork. Set aside the potato and water to cool. Freeze any extra water in ice cube trays. Use potato water in place of the liquid in any bread recipe. It’ll make the dough soft and sweet.

Pour lukewarm potato water or buttermilk into a small bowl. Sprinkle yeast and pinch of sugar over milk; let stand until foamy, about 5 minutes.

In a bowl, whisk together sugar, 2/3 egg, and 2/3 egg yolk. Add egg mixture to yeast mixture, and whisk to combine.

In the bowl of an electric mixer fitted with the paddle attachment, combine flour and salt. Add egg mixture, and beat on low speed until almost all the flour is incorporated, about 30 seconds. Change to the dough hook. Add 2 tablespoons butter, and beat until flour mixture and butter are completely incorporated, and a smooth, soft dough that’s slightly sticky when squeezed is formed, about 10 minutes.

Turn dough out onto a lightly floured surface, and knead a few turns until smooth. Butter a large bowl. Place dough in bowl, and turn to coat. Cover tightly with plastic wrap. Set aside in a warm place to rise until doubled in bulk, about 2 hours.

Make filling and shape dough:
While the dough is rising, place chocolate and cinnamon in a large bowl. Stir to combine. Stir in the Nutella until well combined.

Generously butter a 9x5x 2 3/4-inch loaf pan line with parchment paper. Beat remaining 1/3 egg with 1 teaspoon milk; set egg wash aside. Gently punch down the dough, and transfer to a clean surface. Let rest 5 minutes. On a generously floured surface, roll dough out into a 16-inch square; it should be 1/8 inch thick.

Brush edges with reserved egg wash. Crumble the chocolate filling (reserve 2 tablespoons) evenly over dough, leaving a 1/4-inch border. Refresh egg wash if needed. Roll dough up tightly like a jelly roll. Pinch ends together to seal. Twist 5 or 6 turns. Brush top of roll with egg wash. Carefully crumble 2 tablespoons filling over the left half of the roll, being careful not to let mixture slide off. Fold right half of the roll over onto the coated left half. Fold ends under, and pinch to seal. Twist roll 2 turns, and fit into prepared pan and cover loosely with plastic wrap.

Make streusel:
In a large bowl, combine sugar, flour, salt, hazelnuts and butter. Using a fork, stir until fully combined with clumps ranging in size from crumbs to 1 inch.

Squeeze the streusel in the palm of your hand so large clumps remain. Uncover the loaf and brush the top with egg wash. Sprinkle the streusel on top. It will seem like you have too much streusel, but pack it in there. The dough will expand later. Re-apply the plastic wrap and let stand until the dough reaches the top of the pan and is about doubled in volume, about 1 hour.

Bake loaf:
Fifteen minutes prior to baking, preheat the oven to 350F. Bake until the top is golden brown and the bottoms sound hollow when tapped (when loaf is removed from pan), about 40 minutes. If the top browns too quickly, cover the loaf with aluminum foil.

Transfer to wire rack and cool for at least 30 minutes. Remove from pan. Serve slightly warm. Babka freezes well for up to 1 month.

Comments (11)      Email Email      Print Print

You have four days to make this cake

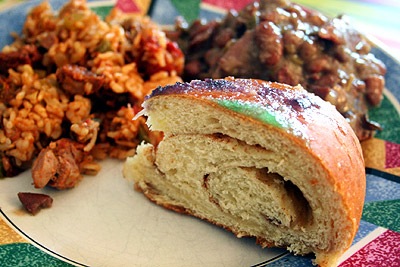
king cake with jambalaya and rice and beans

Mardi Gras has a reputation for being an extended “Girls Gone Wild” party, and wrongfully so. The Mardi Gras or Carnival season begins on the “Twelfth Night,” when Jesus showed Himself to the three wise men. For one month, New Orleanians celebrate with parties, parades and elaborate costumes. Some, like the Mardi Gras Indians, spend the entire year hand-sewing 300-400 feathers for a costume. The beauty of Mardi Gras is that everyone–friends, strangers, whites blacks–celebrates together. It’s such a big deal in New Orleans that Fat Tuesday (Mardi Gras day) is a legal holiday.

No other food marks Mardi Gras like king cake, a cinnamon roll-like wreath. The top is sprinkled with purple, green and yellow sugar, signifying justice, faith and power (respectively). A baby figurine is also hidden inside. It’s good luck to find it in your slice, but you also have to host the next party and supply more king cake.

I tried the king cake recipe that appeared in the article I wrote for the AP, but Southern Living’s is better. It’s even better than the king cake shipped from Randazzo’s Bakery in New Orleans. The addition of sour cream (reduced-fat is fine) makes the cake stay moist and soft for days. It also makes the cake taste tangy and more buttery.

Please make this cake before next Tuesday, though. Eating king cake out of season is as unfashionable as eating fruitcake outside of December. (Although some argue that fruitcake should never be eaten, I disagree.)

Recipe: Southern Living’s traditional king cake

More info about New Orleans: CulinaryCorps cooks up a storm in New Orleans

Comments (2)      Email Email      Print Print

Savory Cheese Biscotti

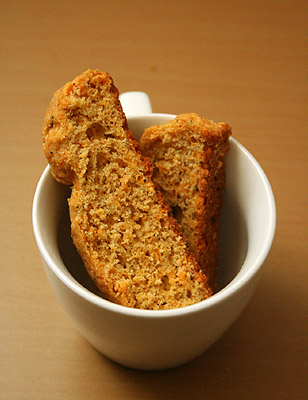
cheese biscotti

For a twist on cheese straws, try making savory cheese biscotti. These “cookies” are macho enough for Super Bowl parties but elegant enough for other occasions.

This recipe is adapted from Marcy Goldman, the creative cook behind Betterbaking.com. Usually, recipes fall under two camps: classical or fun. Reference books like The Cake Bible have trustworthy recipes, but after a while, I want something more than basic sponge cake. Then there’s the comfort-food recipes, like Paula Deen’s bacon-wrapped mac and cheese. But can you trust Paula Deen? She of the Velveeta chocolate fudge? Fortunately, you get great results with Marcy’s recipes, and there’s a twist to keep things interesting.

The secret to these biscotti is wine, which makes them taste even cheesier. I paired Gewürztraminer with Mimolette cheese (leftover from the CulinaryCorps potluck). Mimolette looks like cantaloupe, but the flavor is a cross between cheddar and parmesan. Because it’s firm, crunchy bits of cheese remain after baking.

After the first baking, these biscotti are as flavorful and tender as Red Lobster’s cheddar biscuits. I don’t know what the “unscotti” are like when they’re cool; I couldn’t wait that long. But my gut says that this recipe is a two-for-one. Bake once, and you have biscuits. Bake twice, and you have crunchy cheese sticks.

Savory Cheese Biscotti

Adapted from A Passion for Baking by Marcy Goldman

Makes 2 1/2 to 3 1/2 dozen biscotti, depending on size

Any firm cheese and wine will work here: the original recipe calls for Parmesan and Chianti. To lighten things up, you can probably reduce the oil by half, since these biscotti are rich.

1/2 cup olive oil
3 large eggs
1 1/4 teaspoons salt, or to taste (depending on how salty your cheese is, you can reduce or increase the salt by 1/4 teaspoon)
1 tablespoon sugar
4 teaspoons cracked black pepper
2 tablespoons finely minced fresh rosemary, parsley, or chives
1 teaspoon garlic powder
1/2 cup spicy white wine, such as Gewürztraminer
2 cups freshly grated Mimolette cheese
2 teaspoons baking powder
1/4 teaspoon baking soda
2 to 2 1/4 cups all-purpose flour

  1. Preheat oven to 350°Â F. Line a baking sheet with parchment paper or greased foil.
  2. In a mixer bowl, blend oil, eggs, salt, pepper, herbs, and garlic powder. Blend in wine, cheese, baking powder, baking soda, and flour to make a stiff dough.
  3. Spread dough into a log about 10 inches long and 4 to 5 inches across and pat down to square off the dough neatly.
  4. Bake until set, about 35 to 45 minutes. Cool slightly on baking sheet. Wrap and refrigerate log 1 hour (this step ensures that the biscotti don’t fall apart when you slice them). Using a long serrated knife, slice log into 1/4-inch-thick slices.
  5. Preheat oven to 300°Â F. Return biscotti to baking sheets and bake a second time to crisp, about 20 minutes, turning once at midway point to ensure even baking.
  6. Taste one biscotto after it cools. If it is crisp, biscotti are done. Otherwise, bake a little longer, 5 to 10 minutes. Let cool completely on baking sheets.

Comments (5)      Email Email      Print Print

New Gianduja (Chocolate-Hazelnut Spread) Recipe

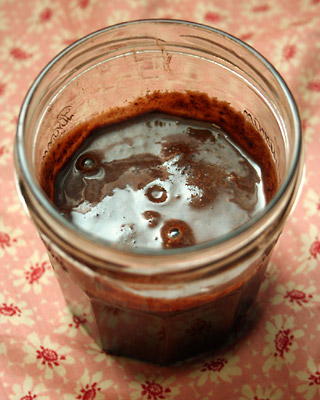
the new homemade chocolate hazelnut butter

After some teases here and there, here’s the new, improved recipe for homemade chocolate-hazelnut spread. Finally! While the original version was delicious, it tasted faintly chalky. The culprit was the powdered sugar, which has added cornstarch (to keep the sugar from caking). Unfortunately, raw cornstarch is as appetizing as raw flour.

I tried making my own powdered sugar by whizzing granulated sugar in a food processor, but it never came out fine enough. It was like crunching on sand. I even tried sweetening it with fruit paste, which split the mixture into a tough, chocolate blob and an oil slick. So that’s what happens when you mix oil and water…

It was time to go the route of the pros and make praliné (caramel powder). The combination of browned sugar, toasted nuts and cocoa powder put it worlds above Nutella. With this method, I didn’t have to add oil to make it a spreadable consistency. Not only was it healthier, but the flavors were more concentrated.

This caramel base is fool-proof. You don’t need a thermometer, and you don’t need to worry about stuff crystallizing. The finished product is so good that you’ll swear you jacked it from a French pastry chef.

For instructions, check the amended chocolate-hazelnut butter recipe.

Comments (6)      Email Email      Print Print

Menu for Hope Winners

Menu for Hope

Wow, this year’s Menu for Hope raffle raised $91,188 to feed schoolchildren in Lesotho, Africa! That’s 50% more than last year. Many thanks to the following:

  • Chez Pim for conceiving and organizing this annual charity event
  • Serious Eats for coordinating the East Coast prizes
  • Prize donors for giving away thousands of dollars’ worth of goodies
  • Bloggers for hosting the prizes
  • YOU for donating!

Without any further ado, congratulations to Eric for winning the Wild Sweets Chocolate cookbook and Yunlin for snagging my homemade nut butters. For the full winners’ list, check Chez Pim’s site.

I won Charles’ Chocolates deluxe box assortment from Dessert First, Roni Sue chocolate buttercrunch and seasonal truffle subscription from Serious Eats, L.A. Burdick Chocolate Mice from Breadchick and Rancho Gordo beans to make it sort of healthy. Yowzers, that’s like a lifetime supply of chocolate.

Forgive me for being away so long. This blog has been broken, with viruses, post spam (yes, someone found a way to tack on info about male enhancement), and funny formatting. I restored my databases from backup and reinstalled WordPress about five times. Hopefully, there will be no more fixes!

Comments off      Email Email      Print Print

A pear 1,300 years in the making

pile of pears

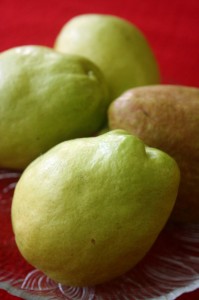
These fruits have waxy skins and stems that are too long for their own good. They look like the offspring of apples, guavas and pears. I would have ignored them at the market if it weren’t for my grandmother, a Chinese version of Martha Stewart. She makes her own chili paste and drinks goji berry-logan elixir every day. She introduced me to “hollow” greens (because the stems resemble straws), jujube dates and now, fragrant pears.

fragrant pear

It sounds like a vague description, but that’s their proper name. Farmers have grown these pears in China’s Xinjiang region for 1,300 years, but they’ve only been in the U.S. for about a year. (I discovered these pears right when they came here, but by the time I wanted to write about them, they were out of season. Now I appear out of the loop.)

juicy fragrant pear

Other Asian pears are crunchy and light, but the flesh is gritty and not very sweet. The skin is also thick and bitter. Fragrant pears are even crispier, but they are also sweet. Despite the skin’s appearance, they’re also entirely edible (except for the seeds of course). They are so juicy that you need to slurp quickly after taking a bite.

They are in season now, so head over to your local Chinatown or fancy supermarket. They’re not for the eco-conscious (it takes lots of jet fuel and protective packaging to ship them here), but they are very special.

Comments (4)      Email Email      Print Print

Chocolate No-Knead Bread

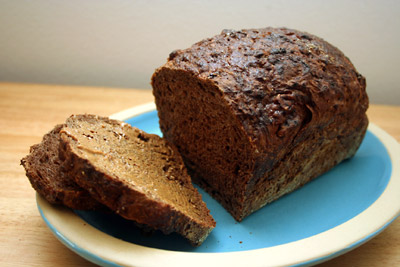
chocolate no-knead bread

Chocolate bread is nature’s perfect food. Bread is basic nourishment for the body, while chocolate is nourishment for the soul. Think of pain au chocolat (chocolate croissants) and chocolate toast, which prove that chocolate and dough just go together.

When I was a teenager, I saw Martha Stewart make chocolate bread from Balthazar Bakery. It was real artisan bread, not a muffin, with Valrhona cocoa powder and chocolate chunks. It sounded so naughty, yet so good.

When I moved to New York and finally tried that coveted bread, I was disappointed. While it was carefully crafted, the dough tasted bitter and wasn’t chocolaty enough for me. Fortunately, Au Bon Pain had crusty chocolate-cherry-walnut bread, and Fresh Direct distributed Ecce Panis’ bake-at-home chocolate rolls. When the rolls were fresh out of the oven, the chocolate oozed out of the feathery insides. (Note: Au Bon Pain no longer makes chocolate bread, and Fresh Direct only has chocolate bread pudding now. Boo!)

Since chocolate bread is going extinct, I compiled recipes from reputable sources, such as Balthazar, Nancy Silverton’s Breads from the La Brea Bakery, and the Institute of Culinary Education. I then made a lazy version by throwing cocoa and sugar into Sullivan Street Bakery’s famous no-knead bread recipe.

This is dessert for breakfast. I love toasting this bread, slathering on peanut butter and sprinkling bittersweet chocolate on top. The chocolate immediately melts into sweet lava. S’more sandwiches, filled with graham crackers and marshmallows, are especially good.

I realize that people are trying to eat healthily since it’s New Year’s, but this bread isn’t that bad for you. It’s low-fat, has a fair amount of fiber and has a little more sugar than commercial bread (and fortunately no high-fructose corn syrup).

For more no-knead bread, try my 100% whole wheat variation.

Chocolate No-Knead Bread

The sugar makes this bread chewy and moist, but it’s not too sweet for a good old peanut butter sandwich. If possible, use the metric measurements, as they’re more accurate.

Adapted from Jim Lahey of Sullivan Street Bakery
Time: About 1 1/2 hours plus 14 to 20 hours’ rising

2 1/3 cups (287 grams) all-purpose flour, plus 1/4 cup more for dusting
1 cup plus 2 tablespoons (143 grams) whole wheat flour (recommended brand: King Arthur)
1/3 cup (31 grams) unsweetened cocoa powder, preferably natural process (not Dutch-processed)
1/3 cup plus 1 tablespoon (75 g) sugar
1/4 teaspoon (1 gram) instant yeast (or 1/4 plus 1/16 teaspoon active dry yeast*)
1 ¼ teaspoons (8 grams) salt
Scant 1 3/4 cups (387 grams) water
Cornmeal or wheat bran as needed
1 tablespoon milk, for brushing
1 tablespoon turbinado sugar, for sprinkling

1. In a large bowl combine the flours, cocoa powder, sugar, instant yeast, and salt. Add the water and stir until blended. Cover bowl with plastic wrap. Let dough rest at least 12 hours, preferably 18, at warm room temperature, about 70 degrees.

2. Dough is ready when its surface is dotted with bubbles. Liberally flour a work surface and place dough on it; sprinkle it with more flour and fold it over on itself once or twice. Cover loosely with plastic wrap and let rest about 15 minutes.

3. Using just enough flour to keep dough from sticking to work surface or to your fingers, gently and quickly shape dough into a ball. Generously coat a cotton towel (not terry cloth) with flour, wheat bran or cornmeal; put dough seam side down on towel and dust with more flour, bran or cornmeal. Cover with another cotton towel and let rise for about 2 hours. When it is ready, dough will be more than double in size and will not readily spring back when poked with a finger.

4. At least a half-hour before dough is ready, heat oven to 450 degrees. Put a 6- to 8-quart heavy covered pot (cast iron, enamel, Pyrex or ceramic) in oven as it heats. When dough is ready, carefully remove pot from oven. Slide your hand under towel and turn dough over into pot, seam side up; it may look like a mess, but that is O.K. Shake pan once or twice if dough is unevenly distributed; it will straighten out as it bakes. Brush the top of the loaf with milk and sprinkle with turbinado sugar. Cover with lid and bake 30 minutes, then remove lid and bake another 15 to 30 minutes, until loaf is beautifully browned. Cool on a rack.

Yield: One 1 1/2-pound loaf.

Variation:

Double chocolate-cherry-walnut bread: After the first rise, pat the dough into a large rectangle on a well-floured surface. Sprinkle 1/3 cup each of good chocolate chunks; toasted, chopped walnuts; and dried cherries on top. From left to right, fold 1/3 of the dough over like a book. Fold over the other side of the dough and pat down into a tall rectangle. From top to bottom, fold 1/3 of the dough down. Fold the remaining bottom 1/3 to meet the top. Using your fingers or the heel of your hand, pinch the seams closed. Continue on with step 3 and let rise until double (it may take longer than the usual two hours, because of the weight of the mix-ins).

Notes:

  • * If substituting active dry yeast, proof it in 1/4 cup of lukewarm water (reserved from the total water) for 10 minutes. Add the yeast with the rest of the water when mixing it in the dough.
  • To make a sandwich loaf, turn out the dough on a floured board after the first rise. Gently pat the dough into a 5-by-9 inch rectangle and roll up the length of the dough. Pinch the seam closed with your fingertips or the heel of your hand. Rock the dough to even it out. Cover it with an inverted mixing bowl and let rise, seam side down, for about two hours. A half hour before baking, preheat the oven to 450 degrees F, with a standard 9-by-5-inch loaf pan inside. When ready to bake, brush the pan with oil and generously dust with corn meal or wheat bran. Drop the dough in the pan, seam side up (it’s okay if it looks messy). Shake the pan to even out the dough. Brush the top with milk and sprinkle with turbinado sugar. Cover the loaf loosely with aluminum foil (leave room on top for the dough to rise) and bake for 30 minutes. Remove the foil and bake for 15-30 minutes more.

Comments (24)      Email Email      Print Print